Page 6
RS-Divider Curtain
Part No 4801-5176 Rev 01-11-16
3
Use of Equipment
The RS-Divider Curtain is a motorized curtain designed to divide or separate a portion of an opening or room of a
structure for environmental control. The Drive Pipe is powered by a Somfy tube mount motor typically wired to a 3
position constant contact switch.
4
General Dimensions
The RS-Divider Curtain mounting Dimensions are shown below.
5
Installation of RS-Divider Curtain
To avoid obstructions to curtain during installation, make sure that all trusses and other support beams do not fall
below the required clear opening height.
5.1
Tools Required
5/8 in. Drill bit and drill
3/4 in Wrench or Socket
Phillips Head Bit or Screwdriver
Carpenter's level
Tape measure
Ladder
NOTE: Other Tools May Be Required According To Installation.
5.2
Overview
RS-Divider Curtains are shipped pre-assembled with the motor and curtain pre-installed. When components are
received, check for damaged, loose or missing parts. If there are damaged or missing parts contact your RollSeal
distributor immediately. Please read and understand all instructions in this manual before beginning installation.
5.3
Attachment Points of Curtain
When installing the RS-Divider Curtain, pay close attention to the following guidelines. End brackets on the curtain
have flanges with pre-drilled holes that serve as mounting points for the curtain.
1. Make sure that mounting surface is level & square.
2. The Left and Right mounting brackets have inner and outer flanges
with pre-drilled holes that serve as
attachment points.
3. Flanges must be flush against framing for attachment of screws/ bolts.
4. Flanges must remain parallel to each other and perpendicular to mounting structure for optimal performance.
5.4
Fastening Curtain Assembly to Clear Opening
1.
Verify that the overall height and overall width of the clear opening meet the requirements for the Curtain
System.
2.
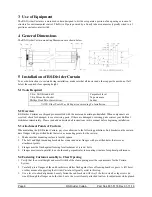
Carefully press flanges of the end bracket assemblies flush against face of framing boards or posts. A lift, hoist,
or other means of supporting the Divider Curtain will greatly assist in this step.
3.
Use a level to check alignment. Loosely fasten the end brackets with two (2) bolts (in steel) or lag screws (in
wood) through the flanges on both sides. Leave the screws loosely attached to allow for adjustment while plumb

