Page 4
RS-Divider Curtain
Part No 4801-5176 Rev 01-11-16
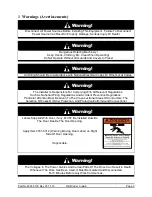
Danger!
Only Qualified Electrical Personnel Familiar With The Construction And Operation Of This
Equipment And The Hazards Involved Should Install, Adjust, And/Or Service This Equipment.
Read And Understand This Manual In Its Entirety Before Proceeding.
Failure To Observe This Precaution Could Result In Severe Bodily Injury Or Death!
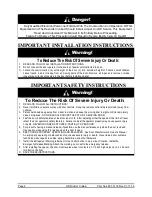
IMPORTANT INSTALLATION INSTRUCTIONS
Warning!
To Reduce The Risk Of Severe Injury Or Death:
1. READ AND FOLLOW ALL INSTALLATION INSTRUCTIONS.
2. Do not connect the door operator to the source of power until instructed to do so.
3.
Locate the control station: (a) within sight of the door, (b) at a minimum height of 5 feet so small children
cannot reach it, and (c) away from all moving parts of the door. Remove all ropes and remove or make
inoperative all locks connected to the door before installing opener.
IMPORTANT SAFETY INSTRUCTIONS
Warning!
To Reduce The Risk Of Severe Injury Or Death:
1. READ AND FOLLOW ALL INSTRUCTIONS!
2. Never let children operate or play with door controls. Keep the remote control (where provided) away from
children.
3. Personnel should keep away from a door in motion and keep the moving door in sight until it is completely
closed or opened. NO ONE SHOULD CROSS THE PATH OF A MOVING DOOR.
4.
Test the door’s safety features at least once a month. After adjusting either the speed or the limit of travel,
retest the door operator’s safety features. Failure to adjust the operator properly may cause severe injury
or death. NEVER GO UNDER A STOPPED, PARTIALLY OPEN DOOR.
5. For products having a manual release, if possible, use the manual release only when the door is closed.
Use caution when using this release when the door is open.
6. KEEP DOORS PROPERLY OPERATING AND B
ALANCED. See Door Manufacturer’s Owner’s Manual.
An improperly operating or balanced door can cause severe injury or death. Have trained door systems
technician make repairs to cables, spring assemblies, and other hardware.
7. Install the Entrapment Warning label next to the control button in a prominent location. Install the
Emergency Release Marking. Attach the marking on or next to the emergency release.
8. After installing the opener, the door must reverse when it contacts a 1-1/2 inch high object (or a 2 x 4 board
laid flat) on the floor.
9. SAVE THESE INSTRUCTIONS.
!
!
!
!
!

