10
6. General operation
6.1. Quick start
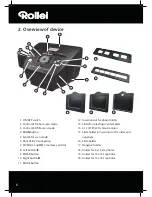
• To scan slides or negatives, slide the switch at the top for the scan mode and for selecting the
insertion slot to the left “Film scanner” position.
To scan photos, slide both switches to the right, to the position “Photo scanner”.
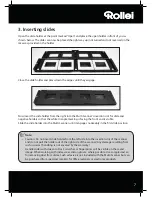
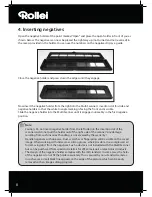
• Place slide, negative or photo to be scanned in the respective holder.
• Insert the slide or negative holder into the insertion slot on the right of the device or place the
photo holder in the slot on the top of the device.
• Place the memory card in the memory card slot.
• Using one of the following two options connect the scanner to power:
1. Connect the Multi Scanner to a computer using the USB cable
2. Connect the device to the mains using the USB cable and the USB mains adaptor.
• Push the
On/Off switch
to switch on the Multi Scanner.
• For scanning, follow the instructions on screen. Always confirm selection of the function by
pressing the
ENTER
key.
• You can transfer the data from the memory card to the computer via the USB connection. For
this purpose, connect the Multi Scanner to the computer using the enclosed USB cable.
After selecting the USB mode, the scanner appears as a removable storage device under
My Computer.
Note:
• If the switch for the scan mode and the switch for selecting the insertion slot are in the
same position “Film scanner” or “Photo scanner”, the respective LED will light up next to the
switch-on button.

