25
Arranging multiple objects
1
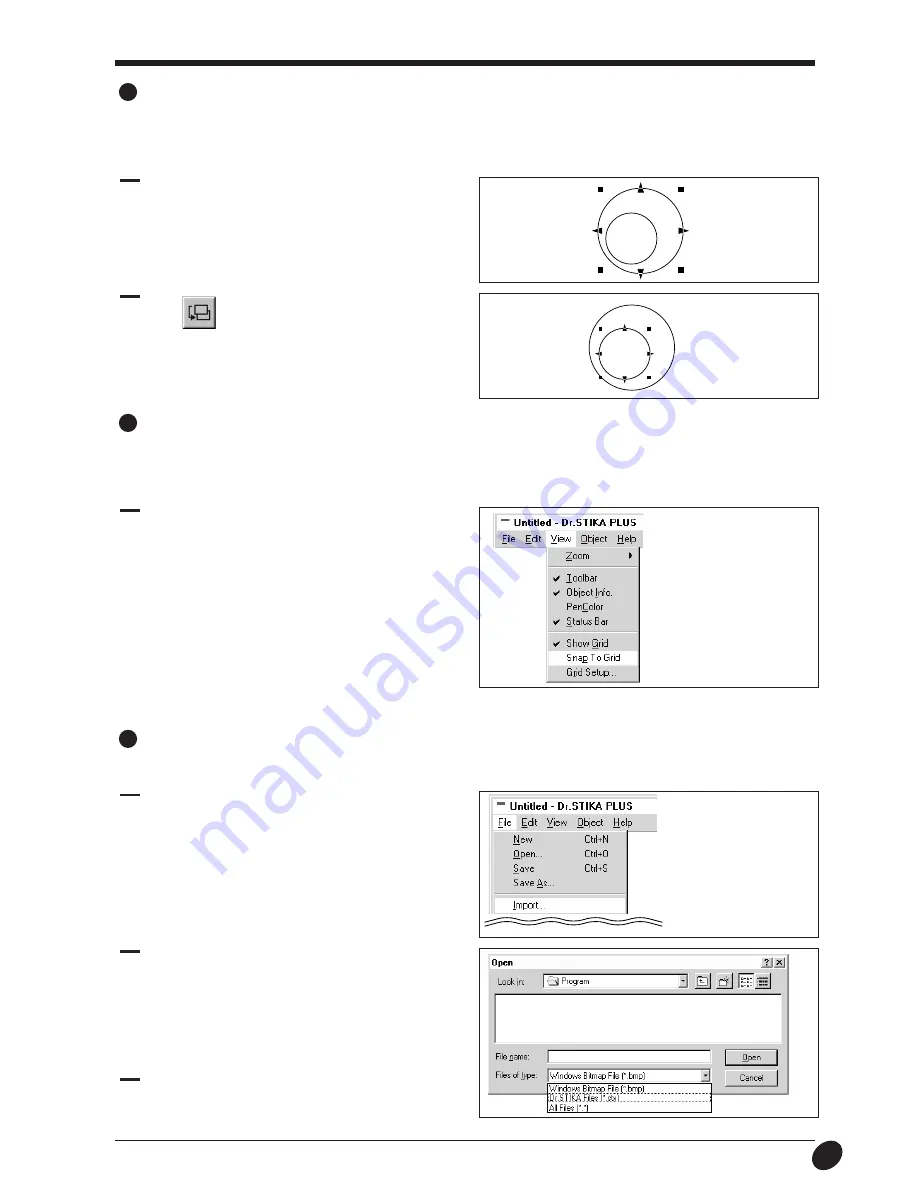
To cause objects to be automatically placed on the grid
lines, display the [View] menu and click [Snap To Grid].
The on-screen lines that resemble graph paper are called a grid. This grid can be used as a guide for determining the size and positioning
of objects. In addition, activating [Snap To Grid] causes objects to automatically be aligned with the grid lines. This feature is used when
accurate placement or precise sizing for objects is desired. Please refer to the relevant help screens for more about making settings for
grid conditions.
2
Click
.
The large circle is positioned behind the other one. The
smaller circle that was in back and could not be selected is
now in front and can be selected.
1
In the figure at right, the large circle is positioned in front of
the smaller one. Select the large circle.
When an object cannot be selected...
All objects maintain a certain front-to-back relationship when they overlap. This hierarchy depends on the sequence in which the objects
were created, with newer objects existing more to the front than older ones. When a smaller object lies behind a larger one, the smaller
object cannot be selected. To select the smaller object, change the front-to-back relationship of the larger and smaller objects. This front-
to-back relationship between objects can be changed at any time.
Importing an object from another Dr. STIKA PLUS file
An object saved in another file can be added to the file for the object now being edited. This makes it possible to re-use objects that have
been previously created and saved.
1
From the [File] menu, click [Import...].
2
Choose the file and click [Open].
3
The object is added to the file being edited. This newly
added object can be edited in the same ways as any ordinary
object.


