background image

40

Using the Convenient Functions in Performances

 Recording Audio

The RD-700NX lets you easily record your performance as an audio fi le.
You can then play back the recording to evaluate your performance.

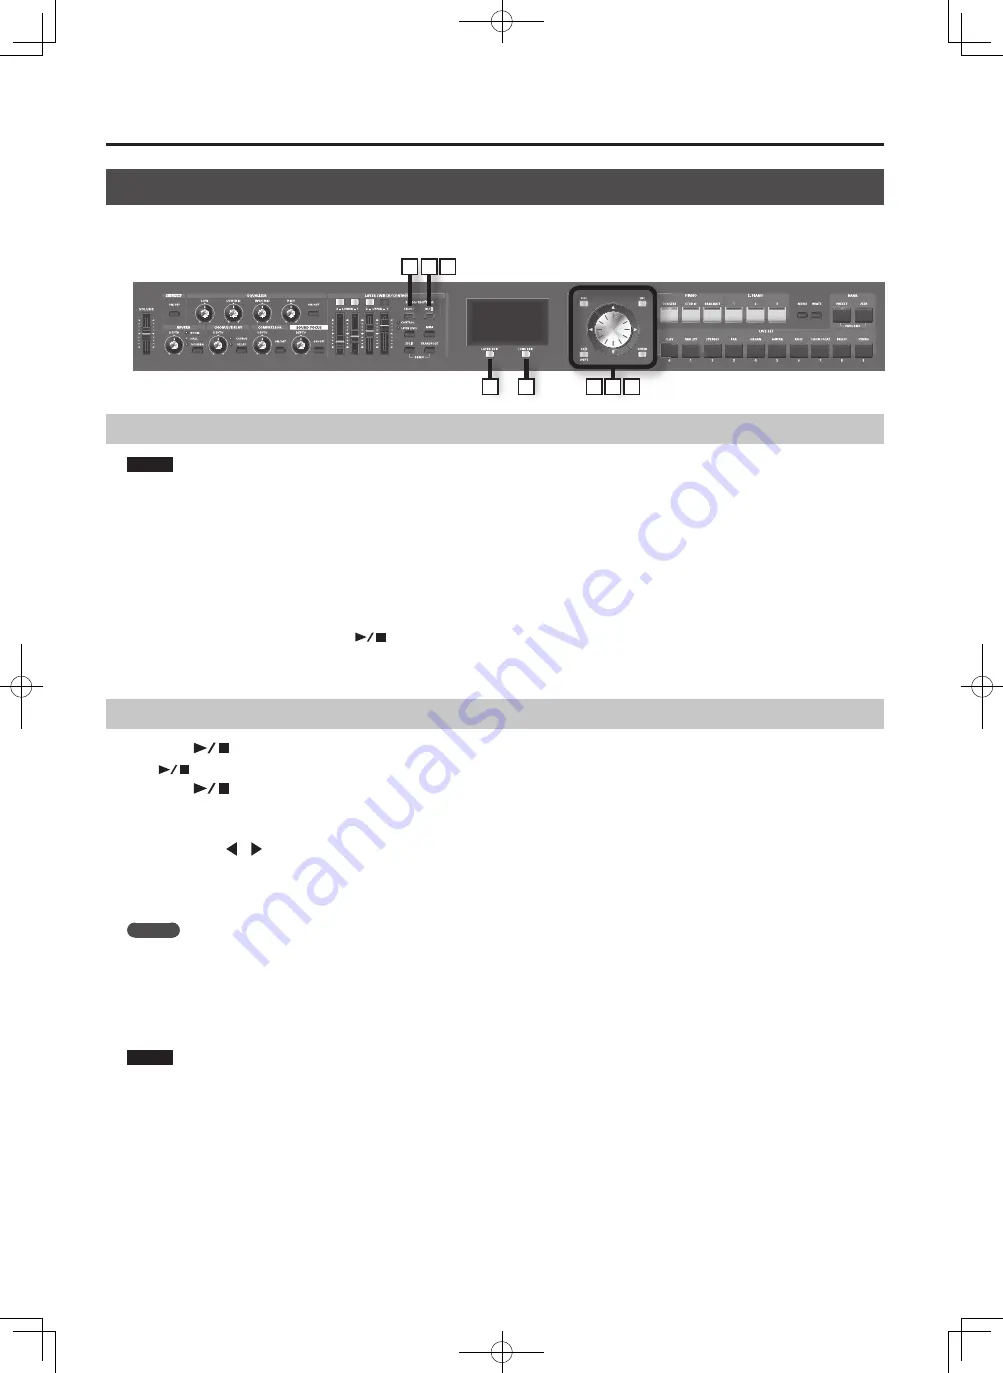
3

7 8

6

4

5

9 10

Getting ready to record

NOTE

You must not disconnect the USB memory.

1. 

Connect your USB memory to the external memory connector (p . 18) .

2. 

Select the tone that you want to play (p . 27) .

3. 

Press the [SELECT] button .

4. 

Press the [Layer EDIT] (SONG/RHYTHM) button to access the SONG screen .

5. 

Press the [TONE EDIT] (REC) button .

The display will indicate “New Song.”
The [TONE EDIT] (REC) button will light, the [

] button will blink, and the RD-700NX will enter recording-standby mode.

If you decide to cancel recording, press the [TONE EDIT] (STOP) button.

Starting/stopping recording

6. 

Press the [

] button .

The [

] button will light, and recording will begin.

7. 

Press the [

] button .

Recording will stop, and a screen will appear, allowing you to rename the song.

You can also stop recording by pressing the [TONE EDIT] (REC) button.

8. 

Use the cursor [

][

] buttons to move the cursor to the position where you want to enter a character .

9. 

Use the [DEC] [INC] buttons or the VALUE dial to enter the desired name .

Pressing the [Layer EDIT] (DELETE) button will delete one character, and pressing the [TONE EDIT] (INSERT) button will insert one character of blank 

space.

MEMO

You can also use the LIVE SET buttons to specify and enter characters directly.

10. 

Repeat steps 3–4 to enter the desired name .

By pressing the [EXIT/SHIFT] button, you can save the song to USB memory without changing its name.

11. 

Press the [ENTER] button to confi rm the name .

The song will be saved.

NOTE

Never disconnect the USB memory while the screen indicates “Executing...”

Содержание RD-700NX

Страница 1: ... 5 1 0 0 0 1 6 9 8 3 0 2 ...

Страница 2: ...y heat sources such as radiators heat registers stoves or other apparatus including amplifiers that produce heat 9 Do not defeat the safety purpose of the polarized or grounding type plug A polarized plug has two blades with one wider than the other A grounding type plug has two blades and a third grounding prong The wide blade or the third prong are provided for your safety If the provided plug d...

Страница 3: ...age 004 Never install the unit in any of the following locations Subject to temperature extremes e g direct sunlight in an enclosed vehicle near a heating duct on top of heat generating equipment or are Damp e g baths washrooms on wet floors or are Exposed to steam or smoke or are Subject to salt exposure or are Humid or are Exposed to rain or are Dusty or sandy or are Subject to high levels of vi...

Страница 4: ...with its proper ventilation 101c This RD 700NX for use only with Roland stand KS G8 Use with other stands is capable of resulting in instability caus ing possible injury 101f Even if you observe the cautions given in the owner s manual certain types of handling may allow this product to fall from the stand or cause the stand to overturn Please be mindful of any safety issues before using this prod...

Страница 5: ... slip or move accidentally 361 Do not put anything that contains water e g flower vases on this unit Also avoid the use of insecticides perfumes alcohol nail polish spray cans etc near the unit Swiftly wipe away any liquid that spills on the unit using a dry soft cloth Maintenance 401a For everyday cleaning wipe the unit with a soft dry cloth or one that has been slightly dampened with water To re...

Страница 6: ...ging to a third party in part or in whole without the permission of the copyright owner is forbidden by law 853 C 01 2 Do not use this product for purposes that could infringe on a copyright held by a third party We assume no responsibility whatsoever with regard to any infringements of third party copyrights arising through your use of this product C 03 4 The copyright of content in this product ...

Страница 7: ... Creation of Organ Tones 42 Changing the Undulation of the Organ Tone Rotary Effect 43 Changing the Layer LEVEL Slider Feet Assignments 43 Selecting Stored Settings Live Set 44 Registering the Live Sets You Like 44 Storing Settings to Live Sets 45 Making Detailed Settings for the ONE TOUCH Tones 46 Making Detailed Settings for the Piano Tones 46 Changing the Key Touch 48 Finely Adjusting the Tunin...

Страница 8: ...us Settings 74 Making Reverb Settings 74 Setting Chorus and Delay 75 Making the Compressor Settings 76 Selecting the Type of Compressor Type 76 Detailed Settings of Compressor 76 File Management 77 Saving a Live Set File LIVE SET Save 77 Calling Up Live Set Files LIVE SET Load 78 Deleting a Live Set File LIVE SET Delete 78 Copying a Live Set File LIVE SET Copy 79 Deleting a Song SONG Delete 80 Cop...

Страница 9: ...N OFF Button Turns the compressor on off p 34 SOUND FOCUS DEPTH Knob Allows you to enhance the sound s definition p 34 SOUND FOCUS ON OFF Button Turns Sound Focus on off p 34 5 LAYER SWITCH CONTROL LAYER Switch Turns each LAYER s sound on and off p 31 LAYER LEVEL Slider Adjusts the volume level for each part p 31 If the CONTROL indicator is lit the sound will change in real time according to the p...

Страница 10: ...tons turning knobs or operating other controllers ENTER Button This is used to finalize a value or execute an operation 7 ONE TOUCH PIANO CONCERT Button STUDIO Button BRILLIANT Button Selects the optimum settings for piano performances p 46 E PIANO 1 Button 2 Button 3 Button Selects the optimum settings for E Piano performances p 50 8 FUNCTION MENU Button Press this button when you wish to adjust ...

Страница 11: ...you to use the switch as a damper pedal With a pedal connected to the FC1 or FC2 jack you can then assign a variety of functions to the pedal p 72 18 MIDI Connectors IN OUT 1 OUT 2 THRU OUT 3 Used for connecting external MIDI devices and for transmission of MIDI messages p 86 The THRU OUT 3 connector s function can be switched to operate either as MIDI THRU or as MIDI OUT p 69 19 OUTPUT L MONO R J...

Страница 12: ...in injury or damage For details on how to assemble the stand refer to the owner s manual that accompanied the stand Seen from the side Align the seam in the RD 700NX s panel on the bottom near the front with the corners of the stand s rubber feet Seen from the rear Align the center screw on the bottom of the RD 700NX with the center of the stand Align the center screw on the bottom of the RD 700NX...

Страница 13: ...g connections confirm the following Is the volume level of the RD 700NX or connected amp turned all the way down Is the power to the RD 700NX or connected amp turned off 2 Connect supplied power cord to the AC IN connector of the RD 700NX and plug the other end into an AC outlet ...

Страница 14: ...t your Roland dealer if you need to purchase accessories such as these NOTE To prevent malfunction and or damage to speakers or other devices always turn down the volume and turn off the power on all devices before making any connections Stereo headphones Mixer etc Computer to Power outlet Damper pedal DP Series Expression pedal EV 5 EV 7 or Pedal switch DP Series Monitor speakers powered Power am...

Страница 15: ...or these jacks are shown below Make connections after first checking the wiring diagrams of other equipment you intend to connect 922 NOTE Use Stereo headphones Use headphones made by Roland Using other headphones might not give you enough volume Use only the specified expression pedal EV 5 EV 7 sold separately By connecting any other expression pedals you risk causing malfunction and or damage to...

Страница 16: ...ormally Always make sure to have the volume level turned down before switching on power Even with the volume all the way down you may still hear some sound when the power is switched on but this is normal and does not indicate a malfunction In the unlikely event the power is turned off or cut off while Factory Reset p 85 is in progress the data may become corrupted and it may require additional ti...

Страница 17: ...on the rear panel Rear Panel Connecting the USB Memory You can copy Live Set files and song files to separately sold USB memory for safekeeping You can also play back SMF music files that s saved on USB memory or play audio files from USB memory p 38 1 Connect your USB memory to the USB MEMORY connector located on the RD 700NX s rear panel Rear Panel NOTE Never insert or remove a USB memory while ...

Страница 18: ...force 2 Switch on power to the connected CD drive 3 Switch on the RD 700NX s power NOTE Use a CD drive sold by Roland We cannot guarantee operation if any other CD drive is used CDs that contain both music tracks and data will not play correctly The RD 700NX is capable of playing back only commercial CDs that conform the official standards those that carry the COMPACT disc DIGITAL AUDIO logo The u...

Страница 19: ... memory Non rewritable memory Preset memory The data in preset memory cannot be rewritten If you ve edited data that was recalled from preset memory you can store it in rewritable memory user memory or USB memory Overview of the RD 700NX Basic Organization of the RD 700NX The RD 700NX can be divided into two sections a controller section and a sound generator section Controller Section controllers...

Страница 20: ...rmore you can freely control external MIDI sound generators with the RD 700NX in the same manner as with the Layer You can likewise control the external MIDI sound generator with the four parts UPPER 1 UPPER 2 LOWER 1 and LOWER 2 with this group of four parts being referred to as the EXTERNAL Layer The external MIDI sound generator is assigned to these four parts for control Tone The individual so...

Страница 21: ...e creation of sounds using an organ s harmonic bars p 42 Pressing the Cursor EXIT SHIFT button when this screen is displayed returns you to the Live Set screen Song Rhythm Screen When the SONG RHYTHM SELECT button is pressed this screen is displayed You can change Rhythm patterns Songs and the tempo p 37 p 38 You can also connect USB memory sold separately to the USB MEMORY connector and play SMF ...

Страница 22: ...r moving to an item whose setting you want to change by moving the cursor In the LAYER EDIT screen these buttons are used to select the layer Moving Between Display Pages When arrow symbols and appear at the upper right of the display screen it indicates that there are additional pages in the directions shown by the arrows You can switch screens with the Cursor and buttons Navigating Among ItemsTo...

Страница 23: ...d pressing the INC button To set the item to its default value or turn it off Press the DEC button and INC button simultane ously VALUE Dial Turn the dial clockwise to increase the value or counterclockwise to decrease the value LIVE SET buttons Numeric Keys In edit screens you can use the LIVE SET buttons as 0 9 buttons to directly specify a numerical value When you enter the number the value wil...

Страница 24: ...s the TRANSPOSE button The Demo screen appears 2 Use the Cursor buttons the DEC INC buttons or the VALUE dial to select a demo song 3 Press the ENTER button or the TONE EDIT PLAY button to start playback of the demo song When the last song finishes playing playback will return to the first song and continue 4 Press the EXIT SHIFT button or the LAYER EDIT MENU button to stop a demo song during play...

Страница 25: ...rve these settings store them to a Live Set p 45 2 Use the DEC INC buttons or turn the VALUE dial to select a variation MEMO By holding down a ONE TOUCH PIANO button or a ONE TOUCH E PIANO button for several seconds you can store the variation that s currently selected for that button The next time you press that button the stored variation will be selected Making Detailed Settings With the RD 700...

Страница 26: ...ESET button or the BANK USER button to select the bank The indicator of the selected button will light 2 Press any of the LIVE SET buttons to select the category The indicator of the selected LIVE SET button will light 3 Use the DEC INC buttons or VALUE dial to select the tone Play the keyboard and you will hear the selected Live Set NOTE When you edit a setting an will appear If you turn off the ...

Страница 27: ...t tones played in the left and right parts of the keyboard Performing with LayeredTones You can perform with up to four layered tones applied to the entire keyboard 1 2 1 Press the UPPER 1 button and UPPER 2 button getting the indicators to light Try fingering the keyboard The Tones for UPPER 1 and UPPER 2 are layered and played 2 Press the UPPER 2 button once more and the indicator light goes out...

Страница 28: ...h the keyboard is divided the Split Point in Split mode 1 Hold down the SPLIT button for several seconds Current value of the setting is displayed 2 While holding down the SPLIT button press the key that is to become the new split point When you release the SPLIT button the previous display will reappear The split point key is included in the LOWER section When you specify the split point each lay...

Страница 29: ... that have their Layer switch turned off are dimmed in the screen 3 Use the LIVE SET buttons to select the tone category and then use the DEC INC buttons or the VALUE dial to select a tone MEMO If you use the buttons to select a layer whose Layer switch is off unlit the Layer switch of the selected layer will blink If you then press the blinking button that layer s Layer switch will turn on lit ...

Страница 30: ...hich the Layer switch indicator is lit on will produce sound when you play the keyboard Layers for which the Layer switch indicator is unlit off will not produce sound even if you play the keyboard Each Layer switch will alternately turn on off each time it is pressed Layer LEVEL Slider Adjusts the volume of an individual layer When a layer s Layer switch indicator is not lighted no sound is produ...

Страница 31: ...o have E sound when you play C on the keyboard hold down the TRANSPOSE button and press the E4 key The degree of transposition then becomes 4 When you release the TRANSPOSE button the previous display will reappear When the amount of transposition is set the Transpose function switches on and the TRANSPOSE button lights up When the transpose value is set to 0 the button s indicator will remain dar...

Страница 32: ...lay on the keyboard By adding the chorus and delay effect you can give the sound greater dimension with more fatness and breadth 1 2 1 Press the CHORUS DELAY button The chorus type switches each time you press the CHORUS DELAY button MEMO Types of chorus other than those listed can be selected in Chorus Type p 75 of the 3 Effects Edit screen In this case the CHORUS DELAY button s indicator corresp...

Страница 33: ...e power is turned on 1 3 2 1 Press the COMPRESSOR ON OFF button getting its indicator to light 2 Use the COMPRESSOR DEPTH Knob to adjust the depth of the effect Turning the knob toward the right will deepen the effect and turning it toward the left will lessen the effect 3 To cancel this function press the COMPRESSOR ON OFF button once more extinguishing the indicator NOTE Sounds may become distor...

Страница 34: ...an press the TONE EDIT NUMERIC button to get a numerical reading for the value of the setting Pressing the TONE EDIT NUMERIC button toggles you between NUMERIC and GRAPHIC as the format for what you see indicated in the screen The way settings are made differs depending on the format used as follows When the Graphic format is used Slightly adjust the knob for the range in which you want to change ...

Страница 35: ...ME slider DISPLAY CONTRAST knob Pitch Bend Modulation lever Pedals ONE TOUCH PIANO buttons ONE TOUCH E PIANO buttons EXIT SHIFT button 1 While holding down the MENU button and press the ENTER button A screen like the one shown at right will appear 2 Press the ONE TOUCH PIANO buttons the ONE TOUCH E PIANO buttons or the EXIT SHIFT button to cancel Panel Lock MEMO You can assign the Panel Lock funct...

Страница 36: ... the rhythm will stop Changing RhythmTempos 1 In the Rhythm screen press the Cursor button to move the cursor to the tempo indication in the top line of the screen 2 Use the DEC INC buttons or VALUE dial to change the tempo The Rhythm are played at the selected tempo MEMO The way Rhythm is played and the tempo display may differ with some Rhythm Patterns If you press the MENU button and then choos...

Страница 37: ...tored in the Live Set Selecting the Song 1 In the SONG screen use the buttons to move the cursor to the media indication in the screen 2 Use the DEC INC buttons or the VALUE dial to select the desired media Type Explanation INT Songs in the RD 700NX s internal memory USB Songs in USB memory connected to the USB MEMORY connector Songs on a CD in a CD drive connected to the USB MEMORY connector 3 Pr...

Страница 38: ... file is selected the indication will be the playback time 2 Use the DEC INC buttons or the VALUE dial to change the value The playback position will change as shown by the indication Return to the Beginning of the Song 1 In the SONG screen hold down the EXIT SHIFT button and press the DEC button Caution when Playing Back Audio Files Playing back an MP3 file or changing the playback tempo of an au...

Страница 39: ...Starting stopping recording 6 Press the button The button will light and recording will begin 7 Press the button Recording will stop and a screen will appear allowing you to rename the song You can also stop recording by pressing the TONE EDIT REC button 8 Use the cursor buttons to move the cursor to the position where you want to enter a character 9 Use the DEC INC buttons or the VALUE dial to en...

Страница 40: ...7 2 Press the TONE EDIT button The TONE EDIT button will light and the TONE EDIT screen will appear 3 Use the cursor buttons to choose MFX 1 or MFX 2 4 Use the cursor buttons to move the cursor to the parameter that you want to edit 5 Use the DEC INC buttons or the VALUE dial to set the desired value 6 When you ve finished editing press the TONE EDIT button so its indicator goes out You will retur...

Страница 41: ...octave it would be shortened to 2 1 Access the Live Set screen p 27 2 Select a Live Set to which one of the TW Organ 1 10 tones is assigned 3 Press the Cursor button The Tone Wheel screen will appear This Tone Wheel screen appears only when a Tone Wheel Tone is selected for one of the Layer 4 When the Layer LEVEL sliders are moved the harmonic bars move in the display and the tone changes By press...

Страница 42: ...ach of the Layer LEVEL sliders used in Tone Wheel mode 1 Press the MENU button getting the indicator to light The Edit Menu screen appears 2 Press the Cursor buttons to select 2 Control 3 Press the ENTER button to display the Edit screen 4 Press the Cursor buttons to select Harmonic Bar Footage assignments in the Tone Wheel screen from the left of the screen 16 5 1 3 8 4 2 2 3 2 1 3 5 1 1 3 1 5 Pr...

Страница 43: ... Sets in each of the four banks to the Favorite Live Sets 1 In the Live Set screen recall the Live Set that you want to register 2 Hold down the BANK PRESET button and press the BANK USER button The Favorite Live Set screen will appear 3 Use the TONE EDIT BANK CHANGE button to select the bank in which you want to register the Live Set 4 Hold down the Layer EDIT ASSIGN button and press the LIVE SET...

Страница 44: ...ves the cursor to the save destination Live Set number 6 Select the save destination Live Set number either by using the DEC INC buttons or the VALUE dial When using the LIVE SET buttons to input Live Set numbers press the ENTER button afterwards to set the number 7 When you have finished determining the save destination and the name for the new Live Set press the ENTER button or the Layer EDIT WR...

Страница 45: ...sor buttons to move the cursor to the parameter to be set Move the cursor to one of the following menus and press the ENTER button then select the parameter you want to set in the screen that follows 1 Key Touch Edit 2 Micro Tune Edit 3 Sym Resonance 4 Equalizer 5 Initialize 4 Use the DEC INC buttons or the VALUE dial to edit the value For details on the parameters refer to the Piano Parameters ta...

Страница 46: ...harmonics Because no damper sound stopping mechanism is applied to the front or back sections of the string the resonating sounds linger even after the sound of the string stops when you release the played key String Resonance OFF 1 127 When the keys are pressed on an acoustic piano the strings for keys that are already pressed also vibrate sympathetically The function used to reproduce is called ...

Страница 47: ... when less force is used to play the keys Velo Keyflw Sens Veloc ity Keyfollow Sensitivity 63 63 This setting changes the touch sensitivity according to the key range being used As the value is increased the touch becomes heavier in the upper registers and lighter in the lower keys Key Off Position STANDARD Note off will occur at the depth of a conventional piano DEEP Note off will occur at a deep...

Страница 48: ...dal is not pressed Making the Equalizer Settings This sets the equalization Parameter Value Description Sw OFF ON When set to ON the effect is applied C2 Low Gain High Gain Level Selects the parameter to be controlled with MFX 2 CTRL Low Freq 200 400 Hz Frequency of the low range Low Gain 15 15 dB Gain of the low range Mid1 Freq 200 8000 Hz Frequency of the middle range 1 Mid1 Gain 15 15 dB Gain o...

Страница 49: ...ill be set to their power up default values Store any arrangements of settings that you want to keep in Live Set p 45 1 In the ONE TOUCH E PIANO screen use the DEC INC buttons or the VALUE dial to select the variation that you want to edit 2 Press the TONE EDIT button The tone edit screen will appear 3 Press the Cursor buttons to switch screens and press the Cursor buttons to move the cursor to th...

Страница 50: ...lue will move the tone bars and pickups farther apart This makes it easier for you to produce varied dynamics Increasing this value will produce a more powerful sound Bell Thump 10 0 10 This adjusts the balance between two components of the attack the Bell component and the Thump produced by the hammer Adjusting this value from 0 toward the negative side will emphasize the bell sound while adjusti...

Страница 51: ...rns tremolo on off Tremolo Rate Mode Hz Note 1 When this is set to note the effect is synchronized with the tempo Tremolo Rate Hz 0 05 10 00 Hz Frequency of the tremolo Hz Tremolo Rate Note 1 Frequency of the tremolo Tremolo Depth 0 127 Depth of the tremolo Tremolo Duty 10 10 Specifies the duty cycle of the LFO waveform used to apply tremolo Increasing this value will increase the duty cycle of th...

Страница 52: ...the tremolo Tremolo Duty 10 10 Specifies the duty cycle of the LFO waveform used to apply tremolo Increasing this value will increase the duty cycle of the LFO waveform for the L channel the duty cycle for the R channel will decrease Speaker Sim LINE OLD NEW WURLY TWIN Type of the speaker When LINE is selected no speaker used Drive 0 48 Amount of distortion Level 0 127 Adjust the output level Note...

Страница 53: ...se of stereo This parameter is effective only with respect to SuperNATURAL Piano E Piano Type Changes the sound from soft to strikingly unique This parameter is effective only with respect to certain SuperNATURAL E Piano tones Sound Lift Limits the volume change produced by variations in your playing touch Enhancer Controls the harmonic content of the upper range making your sound more prominent T...

Страница 54: ... to reach full volume Higher values produce a milder attack lower values produce a sharper attack With some Tones the effect does not work as intended Release Time Offset This is the time over which the sound decays to silence after you release the key Higher values produce longer decay set lower values for a clear cut sound With some Tones the effect does not work as intended Cutoff Offset Adjust...

Страница 55: ... as coming from the left side Similarly more of the sound will originate at the right if the value of R is increased When set to 0 the sound is heard as coming from the center REV Reverb Amount 0 127 This sets the depth of the reverb and chorus effects When this value is set to 0 no reverb or chorus effect is applied when the REVERB DEPTH knob or the CHORUS DEPTH knob is turned CHO Chorus Amount T...

Страница 56: ...ain tones V Reserve Voice Reserve 0 64 Specifies the number of voices that will be reserved for each layer if you attempt to play more than 128 voices Dp ON OFF Specifies whether the damper pedal will ON or will not OFF control each layer F1 Specifies whether the pedal connected to the FC1 jack will ON or will not OFF control each layer F2 Specifies whether the pedal connected to the FC2 jack will...

Страница 57: ...truments and computers By using a MIDI cable to connect devices that have MIDI connectors you can create an ensemble in which a single MIDI keyboard can play multiple instruments or change settings automatically as the song progresses About MIDI Connectors The RD 700NX has the following three types of MIDI connector Their functions differ as described below MIDI IN Connector Performance messages f...

Страница 58: ...MIDI connector whose function can be switched between OUT and THRU and a USB MIDI connector For each layer you can select the MIDI OUT connector or USB MIDI connector from which its data is to be transmitted 1 2 1 Press the MIDI button so the MIDI indicator is lit The MIDI screen appears If the following screen doesn t appear press the Cursor button several times to display the MIDI screen NOTE Wh...

Страница 59: ...o ON in the Utility Rec Setting in Edit mode the MIDI screen as shown above is not displayed Set Rec Mode to OFF when setting the MIDI Transmit channel p 86 MEMO For instructions on setting each of the external MIDI sound generator s Part s Receive channel refer to the owner s manual for each device 2 Use the Cursor buttons to move the cursor and use the DEC INC buttons or the VALUE dial to set th...

Страница 60: ...sor buttons to move the cursor and use the DEC INC buttons or the VALUE dial to set the MSB LSB and PC for each layer Pressing the DEC INC buttons simultaneously switches the settings value to OFF When this setting is OFF bank select and program change messages will not be transmitted Parameter Settings MSB Bank Select MSB CC 00 0 127 OFF LSB Bank Select LSB CC 32 0 127 OFF PC Program Change 1 128...

Страница 61: ...Key Range for Each Layer Key Range Set the keyboard range in which each Layer will sound This can be used to make notes in different areas of the keyboard play different Tones Specify the lower limit LWR and upper limit UPR of the key range being set You can also set this by pressing a specific key and then pressing the ENTER button Parameter Value LWR Key Range Lower A0 C8 UPR Key Range Upper NOT...

Страница 62: ...s for a clear cut sound COF CC74 Higher values brighten the sound lower values make the sound seem darker RES CC71 Higher value makes the special quality of the sound stronger lower value reduce these characteristics Smoothly Changing the Pitch Portamento Portamento is a function that causes the pitch to change smoothly from one note to the next note played The Portamento Time setting determines t...

Страница 63: ...d Off These settings determine whether the external MIDI device is controlled ON or not OFF by the pedals connected to each PEDAL jack the slider the Modulation lever the Pitch Bend lever and S1 S2 buttons Parameter Description Value Dp Damper pedal ON OFF F1 Pedal connected to the FC1 jack F2 Pedal connected to the FC2 jack PB Pitch Bend Lever Md Modulation Lever S1 S1 button S2 S2 button LW2 CON...

Страница 64: ...m 4 Compressor 7 V LINK However following settings are not saved V LINK On or Off ParametersThat Can Be Set Menu Parameter Page 0 System Master Tune p 67 Master Volume p 67 EQ Mode p 67 Pedal Mode p 67 Tone Remain p 68 S1 S2 Mode p 68 Live Set Control Channel p 69 USB Driver p 69 USB Memory Mode p 69 USB MIDI Thru Switch p 69 MIDI OUT3 Port Mode p 69 Damper Polarity p 69 FC1 Polarity p 69 FC2 Pola...

Страница 65: ... functions 1 Press the MENU button getting the indicator to light The Menu screen appears 2 Press the Cursor button to select 0 System 3 Press the ENTER button to display the Edit screen 4 Press the Cursor buttons to switch screens and press the Cursor buttons to move the cursor to the parameter to be set 5 Use the DEC INC buttons or the VALUE dial to set the value If you press the DEC button and ...

Страница 66: ...to SYSTEM When this is set to SYSTEM Pedal Setting appears in the lower right of the screen Pressing the TONE EDIT Pedal Setting button at this point calls up the screen for the function assigned to the pedal Parameter Value Function Parameter Setting Changed FC1 FC2 00 OFF No control CC00 CC127 Controller Numbers 0 127 129 BEND UP The pitch will rise in the same way as when you move the Pitch Ben...

Страница 67: ...n Pressing the TONE EDIT S1 S2 Setting button at this point calls up the screen for the function assigned to the S1 S2 buttons Parameter Value Function Parameter Setting Changed S1 S2 00 OFF No control 01 COUPLE 1OCT Playing a key will also sound an additional note one octave higher 02 COUPLE 1OCT Playing a key will also sound an additional note one octave lower 03 COUPLE 2OCT Playing a key will a...

Страница 68: ...ithout change the MIDI messages that are received at the MIDI IN connec tor Performance data from the RD 700NX itself will no longer be sent from this connector OUT If you choose OUT the connector will function as MIDI OUT and will transmit data from the keyboard and controllers to an external MIDI device Switching the Pedal s Polarity Damper FC1 FC2 Polarity Switch the polarity of pedals connecte...

Страница 69: ...KIRNBERGE Kirnberger This scale is a modification of the meantone and just intonations that permits greater freedom in transposition to other keys Performances are possible in all keys III MEANTONE Mean Tone This scale makes some compromises in just intonation enabling transposition to other keys WERCKMEIS Werckmeister This is a combination of the mean tone and Pythagorean scales Performances are ...

Страница 70: ...r or lower limit the setting for Key Touch one of five possible values is automatically changed to accommodate the value you ve specified Setting a ConstantVolume Level in Response to the Playing Force Velocity This sets the sound to play at a fixed volume regardless of the strength used to play the keyboard the velocity Parameter Value Description Velocity REAL Volume levels and the way sounds ar...

Страница 71: ...UP The pitch will rise in the same way as when you move the Pitch Bend lever toward the right 130 BEND DOWN The pitch will fall in the same way as when you move the Pitch Bend lever toward the left 131 AFTERTOUCH Controls aftertouch 132 OCTAVE UP Each pedal press raises the key range in octave steps up to 4 octaves higher 133 OCTAVE DOWN Each pedal press lowers the key range in octave steps up to ...

Страница 72: ...the song 14 SONG FWD Fast forwards the song 15 MFX1 SW Turns on off multi effect 1 p 41 for the layer specified by MFX Control Destination 16 MFX2 SW Turns on off multi effect 2 p 41 for the layer specified by MFX Control Destination 17 ROTARY SPEED When using the rotary effect switches the rotary effect between slow and fast Assigning Functions to the LAYER LEVEL Sliders Slider Assign Here you ca...

Страница 73: ...r each individual tone p 56 ReverbType Select the reverb type When you change the Reverb Type the Reverb parameters will be automatically adjusted to the optimal values Rather than setting the reverb parameters one by one you can make the settings more easily by first setting the Reverb Type and then changing only the necessary parameters The way the REVERB button s indicators light changes with t...

Страница 74: ...rameters one by one you can make the settings more easily by first setting the Chorus Type and then changing only the necessary parameters The way the CHORUS DELAY indicators light changes with the selected type Parameter Value Description Cho Type Chorus Type OFF Chorus or Delay is not used The indicator does not light CHORUS Normal Chorus The CHORUS indicator remains lit DELAY Normal Delay The D...

Страница 75: ...or Type When you change the this parameter the Compressor parameters will be automatically adjusted to the optimal values You can make the settings easily by first setting the Compressor Type and then changing only the necessary parameters Parameter Value Description Type Compressor Type HARD COMP Applies strong compression SOFT COMP Applies mild compression LOW BOOST Boosts the low end MID BOOST ...

Страница 76: ...onnected to the USB MEMORY connector on the rear panel 5 Press the Cursor buttons to move the cursor to the positions where the characters are to be input 6 Use the DEC INC buttons or the VALUE dial to enter the name Names can consist of up to 16 characters The following characters are available space 0 9 A Z _ a z When the TONE EDIT DELETE button is pressed a single character blank space is inser...

Страница 77: ...Compressor settings p 76 The system parameter is memorized by only the Live Set file saved after pressing the LAYER EDIT WRITE button to memorize a Live Set to RD 700NX 6 Use the Cursor buttons or the VALUE dial to select the file you want to call up then press the ENTER button The confirmation message appears If you do not want to load the Live Set file press the EXIT SHIFT button 7 Press the ENT...

Страница 78: ...icator to light The Menu screen appears 2 Press the Cursor buttons to select 5 File then press the ENTER button The Edit screen appears 3 Press the Cursor buttons to select 3 Live Set Copy then press the ENTER button The following screen appears 4 Press the LAYER EDIT DEST button to select the type of copy Parameter Description INT USB Copy from the RD 700NX s internal memory to USB memory USB INT...

Страница 79: ...nal memory to USB memory sold separately You can also copy a song file from USB memory to the RD 700NX s internal memory 1 Press the MENU button getting the indicator to light The Menu screen appears 2 Press the Cursor buttons to select 5 File then press the ENTER button The Edit screen appears 3 Press the Cursor buttons to select 5 SONG Copy then press the ENTER button The following screen appear...

Страница 80: ...indicator to light The Edit screen appears 2 Press the Cursor buttons to select 5 File then press the ENTER button The Edit screen appears 3 Press the Cursor buttons to select 6 Format then press the ENTER button The following screen appears 4 Press the LAYER EDIT MEDIA button to select the media that you want to format 5 Press the ENTER button The confirmation message appears If you decide to can...

Страница 81: ...some Rhythm Patterns Adjusting theVolume Volume Adjusts the volume of the Rhythm Parameter Value Volume 0 127 Changing Patterns Pattern This selects the Rhythm pattern Select from 200 options MEMO YoucanalsochangeaRhythm spatterninthe Rhythmscreen p 37 Changing the Drum Set Rhy Set You can change a Rhythm s drum set set of drum and percussion tones MEMO When this setting is changed the Part 10 Ton...

Страница 82: ... Press the Cursor buttons to move the Cursor to the parameter to be set 5 Use the DEC INC buttons or the VALUE dial to edit the value 6 When you have finished making the settings press the MENU button You are returned to the previous screen MEMO If you want to save this settings press the LAYER EDIT WRITE button Settings saved in the RD 700NX are not deleted even when the power is turned off Detai...

Страница 83: ...e steps Center Cancel OFF ON When playing back audio data this causes sounds located in the center e g vocals or melodic instruments to be reduced in volume MIDI OUT Port ALL INT INTERNAL 1 MIDI OUT 1 2 MIDI OUT 2 3 MIDI OUT 3 USB This sets the MIDI connector port from which the song is to be output Audio Volume 0 127 This sets the volume for audio file playback SMF Volume 0 127 This sets the volu...

Страница 84: ...ess no sounds are produced even when the keys are pressed In addition Rhythms being played are also stopped Factory Reset Current 4 Press the ENTER button A screen like the one shown below appears NOTE If you ve selected One Touch the settings of the ONE TOUCH PIANO buttons and the ONE TOUCH E PIANO buttons will be reset 5 Press the ENTER button The confirmation message appears To cancel the Facto...

Страница 85: ...t 8 Utility 3 Press the ENTER button to display the Edit screen 4 Press the Cursor buttons to select 1 Rec Setting 5 Press the ENTER button and the following screen will appear Parameter Value Description Rec Mode ON OFF Ordinarily this will be set to OFF When this is set to ON settings appropriate for recording are used with respect to the output from MIDI OUT regardless of the INTERNAL layer set...

Страница 86: ...he switch that connects and disconnects the MIDI connection between the keyboard controller section and the sound generator section p 20 is called the Local switch Since essential information describing what is being played on the keyboard won t reach the sound generator if the Local switch is set to OFF the Local switch should normally be left ON However if while performing you want to send that ...

Страница 87: ...sure that the power to all devices has been turned off 2 After reading Connecting the External Equipment to RD 700NX p 15 connect an audio device system or headphones 3 Connect the external MIDI device with the MIDI cable as shown in the figure above 4 As described in Turning On the Power p 17 turn on the power of each device Selecting RD 700NX Sounds from an External MIDI Device Transmitting Bank...

Страница 88: ... sure to turn the volume all the way down and turn off the power on all equipment before you make any connections Only MIDI data can be transmitted and received via USB A USB cable is not included If you need to obtain one ask the dealer where you purchased the RD 700NX Switch on power to the RD 700NX before you start up the MIDI application on your computer Don t turn the RD 700NX s power on off ...

Страница 89: ...connector it may take longer for data to be loaded or data may fail to be loaded successfully If this occurs you may be able to solve the problem by changing the USB memory setting 1 Press the MENU button 2 Press the Cursor buttons to select 0 SYSTEM and then press the ENTER button 3 Press the Cursor buttons to switch screens and press the Cursor buttons to move the cursor to USB Memory Mode 4 Use...

Страница 90: ...g in Edit mode set the Local Switch to ON p 83 Are the effect settings correct Check following settings ON OFF settings for MFX1 and MFX2 Effect balance and level p 41 p 54 Could the volume have been lowered by MIDI messages volume messages or expression messages received through pedal operations an external MIDI device or song data Raise the Master Volume in the System section of Edit mode Also r...

Страница 91: ...e the delay timing selected in the DELAY settings in Effects is set to a note value the delay sound may not be heard Either adjust the tempo or change the numerical value of the delay timing No Modulation When Modulation Lever is Moved Could you have selected an organ tone For some of the organ tones the modulation lever cannot be used to apply a modulation effect For such tones the modulation lev...

Страница 92: ... created exclusively for the Sound Canvas Series may not play back properly on the RD 700NX Is the audio data playable Make sure that the audio data can be played by the RD 700NX p 95 Pedal function is not affected Is the System Pedal Mode setting in Edit mode set to SYSTEM Set this to Live Set p 67 S1 S2 buttons function is not affected Is the System S1 S2 Mode setting in Edit mode set to SYSTEM ...

Страница 93: ...ain amount of time for playback to begin The format type is indicated on the booklet for the music files you re using List of Messages Error Messages Indication Situation Action Error 1 You can only read the music file You can only read the music file It can not be saved Error 2 An error occurred during writing An error occurred during writing The external media s protect tab may be in the Protect...

Страница 94: ...D 700SX setup files Other Messages Indication Situation Action Unavailable while in Rec Mode This is displayed when the MIDI button is pressed with Rec Mode ON When Rec Mode is ON you cannot change the MIDI settings To make changes to the MIDI settings set Rec Mode to OFF p 86 File Exists Overwrite OK A file with the same name is already exists If you execute the procedure the file will be overwri...

Страница 95: ...TR AMP SIM 40 COMPRESSOR 41 LIMITER 42 GATE 43 DELAY 44 LONG DELAY 45 SERIAL DLY 46 MOD DELAY 47 3TP PAN DLY 48 4TP PAN DLY 49 MULTTAP DLY 50 REVERSE DLY 51 SHUFFLE DLY 52 3D DELAY 53 T CTRL DLY 54 LONG TC DLY 55 TAPE ECHO 56 LOFI NOISE 57 LOFI COMPRS 58 LOFI RADIO 59 TELEPHONE 60 PHONOGRAPH 61 PCH SHIFTER 62 2V P SHIFTR 63 S P SHIFTER 64 REVERB 65 GATED REV 66 OVDRV CHO 67 OVDRV FLNGR 68 OVDRV DE...

Страница 96: ...t write on the keyboard with any pen or other implement and do not stamp or place any marking on the instrument Ink will seep into the surface lines and become unremovable Do not affix stickers on the keyboard You may be unable to remove stickers that use strong adhesives and the adhesive may cause discoloration Care and Maintenance Please note the following points Failure to do so may result in s...

Страница 97: ... 44 1 kHz 16 bit linear Others Rhythm Pattern 200 patterns Controllers LAYER LEVEL slider x 4 Assignable EQUALIZER knobs x 4 REVERB knob CHORUS knob COMPRESSOR knob SOUND FOCUS knob Pitch Bend Modulation lever S1 S2 Buttons Assignable Display Graphic LCD 240 x 128 dots Connectors OUTPUT Jacks L MONO R 1 4 inch phone type OUTPUT Jacks L R XLR type DAMPER Pedal Jack CONTROL Pedal Jack FC1 FC2 MIDI C...

Страница 98: ...ex Scale 47 E ENTER Button 11 EQ Mode 67 Equalizer 35 49 EQUALIZER ON OFF Button 10 Error Messages 94 EXIT SHIFT Button 11 F Factory Reset All 85 Factory Reset Current 85 Fast forward 39 Favorite Live sets 44 FC1 Polarity 69 FC2 Polarity 69 Feet 42 43 Fine Tune 54 Format 81 F T Fine Tune 63 H Hammer Noise 47 HIGH Knob 10 HIGH MID Knob 10 HUM Noise 51 I INC Button 11 24 Initialize 49 Ivory Feel Key...

Страница 99: ... Portamento Time 55 POWER ON Switch 12 Preset bank 21 Preset memory 20 P T Portamento Time 63 R Rec Mode 86 Recording 40 REL 63 Release Time Offset 55 RES 63 Resonance Offset 55 Return to the Beginning of the Song 39 Reverb 33 Reverb Amount 56 REVERB Button 10 REVERB DEPTH Knob 10 REV Reverb 62 Rev Type Reverb Type 74 Rewind 39 Rhy Set 82 Rhythm 37 82 Rotary 43 Rx GM GM2 Sys On 70 Rx GS Reset 70 S...

Страница 100: ... USB memory 18 20 USB MEMORY Connector 12 USB Memory Mode 90 USB MIDI Connector 12 USB MIDI Thru Sw 90 User bank 21 User memory 20 V VALUE Dial 11 24 Value User CC1 Value 64 Value User CC2 Value 64 Velocity 48 71 Velocity Max 57 63 Velocity Sense 57 63 Velo Delay Sens Velocity Delay Sensitivity 48 71 Velo Keyflw Sens Velocity Keyfollow Sensitivity 48 71 V LINK Button 10 V LINK Mode 83 V LINK OUT P...

Страница 101: ...stem Master Tune p 67 Changing the temperament MENU button 0 System Temperament p 70 Transposing the entire keyboard TRANSPOSE button p 32 Changing the pitch for each Tone TONE EDIT button Coarse Tune p 54 TONE EDIT button Fine Tune p 54 Changing the pitch for each Layer LAYER EDIT button Transpose p 56 Changing the pitch for each EXTERNAL Layer MIDI button Transpose p 62 Changing the pitch for ea...

Страница 102: ...103 MEMO ...

Страница 103: ... installed and used in accordance with the instructions may cause harmful interference to radio communications However there is no guarantee that interference will not occur in a particular installation If this equipment does cause harmful interference to radio or television reception which can be determined by turning the equipment off and on the user is encouraged to try to correct the interfere...

Страница 104: ...For EU Countries For China ...

Страница 105: ...Distribuidora De Instrumentos Musicales J E Olear y ESQ Manduvira Asuncion PARAGUAY TEL 595 21 492147 PERU Audionet Distribuciones Musicales SAC Juan Fanning 530 Lima PERU TEL 511 4461388 TRINIDAD AMR Ltd Ground Floor Maritime Plaza Barataria TRINIDAD W I TEL 868 638 6385 URUGUAY Todo Musica S A Francisco Acuna de Figueroa 1771 C P 11 800 Montevideo URUGUAY TEL 02 924 2335 VENEZUELA Instrumentos M...

Страница 106: ... 5 1 0 0 0 1 6 9 8 3 0 2 ...

Отзывы: