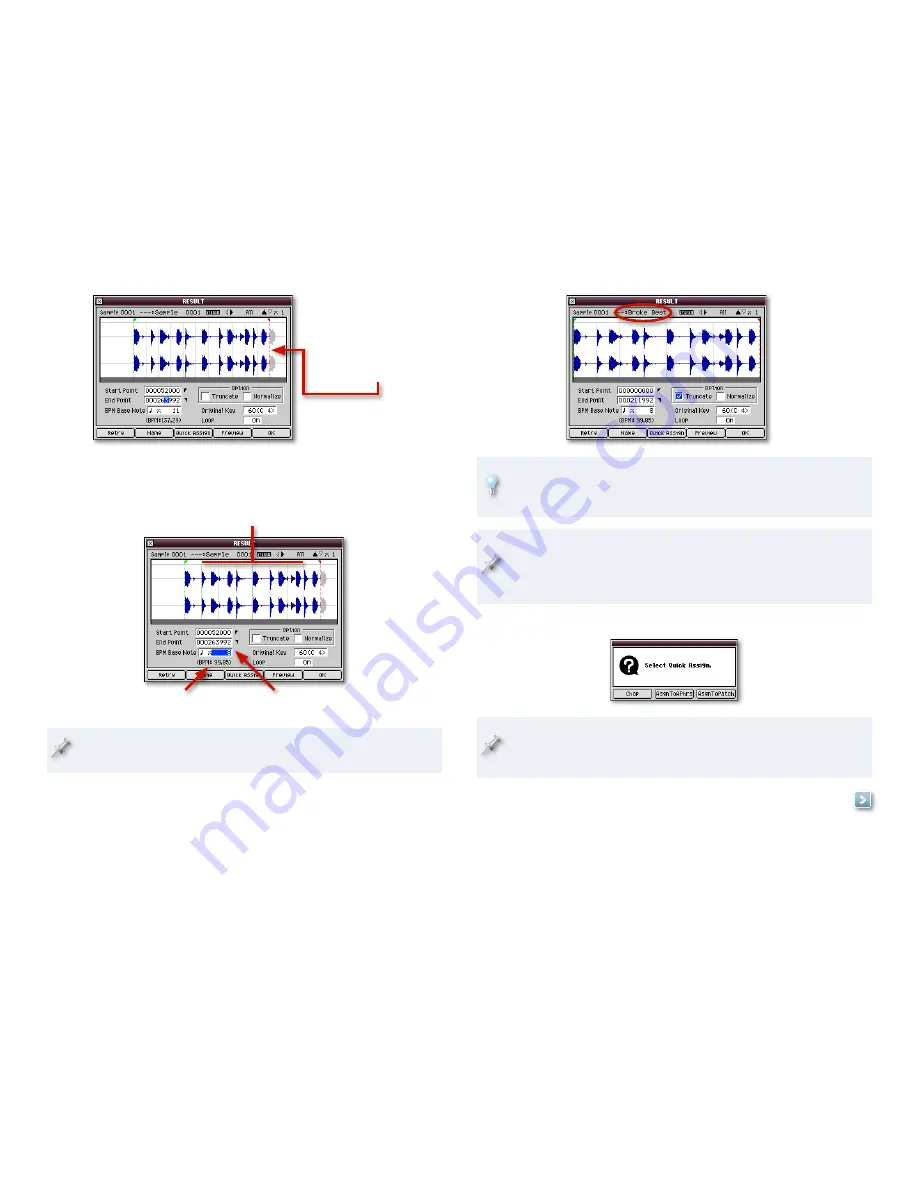
We sampled one extra beat
in this loop so that we’d know
exactly where to set the red
End Point flag—right before
the extra beat.
Set the BPM Base Note parameter to the number of beats in your sample
so the MV-8800 can automatically move beat lines into place onscreen
and calculate the sample’s tempo, or “BPM,” for “Beats Per Minute.”
Number of beats in the sample
MV-8000 figures out BPM
Light gray beat lines moved into place
Setting the BPM Base Note also lets the MV-8800 time-stretch or time-
shrink a sample when it’s used as an audio phrase.
Click Name to display the EDIT SAMPLE NAME window where you can
name the sample. Naming a sample’s a good idea—if you have a bunch
of unnamed samples, things can get confusing fast. When you’re done
naming the sample, click OK to return to the RESULT window.
Checkmark Truncate so that when you leave this window, the MV-8800
trims away everything before the Start Point location and after the End
Point. This way, you won’t use up sample RAM on stuff you don’t need.
�
�
�
We named our
sample “Broke
Beat.”
If you didn’t normalize your sample back in the SAMPLING or
RE-SAMPLING screen—and would like to do it now—checkmark the
Normalize box.
If you’re not ready to assign your sample to an audio phrase or patch,
you can stash it away for now in the project’s sample RAM by clicking
OK. At some later point, you can select the sample in the PROJECT
menu’s Sample Manager and click Quick Assign, as we do below.
Click Quick Assign to display the Quick Assign window.
If you have a sample containing multiple sounds, or want to slice up a
loop, you can click the Chop button to create a patch with each sound
on its own pad—see the MV-8800 Workshop
Auto Chop
booklet.
In the next section, we’ll explain how to set up a sample as
an audio phrase. A little later, we’ll explain how to get it into
a patch.
�


