Working with the Song Finder
E-60/E-50 Music Workstation
r
113
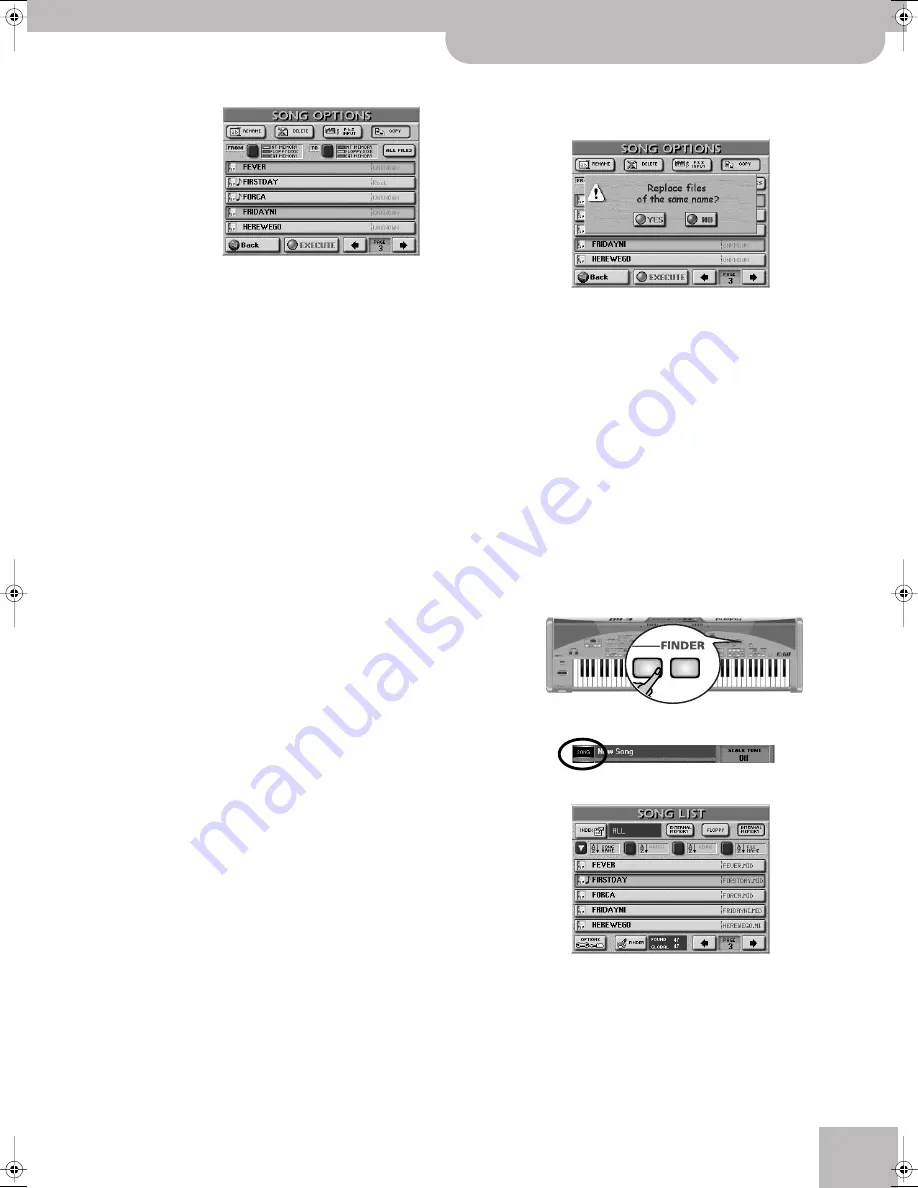
• On the SONG OPTIONS page, press the
[COPY]
field.
• Start by specifying the source that contains the
song(s) you wish to copy: Press the
[FROM]
button
icon several times to select the memory area.
• Now specify the target you wish to copy the selected
song(s) to: Press the
[TO]
button icon once or twice to
select the memory area.
• If the name of the song you want to copy is already
displayed, press its line. You can also select several
songs.
To display the next 5 files, press the
[˚]
field in the
lower right corner. You also use the
[DATA÷ENTRY]
dial and the
[DEC]
/
[INC]
buttons.
You can press this field as many times as necessary
(or until it is no longer displayed). To return to a pre-
vious group of 5 songs, press
[ø]
.
If you need to copy all songs that are currently dis-
played (on all available pages), press the
[ALL¥FILES]
field.
Note:
If the target media (memory card or floppy disk) is not
formatted, a message will be displayed that allows you to for-
mat it before the songs are copied.
(5) If you chose “EXT MEMORY” or “FLOPPY DISK” for
“TO”, disable the card’s/disk’s write protection and
insert it into the PCMCIA slot or disk drive.
To disable the write protection of a floppy disk, close
the “little window” (see p. 11). See the owner’s man-
ual of the memory card for how to disable its write
protection.
Note:
Not all cards have a write protection function.
(6) Press the
[EXECUTE]
field. (Press
[Back]
if you do not
want to proceed, or to select other files.)
You are asked whether it is OK to overwrite all files
on the destination media (“TO”) that have the same
file names as the files you are about to copy.
(7) Press the
[YES]
field if it is OK to overwrite files
with the same names on the destination media.
Press the
[NO]
field if files on the source (“FROM”)
media that have the same name as existing files on
the destination (“TO”) media should not be copied
(only files with “original” names will be copied in that
case).
The data are copied and a “Operation Successful”
message confirms the end of the operation.
(8) Press the
[EXIT]
button to return to the main page.
Editing an Index
You can change the assignments of songs to a category
and even edit the Index names. Furthermore, you can
copy an Index entry (along with all its song assign-
ments) to a different entry.
(1) Press the FINDER
[SONG]
button.
You can also press the
[SONG]
field on the main page.
The display changes to:
(2) Specify the memory area:
[EXTERNAL¥MEMORY]
or
[INTERNAL¥MEMORY]
.
(3) Press the
[INDEX]
field in the top left corner.
INT MEMORY: The E-60/E-50’s internal memory.
FLOPPY DISK: The floppy disk in the E-60/E-50’s drive.
EXT MEMORY: The memory card in the E-60/E-50’s PCM-
CIA slot.
SONG
STYLE
E-60_50_OM_UK.book Page 113 Thursday, June 22, 2006 10:06 AM
Содержание E-50, E-60
Страница 1: ...r Owner s Manual ...
Страница 217: ...Index E 60 E 50 Music Workstation r 217 ...
Страница 220: ...R 602 00 0165 01 RES 557 06 Printed in Italy 09 06 E 60 E 50 OM E ...


