3 Replacement of Main Parts
24
3
11
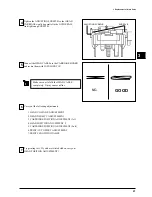
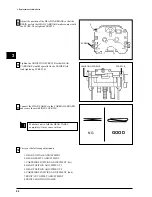
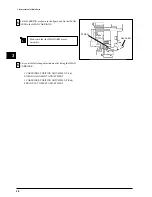
Connect the HEAD CABLEs to the CARRIAGE BOARD
and secure them with INSULOCK TIE.
Make sure not to fold the HEAD CABLE
completely. It may cause cut-line.
NG
GOOD
12
Carry out the following adjustments.
1. HEAD VOLTAGE ADJUSTMENT
2. HEAD DENSITY ADJUSTMENT
3. CARTRIDGE POSITION ADJUSTMENT (1st)
4. HEAD POSITION ADJUSTMENT 1
5. HEAD POSITION ADJUSTMENT 2
6. CARTRIDGE POSITION ADJUSTMENT (2nd)
7. PRINT/CUT OFFSET ADJUSTMENT
8. PRINT LENGTH INITIALIZE
10
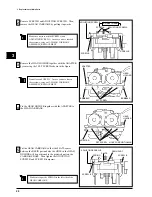
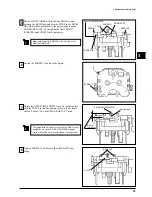
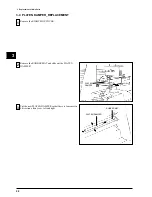
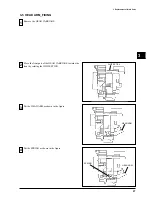
Tighten the ADJUSTING SCREW B so that HEAD
CARRIAGE would be parallel to the GUIDE RAIL.
And tighten up SCREW B.
ADJUSTING SCREW B
SCREW B
9
Adjust the position of the HEAD CARRIAGE so that the
RESIN part on the HEAD CARRIAGE makes contact with
the PLATE. Then tighten SCREW C.
SCREW C
Содержание Color Camm Pro PC-60
Страница 4: ... MEMO ...
Страница 6: ...2 1 Structure Spare Parts 1 1 2 FRAME 1 ...
Страница 8: ...4 1 Structure Spare Parts 1 1 3 FRAME 2 ...
Страница 88: ...84 4 Adjustment 4 MEMO ...


