


Publication 6180W-UM001H-EN-P - August 2007
Replace System Components
47
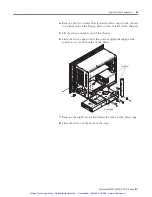
4.
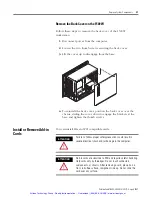
Remove the two screws that fasten the drive cage to the chassis
(on either side of the floppy drive on the outside of the chassis).
5.
Lift the drive assembly out of the chassis.
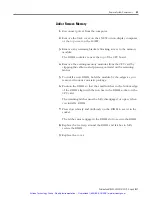
6.
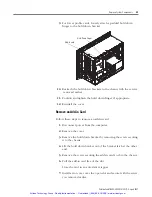
Slide the drive cage toward the power supply disengage lock
points to access both sides of the drive.
7.
Remove the eight screws that fasten the drive to the drive cage.
8.
Slide the drive out the front of the cage.
Drive Cage
Lock Point
Artisan Technology Group - Quality Instrumentation ... Guaranteed | (888) 88-SOURCE | www.artisantg.com