


Publication 6180W-UM001H-EN-P - August 2007
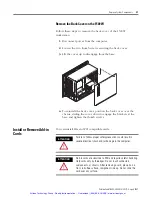
Replace System Components
43
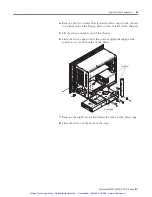
Install the Hard Disk Drive
Follow these steps to install the hard disk drive.
1.
Attach the anti-shock brackets to the drive using the screws
removed during disassembly.
2.
Reattach the disk assembly to the mounting bracket using the
screws removed during disassembly.
3.
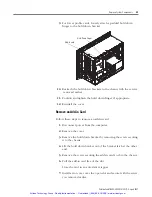
Slide the hard disk drive assembly back into the chassis.
4.
Connect the ribbon cable and four-pin power cable to the hard
disk drive.
Make sure that the cable assembly is properly secured so that
the connection will not be strained by shock or vibration.
5.
Fasten the hard disk drive assembly to the chassis with two (M3)
screws.
6.
Reinstall the back cover.
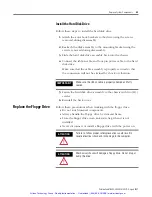
Replace the Floppy Drive
Follow these precautions when working with the floppy drive.
•
Do not touch internal components.
•
Always handle the floppy drive by its metal frame.
•
Store the floppy drive in an anti-static bag when it is not
installed.
•
Never disconnect or install a floppy drive with the power on.
IMPORTANT
Make sure the ribbon cable is properly oriented and fully
seated.
ATTENTION
Failure to follow proper safety precautions could result in
severe electrical shock and/or damage to the computer.
ATTENTION
Mechanical shock will damage a floppy drive. Do not drop or
bump the drive.
Artisan Technology Group - Quality Instrumentation ... Guaranteed | (888) 88-SOURCE | www.artisantg.com