


Publication 6180W-UM001H-EN-P - August 2007
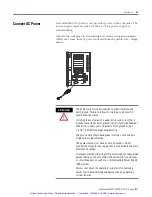
Replace System Components
41
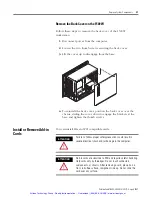
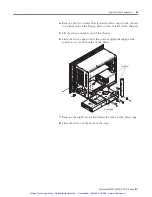
Remove the Hard Disk Drive
This procedure describes how to remove the hard disk drive from the
1500W and the non-display workstations.
1.
Disconnect power from the computer.
2.
Remove the back cover.
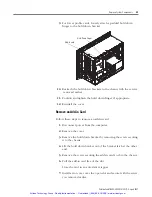
3.
Disconnect the ribbon cable and the four-pin power cable from
the hard disk drive.
4.
Remove the two screws that fasten the hard disk drive assembly
to the chassis.
5.
Lift the hard disk drive assembly out of the chassis.
6.
Remove the four screws that secure the mounting bracket to the
drive.
7.
Remove the four screws that attach the anti-shock brackets to
the disk drive.
TIP
The 1200W drive assembly includes the hard disk drive, the
floppy drive, and the CD/DVD drive. You access the drive
assembly through the bottom cover. Four screws fasten the
drive assembly to the chassis as shown in the 1200W Drive
Assembly illustration. After removing the 1200W drive
assembly, remove the hard disk drive similar to the 1500W and
non-display workstations.
IMPORTANT
Note the location and orientation of all cables before you
remove the existing power supply and cabling, so that you can
reattach them correctly.
Artisan Technology Group - Quality Instrumentation ... Guaranteed | (888) 88-SOURCE | www.artisantg.com