Installing the Single Module Data Viewer Software • 23
Installing the Single Module Data Viewer
Software
1. Launch Windows
®
.
2. Exit from all applications and open windows.
3. Go to www.rkiinstruments.com/sdm2009.
4. Click on the
Download
tab.
5. Click the
Standalone Configuration Software
link.
6. A .zip file will begin to download. Select whether you want to open or save the
.zip file.
7. Extract the contents of the .zip file.
8. Double click the setup.exe file.
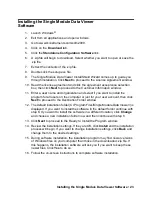
9. The Single Module Data Viewer InstallShield Wizard comes up to guide you
through installation. Click
Next
to proceed to the License Agreement window.
10. Read the license agreement and click the agreement acceptance selection
box, then click
Next
to proceed to the Customer Information window.
11. Enter a user name and organization and select if you want to install the
program for all users on the computer or just for your user account, then click
Next
to proceed to the Destination Folder window.
12. The default installation folder (C:\Program Files\Single Module Data Viewer\) is
displayed. If you want to install the software in the default folder continue with
step 8. If you want to install the software in a different location, click
Change
and choose a new installation folder now and then continue with step 8.
13. Click
Next
to proceed to the Ready to Install the Program window.
14. Review the installation settings. If they are OK, click
Install
and the installation
process will begin. If you want to change installation settings, click
Back
and
change them to the desired settings.
15. During software installation, the installation program may find newer versions
of Windows files on your computer than those in the downloaded .zip file. If
this happens, the installation software will ask you if you want to keep these
newer files. Click
Yes
to do so.
16. Follow the on-screen instructions to complete software installation.

