MAN-2V3B-4.1V REV (D)
15
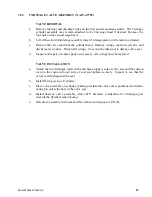
INSTALL
HEAD
a.
Install new O-ring in head or at top of cylinder as applicable.
b.
Carefully position and orient the head on the cylinder and install the nuts or bolts.
Tighten in 5 ft-lb. increments, using a cross sequence, until the proper torque is reached.
Be careful to verify that the head is on square and not cocked.
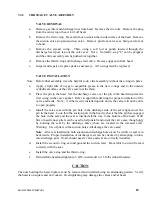
7.4 COMPRESSOR
VALVES
All 3 cylinder heads have a valve assembly whose main components are suction / discharge reeds and a
valve seat. A leaking valve, either suction or discharge, will usually be indicated by a higher than normal
pressure on the preceding stage, or in the case of the first stage, a loss in flow along with low interstage
pressures. This can be caused by wear, breakage, or fouling due to particulates in the valves which
prevent them from fully closing. Remove and service the valves every 4500 hours of operation or if any
of the interstage pressures vary from normal and other possible causes have been eliminated.
REED VALVE INSPECTION AND REPAIR
a.
Inspect the reeds for cracking or pitting. Remove any deposits. Examine the valve seat
for cracks or pits and for leakage past the seat. A uniform imprint of the reed usually
indicates that the valve is sealing normally. Radial lines or streaks extending outward
indicates leakage. Replace parts as required.
b.
Lap the valve seat on a lapping plate using a fine lapping compound. Alternately, on a
flat plate, polish the seat with 400 grit wet/dry sandpaper, then follow up with 600 grit.
When lapping, remove a minimum of material to just clean up the surface.
c.
As necessary, carefully sand the inside surface of the head where the o-rings and valve
parts slide into place. Use 400 grit sandpaper or Scotch Bright.
CAUTION
When reinstalling valves, care must be taken to avoid damaging the O-rings. Lubricate O-rings with an
appropriate grease, such as RIX #45-1007 (Krytox O2 and breathing compatible). Avoid tilting the
valve seat when installing into the head and apply even pressure around the circumference until the
valve is completely installed.
Note: See Drawing A5089G for O-ring installation and material information.
Содержание RIX 2V3B-4.1V Series
Страница 54: ......
Страница 55: ......
Страница 56: ......
Страница 57: ......
Страница 58: ......
Страница 59: ......
Страница 60: ......
Страница 61: ......
Страница 62: ......
Страница 66: ......
Страница 67: ......
Страница 68: ......
Страница 70: ...P N 515 910 P N 515 911 P N 515 792 P N 515 829 X515 910 X515 911 X515 792 X515 829...
Страница 71: ......
Страница 72: ......
Страница 73: ...P N 76 713 X76 713...
Страница 74: ......
Страница 75: ......
Страница 76: ......
Страница 77: ......
Страница 78: ......
Страница 79: ......

