


Installing NICs in CX xx55, DX, EX xx60, and SteelFusion Core Appliances | 83
Installing NICs in 1U CX xx55 and EX xx60 appliances
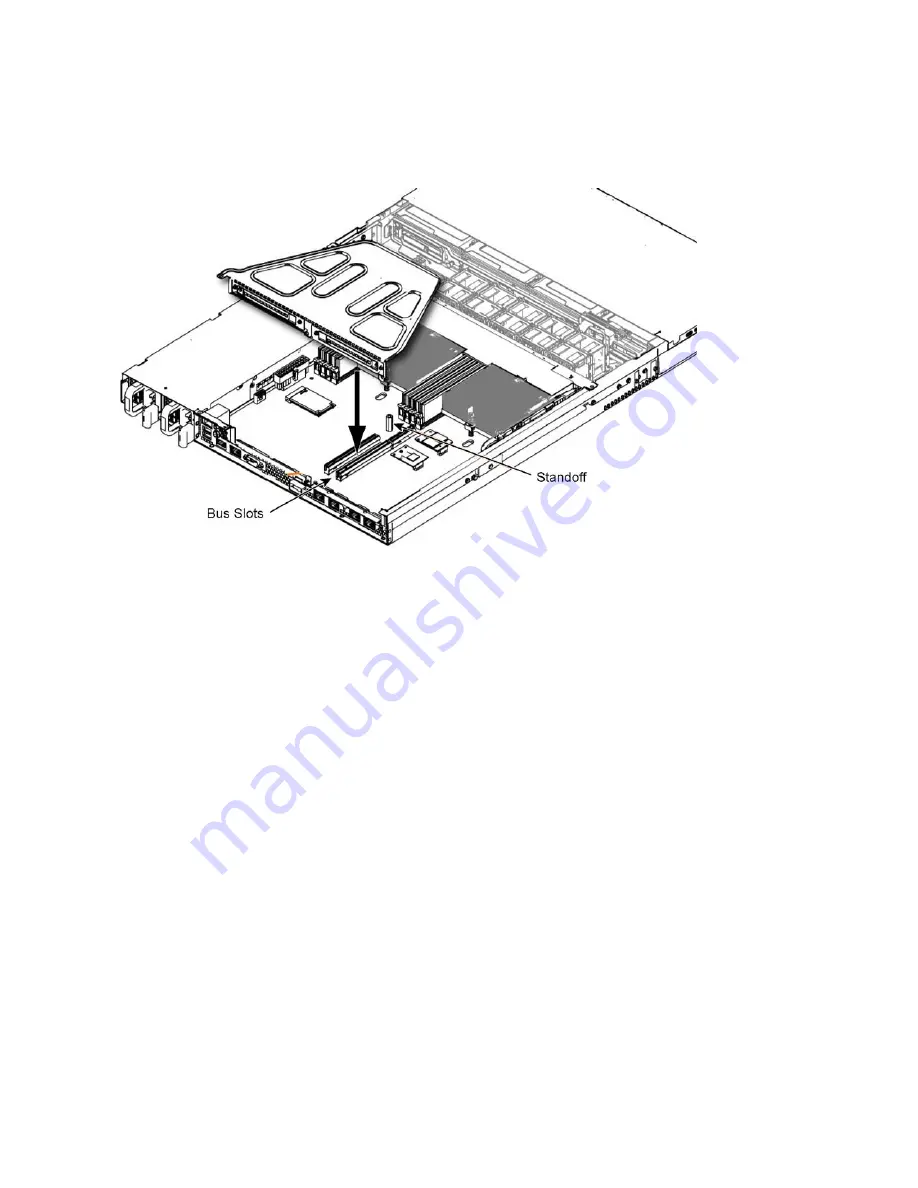
17. Replace the PCIe enclosure in the chassis. Make sure that the NIC connectors fit securely into the
bus slots on the motherboard and that the standoff on the motherboard lines up with the peg on the
PCIe enclosure.
Figure 5-11. Bus slots on the motherboard
18. Replace the two retaining screws on the top of the PCIe enclosure and the one screw on the rear
panel.
19. Replace the cover on the chassis and tighten the locking screws at the back of the chassis.
20. Connect the power cords.
21. Connect the NIC cables.
22. Power up the appliance and check the status lights.
For a detailed figure of the NIC status lights, see
Appendix C, “NIC Status Lights for xx60, xx55, and
To test SteelHead NICs
1. Connect to the SteelHead CLI.
For detailed information, see the
Riverbed Command-Line Interface Reference Manual
.
2. Enter enable mode. At the system prompt, enter the following command:
amnesiac > enable
amnesiac #
3. Verify that the NIC is correctly installed.
For example, to verify a Two-Port Gigabit Ethernet Copper PCIe card, at the system prompt enter
the following command:
amnesiac # show hardware all
Hardware revision: A
Содержание NIC LR
Страница 8: ...8 Contents ...
Страница 16: ...16 Getting Started Troubleshooting ...
Страница 48: ...48 Installing Network Cards in xx80 Appliances Identifying interface names ...
Страница 106: ...106 Installing NICs in SteelHead xx50 Appliances Installing NICs in 3U xx50 appliances and Interceptor 9350 ...


