background image

SAFETY SYMBOLS

IMPORTANT!

 Safety is the single most important consideration in the operation of this equipment. 

The following 

instructions must be followed at all times. 

Failure to follow all instructions listed below may result in electric shock, fire, 

and/or serious personal injury.  

There are certain applications for which this tool was designed. We strongly recommend that this tool not be modified and/

or used for any other application other than that for which it was designed. If you have any questions about its application, 

do not use the tool until you have contacted us and we have advised you.

SAFETY INSTRUCTIONS


GENERAL SAFETY 

KNOW YOUR POWER TOOL. 

Read the owner’s manual 

carefully. Learn the tool’s applications, work capabilities, 

and its specific potential hazards.

BEFORE USING YOUR MACHINE

To avoid serious injury and damage to the tool, read and 

follow all of the Safety and Operating Instructions before 

operating the machine.

1.  Some dust created by using power tools contains 

chemicals known to the State of California to cause cancer, 

birth defects, or other reproductive harm.

Some examples of these chemicals are:

•  Lead from lead-based paints.

•  Crystalline silica from bricks, cement, and other 

•  masonry products.

•  Arsenic and chromium from 

         chemically treated lumber.

Your risk from these exposures varies, depending on how 

often you do this type of work. To reduce your exposure to 

these chemicals: work in a well ventilated area and work 

with approved safety equipment, such as those dust masks 

that are specially designed to filter out microscopic 

particles.

2.  

READ 

the entire Owner’s Manual. 

LEARN

 how to use 

the tool for its intended applications.

3.  

GROUND ALL TOOLS.

 If the tool is supplied with a 3 

prong plug, it must be plugged into a 3-contact electrical 

receptacle. The 3rd prong is used to ground the tool and 

provide protection against accidental electric shock. 

DO 

NOT 

remove the 3rd prong. See Grounding Instructions on 

the following pages.

4.  

AVOID A DANGEROUS WORKING ENVIRONMENT. 

DO NOT

 use electrical tools in a damp environment or 

expose them to rain.

5.  

DO NOT

 use electrical tools in the presence of 

flammable liquids or gasses.

6.  

ALWAYS

 keep the work area clean, well lit, and 

organized. 

DO NOT

 work in an environment with floor 

surfaces that are slippery from debris, grease, and wax.

7.  

KEEP VISITORS AND CHILDREN AWAY.


DO NOT 

permit people to be in the immediate work area, especially 

when the electrical tool is operating.

8.  

DO NOT FORCE THE TOOL

 to perform an operation 

for which it was not designed. It will do a safer and higher 

quality job by only performing operations for which the tool 

was intended.

9.  

WEAR PROPER CLOTHING. DO NOT

 wear loose 

clothing, gloves, neckties, or jewelry. These items can get 

caught in the machine during operations and pull the 

operator into the moving parts. The user must wear a 

protective cover on their hair, if the hair is long, to prevent it 

from contacting any moving parts.

10.  

CHILDPROOF THE WORKSHOP AREA

 by removing 

switch keys, unplugging tools from the electrical 

receptacles, and using padlocks.

11.  

ALWAYS UNPLUG THE TOOL FROM THE 

ELECTRICAL RECEPTACLE

 when making adjustments, 

changing parts or performing any maintenance.

3


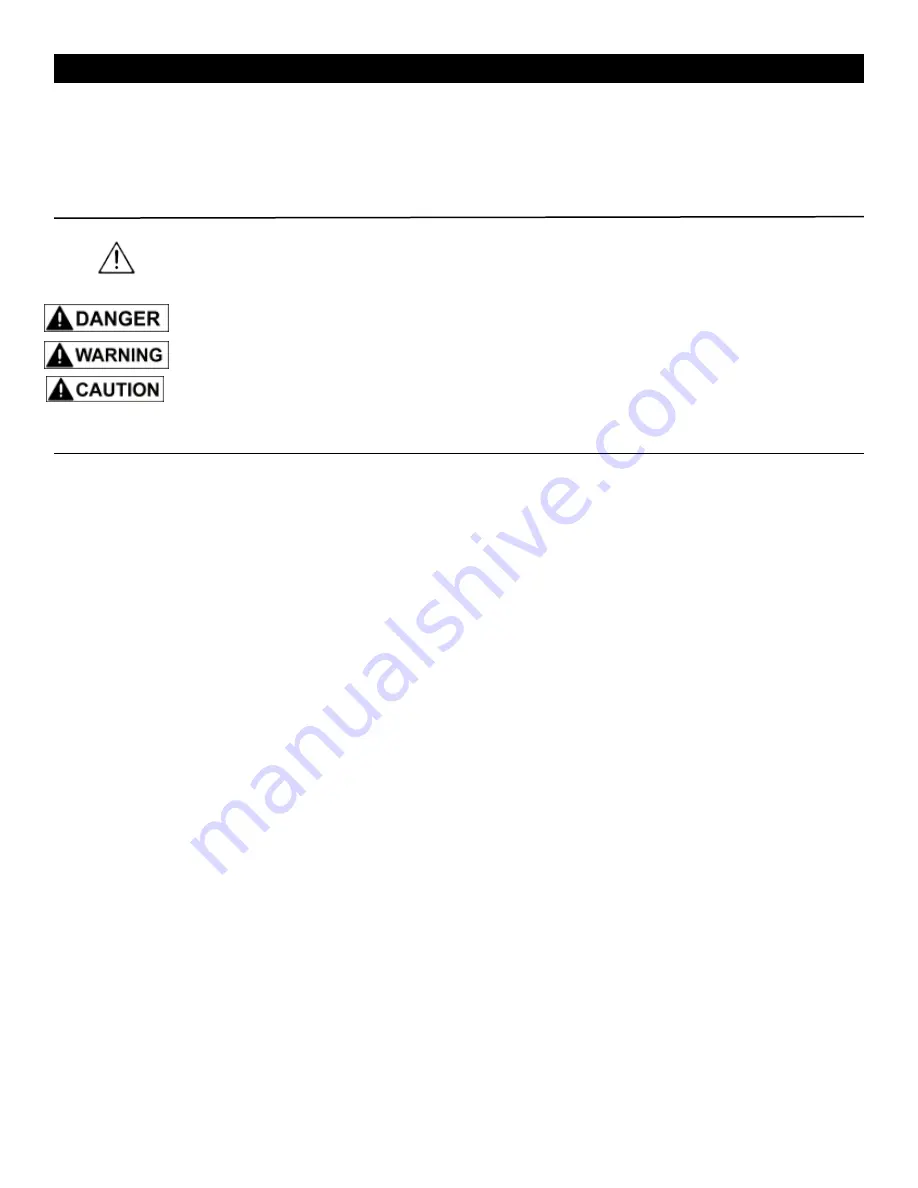
SAFETY ALERT SYMBOL: Indicates DANGER, WARNING, or CAUTION. This symbol may be used in                      

conjunction with other symbols or pictographs.


 Indicates an imminently hazardous situation, which, if not avoided, could result in death or serious injury.


 Indicates a potentially hazardous situation, which, if not avoided, could result in death or serious injury.


Indicates a potentially hazardous situation, which, if not avoided, could result in minor or moderate injury.

NOTICE:


Shown without Safety Alert Symbol indicates a situation that may result in property damage.

Содержание 10-351

Страница 1: ...cord the serial number and date of purchase in your manual for future reference Serial Number _________________________ Date of purchase _________________________ For technical support or parts questi...

Страница 2: ...TS SPECIFICATIONS Model No Motor Horsepower Amps Volts Speed Range Cutting Capacity Cutting Capacity Height Width Blade Width Length Table Size Size Left Tilt Right Tilt Miter Gauge Slot Height to Flo...

Страница 3: ...ical receptacle The 3rd prong is used to ground the tool and provide protection against accidental electric shock DO NOT remove the 3rd prong See Grounding Instructions on the following pages 4 AVOID...

Страница 4: ...ord An undersized cord will cause a drop in line voltage resulting in a loss of power and overheating USE ONLY A 3 WIRE EXTENSION CORD THAT HAS A 3 PRONG GROUNDING PLUG AND A 3 POLE RECEPTACLE THAT AC...

Страница 5: ...t will not get caught on lumber tools or other obstructions while you are working with a power tool Check extension cords before each use If damaged replace immediately Never use a tool with a damaged...

Страница 6: ...off the machine if the material is to be backed out of an uncompleted cut 6 Adjust the upper guide about 1 8 to 1 4 above the material being cut 7 Check for proper blade size and type for thickness a...

Страница 7: ...de Tracking Window H Guide Post Rise Fall Handle I Guide Post Lock Knob J Hinged Blade Guard K Blade Guides L Work Table M Drive Belt Tension Wheel N 4 Dust Ports O Foot Break P Blade Tracking Knob Q...

Страница 8: ...hoist mechanism to lift the Bandsaw c With the help of another person or by installing hoist ring unbolt the Bandsaw from the packing pallet Properly lift the Bandsaw off the packing pallet and place...

Страница 9: ...Rip Fence B Rip Fence Carrier C Re saw Bar A B D C Tools for Assembly Adjustments A Hex Wrench 3MM B Hex Wrench 4MM C Hex Wrench 5MM D Hex Wrench 6MM E 10mm Wrench F 13mm Wrench C A C A E F B B Bandsa...

Страница 10: ...sure that the opening of the slot on the right side of the table leveling bar faces toward the table trunnion This will allow the table leveling bar to open outward from the bandsaw RIP FENCE RAIL Th...

Страница 11: ...may also be set at 90 to the back of the saw blade by adjusting the four trunnion micro adjustment screws found in the base of the lower trunnion A Fig 7 Slightly loosen part 134 mounting bolt refer t...

Страница 12: ...ings correspond to the width of blade you are using by viewing through the tension indicator window B Fig 11 Note The blade tension scale may read differently due to cut specifications of the blade ma...

Страница 13: ...the new blade ensure the blade teeth are pointing downwards and towards you at the position where the blade passes through the table e Center the blade on both wheels ADJUSTMENTS 13 f Re tension the n...

Страница 14: ...n the hex nut Next set the roller guides to within 1 32 of the blade by releasing the lock knob B Fig 18 and turning the micro adjusting knob C Fig 18 Do not set the guides too close as this will adve...

Страница 15: ...heel SETTING THE DRIVE BELT TENSION To properly adjust belt tension turn the hand wheel D Fig 21 until there is 3 8 to 1 2 deflection in the flat ribbed J belt Figure 22 A B C Tension Pulley Figure 21...

Страница 16: ...workpiece to get stuck or bend the blade For straight cuts use the fence provided to feed the workpiece along the blade slowly and in a straight line Use a miter gauge for cross cut or angle cutting...

Страница 17: ...SWITCHES Both the upper and lower blade wheel doors are equipped with safety switches that will shut the saw off when opened Fig 29 The saw will not operate until the blade wheel doors are closed If a...

Страница 18: ...side of the machine near the saw blade etc clean to prevent accumulation of dust Use dust collection if possible 5 To prolong the life of the blade when the bandsaw is not in use for extended periods...

Страница 19: ...sure was put on the workpiece 1 The blade tracking knob hasn t been properly adjusted 2 Inferior blade 3 The wheels are not in alignment REMEDY Check the cable for breakage Contact your local dealer f...

Страница 20: ...t 98 by removing the hex head bolt and washer in the middle of the wheel s hub Carefully slide the lower wheel off of the lower wheel shaft and at the same time remove the saw blade from this wheel Re...

Страница 21: ...M8X20 4 on the back of the upper bandsaw cabinet housing Next swing the Guide Post part 195 right or left until side guide bearings are properly spaced on each side of blade making sure that the blad...

Страница 22: ...must be released on the lower wheel to allow proper adjustments and to avoid damaging the machine If the blade is not running true or it is not running on center of the lower wheel but is correct on t...

Страница 23: ...ary If a blade is moving back and forth wobbling follow these steps Adjustment to the wheel hub on the rear of the bandsaw is required 1 De tension the saw blade 2 Loosen 6 o clock shaft bolt to take...

Страница 24: ...PARTS DIAGRAM FRAME ASSEMBLY 24 NOTE Please reference the Manufacturer s Part Number when calling for Replacement Parts For Parts under Warranty the serial number of your machine is required...

Страница 25: ...Wheel Retaining Ring Retaining Ring Spring Washer Nut M27X2 Relay Bushing Micro Switch Screw M4X30 Light Screw M4X15 Bushing Upper Guide Cover Thread Handle Adjusting Knob Indicator Light Hex Socket S...

Страница 26: ...26 PARTS DIAGRAM WHEEL ASSEMBLY...

Страница 27: ...Lower Wheel Bushing Tire Retaining Ring Bearing Upper Wheel 2 2 1 1 2 2 4 4 1 P10 351 95 P10 351 96 P10 351 97 P10 351 98 P10 351 99 P10 351 100 P10 351 101 P10 351 102 P10 351 103 NOTE Please referen...

Страница 28: ...28 TABLE FENCE ASSEMBLY PARTS DIAGRAM...

Страница 29: ...1 133 P10 351 134 P10 351 135 P10 351 136 P10 351 137 P10 351 138 P10 351 139 P10 351 140 P10 351 141 KEY NO DESCRIPTION QTY MFG PART NO 142 143 144 145 146 147 148 149 150 151 152 153 154 155 156 157...

Страница 30: ...BLADE TENSION TRACKING PARTS DIAGRAM 30...

Страница 31: ...0 Knob Bushing Knob Lever Knob Small Hand Wheel Flat Washer Spring Washer Hex Screw M6X12 2 4 2 2 2 2 2 1 2 1 1 1 1 1 1 1 1 1 1 1 1 2 1 2 2 1 2 10 2 1 P10 351 164 P10 351 165 P10 351 166 P10 351 167 P...

Страница 32: ...GUIDE POST ASSEMBLY PARTS DIAGRAM 32 NOTE Please reference the Manufacturer s Part Number when calling for Replacement Parts For Parts under Warranty the serial number of your machine is required...

Страница 33: ...her Hex Bolt M8X20 Screw M6x12 Big Hand Wheel Handle Assembly Hex Screw M6X12 Hex Screw M5X8 Ring Bushing Rod Locking Handle Setting Plate Pan Head Screw Nut M6X15 Washer Wing Knob Support Bracket 1 1...

Страница 34: ...34...

Страница 35: ...WARRANTY 35 WARRANTY...

Страница 36: ...www rikontools com 10 351M1 10 351 For more information 16 Progress Rd Billerica MA 01821 877 884 5167 978 528 5380 techsupport rikontools com...

Отзывы: