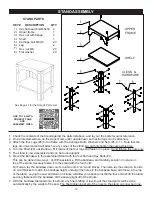


20
FIGURE 36
FIGURE 35
FIGURE 34
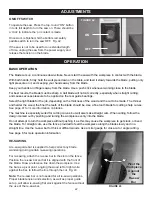
ADJUSTMENTS
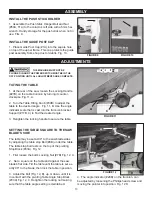
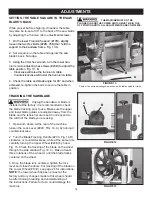
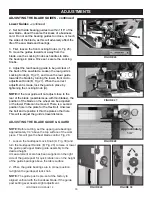
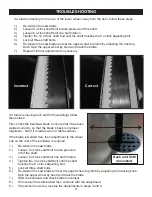
ADJUSTING THE FENCE TO THE TABLE
Check that the fence is lying flat, or parallel to the
table surface. The gap between the table and the
bottom of the fence should be equal along the whole
length of the fence. If a slight adjustment is necessary,
loosen the Fence Rail Nuts (#16F) so that the fence
rail can be adjusted up or down from the table
surface. This will position the fence up or down as
needed to align it parallel to the table surface. Once
the fence is set,
tighten the fence rail nuts. Fig. 34, A.
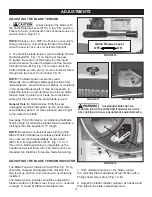
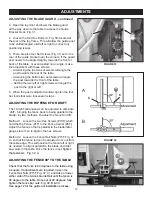
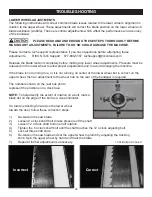
ADJUSTING THE FENCE ON THE CARRIER
The fence can be changed from a vertical position to
a horizontal position, or from its mounting on the left
side of the blade to the right with simple adjustments
of the carrier’s hardware and front rail.
To change the fence from vertical to horizontal:
1. Loosen the two Hex Screws (A, Fig. 35 )which
hold
the Rip Fence
(B, Fig. 35)
to the Fence Carrier
(C,
Fig. 35)
. Slide the fence forward to remove it from the
carrier’s Sliding Block
(D, Fig. 35)
.
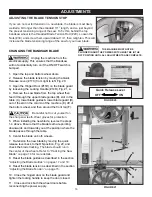
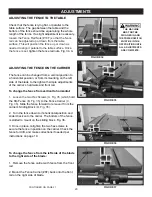
2. Turn the fence down to its horizontal position and
slide it back onto the carrier. The bottom of the fence
is slotted to mount on the sliding block. Fig. 36.
3. Once in place, retighten the two hex screws to
secure the fence in position on the carrier. Check the
fence for drift, and make corrections if needed per
instructions on page 19.
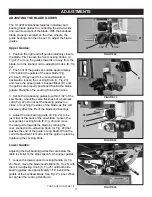
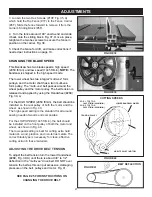
To change the fence from the left side of the blade
to the right side of the blade:
1. Remove the fence carrier with fence from the front
rail.
2. Mount the Fence Carrier (#6F) back onto the front
rail on the right side of blade.
FIGURE 37
CONTINUED ON PAGE 21
B
A
C
THE MACHINE
MUST NOT BE
PLUGGED IN AND
THE POWER SWITCH
MUST BE IN THE
OFF POSITION UNTIL
ALL ADJUSTMENTS
ARE COMPLETE.
D
A
A
Содержание 10-324TG
Страница 43: ...43 OPERATION...


