11
TABLE ASSEMBLY
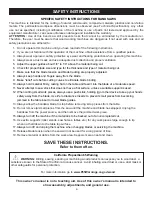
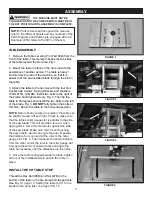
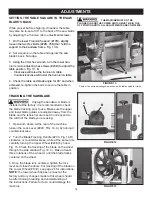
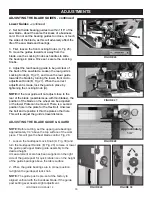
1. Remove the Table Leveling Pin (Part #4B) from the
front of the table. This metal pin keeps the two sides
of the table level at the slot area. Fig. 1.
2. Mount the table in place on the trunnion with the
assistance of another person. The table is heavy!
Do this from the rear of the machine, so that it is
easier to fit the pre-installed blade through the slot in
the table.
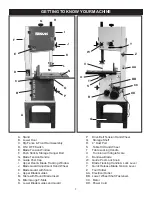
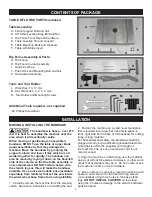
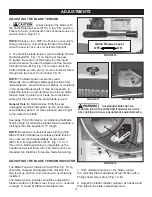
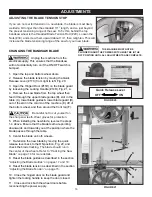
3. Attach the table to the trunnion with the four Hex
Socket Cap Screws, Spring Washers and Washers
(Parts #11B, 10B, 9B). Install two bolts to the right of
the blade, hand tightened only. Fig. 2. Then tip the
table to 45 degrees and install the two bolts to the left
of the blade. Fig. 3.
DO NOT
fully tighten the bolts at
this time. Return the table to the horizontal position.
NOTE:
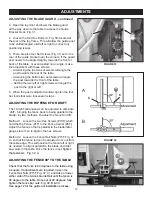
Before finally secured in position, the table can
be slightly moved, left and right. Check to make sure
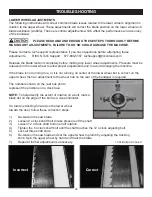
that the table’s miter gauge slot is parallel to the side
of the saw blade. This will provide a true cut when
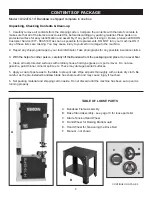
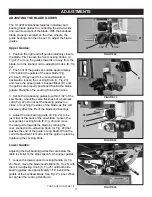
ripping stock. Set a thin metal ruler against the side
of the saw blade. Make sure that it is not touching
the saw’s teeth, which can angle the ruler. Measure
the distance from one end of the ruler to the miter
gauge slot. FIG. 4. Then measure the same distance
from the other end of the ruler to the miter gauge slot.
Compare these two measurements and angle the
table as necessary until the distances are the same.
4. Once the table is aligned parallel to blade, tighten
all four of the installed bolts to secure the table in
place.
FIGURE 1
ASSEMBLY
FIGURE 2
THE MACHINE MUST NOT BE
PLUGGED IN AND THE POWER SWITCH MUST BE IN
THE OFF POSITION UNTIL ASSEMBLY IS COMPLETE.
FIGURE 4
FIGURE 3
NOTE:
Parts referenced throughout the manual
refer to the different sheets and key numbers of the
Parts Diagrams and Parts Lists on pages 28 to 40.
Example: (#7A) refers to Part #7 on Sheet A.
INSTALL THE 90° TABLE STOP
Thread the Hex Bolt (#8B) and Nut (#7B) to the
bottom of the table in the pre-bored and tapped hole.
See Fig. 1
2, page 13. Setting the table to 90° to the
blade will be done later on pages 13 & 14.
Содержание 10-324TG
Страница 43: ...43 OPERATION...


