43
Safety Inspection
1. Check all thermostats and high limit settings.
2. During the following safety checks leave manome-
ters hooked up, check and record.
3. If other gas-fired appliances in the room are on the
same gas main, check all pressures on the Delta
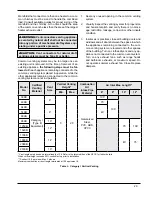
Limited with all other equipment running.
4. Check thermostats for ON-OFF operation.
5. Check high limits for ON-OFF operation.
6. While in operation, check flow switch operation.
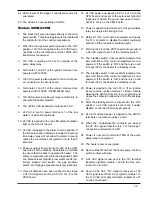
7. Check the low gas pressure switch. (For proper
adjustment, use the attached manometers, if avail-
able, to set pressure. The scales on the switch are
approximate only.) Low gas pressure switch must
be set at 5.0 in. WC for natural gas and 10.0 in.
WC for propane gas.
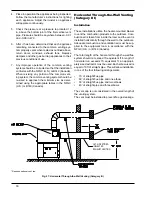
8. Make sure that the high gas pressure switch (op
-
tional) is set to 1.0 in. WC above manifold pres
-
sure.
Follow-Up
Safety checks must be recorded as performed.
Turn heater on. After main burner ignition:
1. Check manometer for proper reading.
2. Cycle heater several times and re-check readings.
3. Remove all manometers and replace caps and
screws.
4. Replace all gas pressure caps.
5. Check for gas leaks one more time.
Pilot Turn-Down Test
The Delta Limited heaters, depending on their size,
have two to five burner sections. Each burner section
is supplied gas by two gas valves incorporated into a
single valve body. A maximum of three burner sections
may be controlled by a single hot surface ignition sys-
tem. The middle of the three burner sections is ignited
directly with a hot surface ignition system.
The burner section that is ignited directly by the hot
surface ignition system serves as a supervised pilot to
light the burner sections on either side of it. The burner
sections on either side of the supervised section (pilot)
are electrically interlocked with the supervised ignition
system so as they are not energized unless flame is
proven on the center section which is acting as a pilot
to light the right and left-hand sections.
The pilot turn-down test is conducted as follows:
1. Turn off manual valves on non-supervised burner
sections.
2. Turn on electrical power and adjust thermostat to
call for heat.
3. Wait for completion of ignition sequence to light
burner section being utilized as a pilot for those
turned off in step 1 above.
4. Gradually reduce manifold pressure (flame) on
supervised burner section by slowly closing man-
ual gas valve. Watch for shut-down due to loss of
supervised flame signal as pressure is being re-
duced. Flame signal should be lost before man-
ifold pressure goes below 2.0 in. WC for natural
gas and 6.0 in. WC for propane gas.
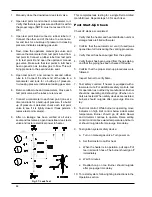
Leak Test Procedure: Dual-Seat Gas
Valves
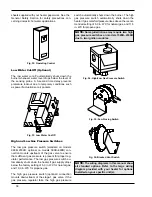
Proper leak testing requires three pressure test points
in the gas train.
Test point A is upstream of the automatic gas valve.
On the first automatic valve, this is a bleedle valve. On
the other valves, this is a plugged port. The bleedle
valve on the first valve may be used for all the other
valves as well.
Test point B is a bleedle valve located between the two
automatic gas valve seats.
Test point C is located downstream of both automat-
ic gas valve seats and upstream of the manual valve.
On the manual valve, this is a bleedle valve. Identical
readings will be found at the plugged port labeled as
Alternate C.
Refer to Fig. 37. The numbers on the diagram refer to
the steps below:
These tests are to be conducted with the electrical
power to the heater turned off.
Содержание Raypak Delta Limited 399B
Страница 23: ...23 Fig 21 2 Stage Wiring Connections Fig 22 3 Stage Wiring Connections Fig 23 4 Stage Wiring Connection...
Страница 39: ...39 Wiring Diagram Models 399B 1259B...
Страница 40: ...40 Wiring Diagram Models 1529B 2339B...
Страница 51: ...51 DIAGNOSTIC DETAIL 12 J 7 J 6 J 5 J 3 0 2 0 16 S 1 F 2 F 3 F 4 F BLOWER DETAIL...
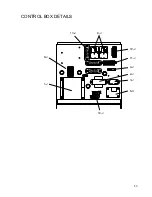
Страница 53: ...53 13 J 8 J 10 J 11 J 4 J 2 J 3 J 6 C 14 J 9 J 1 J CONTROL BOX DETAILS...
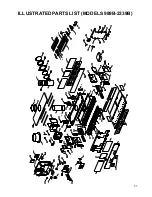
Страница 57: ...57 ILLUSTRATED PARTS LIST MODELS 989B 2339B 10 J 3 O 5 O...
Страница 58: ...58 12 H 6 H 7 H 8 H 2 H 9 H 3 H 5 H 1 H 4 H 1 P HEAT EXCHANGER DETAILS BURNER ASSEMBLY DETAILS...
Страница 59: ...59 CONTROL BOX DETAILS 9 J 8 J 23 S 13 J 10 J 3 O 10 J 3 O 5 O FRONT SWITCH DETAILS...
Страница 66: ...66...
Страница 67: ...67 Raypak Inc 2151 Eastman Avenue Oxnard CA 93030 805 278 5300 Litho in U S A NOTES...

