3
8
Write down the color of the wires
Check mark the wires that are connected to terminals. Next to the
check mark, write down the color of the wire.
Do not include jumpers
as a part of your count.
Check all that apply (Not all will apply):
Terminal
Wire Color
Y
Y2
G
C
7
Record if you have wires in the
following terminals
Do not include jumpers as a part
of your count.
The thermostat
does not need jumpers.
Terminal
Wire Color
A or L/A
O/B
W2 or AUX
E
W
K
10 Disconnect the wires and remove the
old wall plate
Use a screwdriver to release wires from
terminals.
Tip:
To prevent wires from falling back
into the wall, wrap the wires around a
pencil.
Terminal
Wire Color
R
R
h
Rc
S and U terminals are not supported with this thermostat.
If there are wires in terminals that are not listed, you will need
additional wiring support.
Visit
honeywellhome.com/support
to
find out if the thermostat will work for you.
Required (see step 9)
9
Do you see a wire connected to the C terminal?
If yes, skip to step 10.
If you do not see a C wire, proceed with the options below:
Option A - Finding the C-Wire:
There might be an extra wire pushed into
the wall or wrapped around the wire bun-
dle. Gently pull the wire bundle out of the
wall to check for unused wires.
If you have an unused wire, connect that
wire to the C terminal on your new ther-
mostat in step 13.
Connect the other end of the unused wire
to the C terminal on your heating/cooling
system (or the zone panel if your home
uses more than one thermostat to control temperature). Be sure any
other wire(s) connected to the C terminal stay securely connected
when you re-tighten the terminal.
Not all heating/cooling equipment use the C label for the 24 VAC
common wire. If your heating/cooling equipment does not have a C
terminal, check the system manual or contact the manufacturer to
find out which terminal is the 24 VAC common.
Complete installation by following the remaining steps in this guide.
Option B - Using the C-Wire Power Adapter:
If you do not have an unused wire in the wall, and Y and G wires are
used, the THP9045A1098 C-Wire Power Adapter can be used.
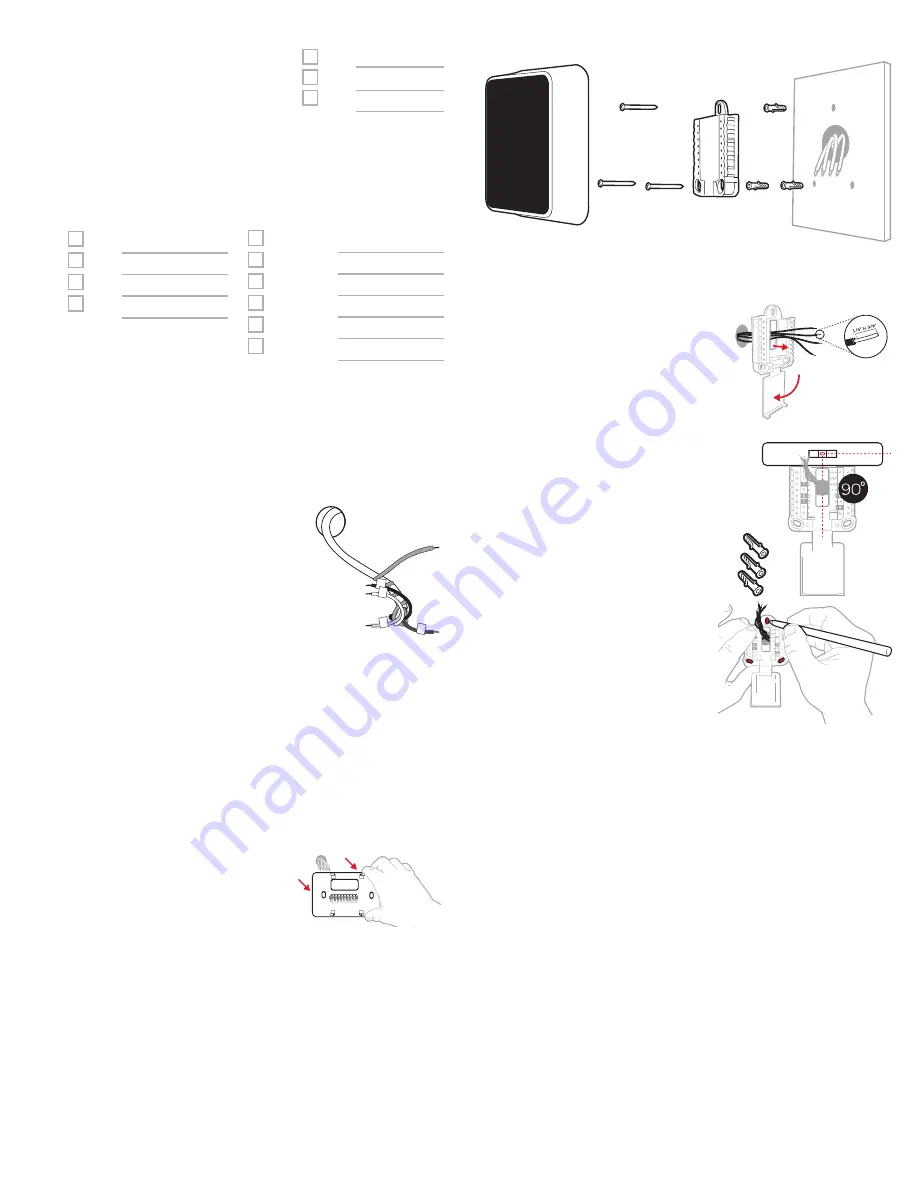
Installing your T5 Smart Thermostat
T5 Smart
Thermostat
Screws
UWP
Mounting
System
Anchors
Wall
11 Bundle and insert wires through
the UWP
Pull open the UWP and insert the
bundle of wires through the back
of the UWP.
Make sure at least
1/4-inch
of
each wire is exposed for easy
insertion into the wire terminals.
12 Insert the wall anchors
It is recommended that you use
the wall anchors included in the
box to mount your thermostat.
You can use the
UWP
to mark
where you want to place the wall
anchors.
a) Level the wall plate.
b) Mark the location of the wall
anchors using a pencil.
c) Drill the holes.
d) Insert wall anchors.
e) Make sure anchors are flush
with wall.
Tip:
Use a
7/32 drill bit
.


