


The
lower panel
displays all the Powerline Ethernet devices, discovered on the current logical network (remote
devices). Displayed immediately above this panel is the number of remote devices found, the type of logical
network (Public or Private), and a message area that reports connectivity and scan status. The following
information is displayed for each of the devices discovered that appear in the lower panel:
Device Name
column shows the default device name, which may be user re-defined. A user may change the
name by clicking on the name and editing in-place, or by using the rename button. An icon is optionally shown
with the name. A distinction in icons is made between low-speed and high-speed devices (14Mbps and 85Mbps).
By default, the icon is displayed with the name.
MAC Address
column shows the device's MAC address.
Password
column shows the user-supplied device password (initially left blank).
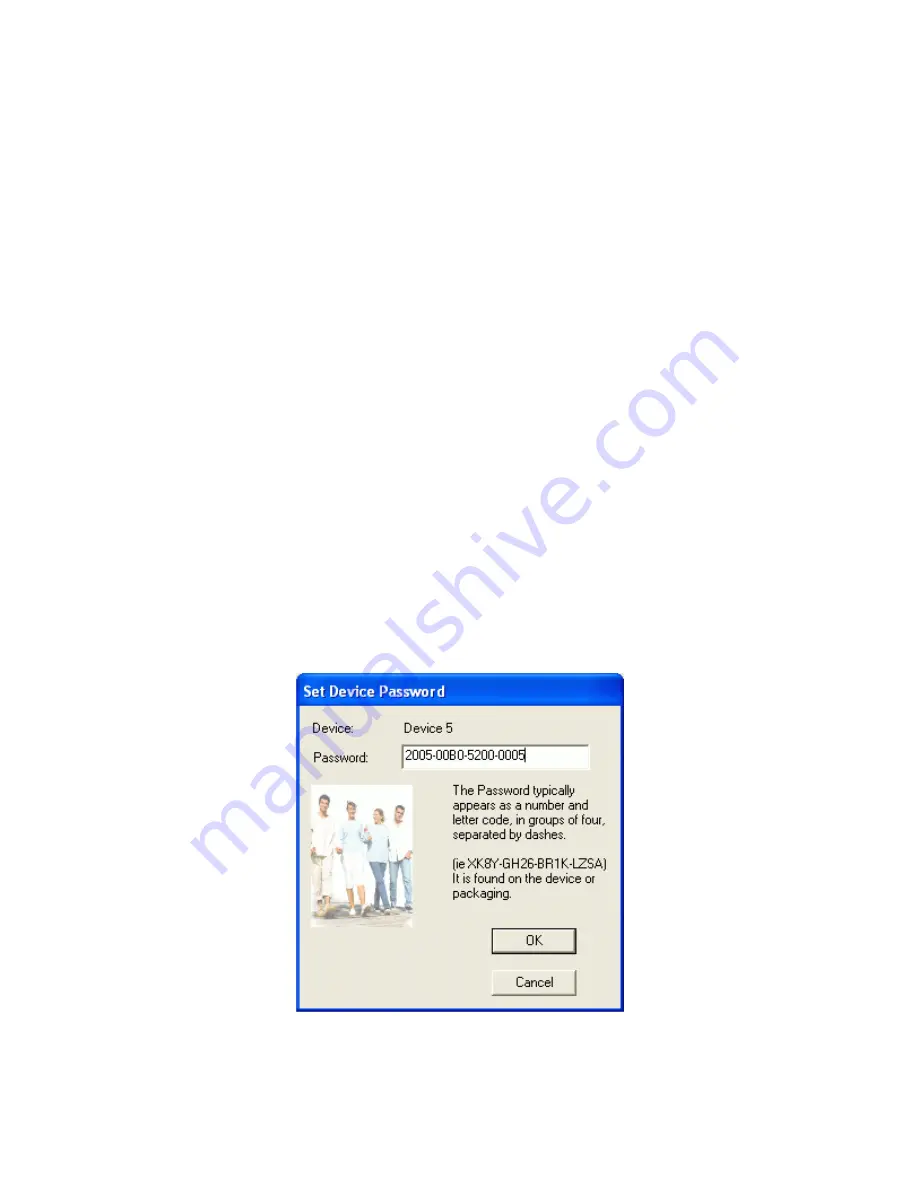
A user may enter the password by using the Set Password button. To set the
Password
of the device (required
when creating a private network), first select the device by clicking on its name in the lower panel and then click
on the Enter Password button .A dialog box will appear as shown in Figure 5 to type the password. The selected
device name is shown above the field for entering the password. Hit OK after entering the new password. A
confirmation box will appear if the password was entered correctly. If a device is not found, the user will be
notified and suggestions to resolve common problems will be presented.
Figure 5
: Set Device Password
57
Содержание ADSL2+ Powerline Router
Страница 1: ...User s Manual ADSL2 Powerline Router with 3 port Switch ...
Страница 14: ...At the Password prompt type admin You can change these later if you wish Click LOGIN 13 ...
Страница 15: ...You can use Quick Setup to setup the router and the router will connect to the Internet via ADSL line 14 ...
Страница 18: ...3 3 3 Admin Setting Set a password to restrict management access to the router The default is admin 17 ...
Страница 20: ...3 3 5 System Log Click Download to save or open system log file 19 ...
Страница 25: ...3 5 1 WAN Configuration 24 ...
Страница 27: ...3 5 2 WAN Status 26 ...
Страница 32: ...3 6 3 STB Bridge Please refer to your ISP for more information on when to configure the router as a bridge 31 ...
Страница 36: ...3 7 3 Packet Filtering To add packet filtering rule to block certain packet 35 ...
Страница 37: ...3 7 4 MAC Control You can block certain client PCs accessing the Internet based on MAC address 36 ...
Страница 42: ...3 8 5 Application Server Settings Supports WEB Telnet SSH TFTP and FTP server 41 ...
Страница 46: ...3 10 1 System Status The System Status page shows the WAN LAN and router s firmware version 45 ...
Страница 57: ...Figure 4 Multiple Local Device Connection 56 ...


