Wartung
- Überprüfen Sie regelmäßig die technische Sicher
-
heit des Gerätes auf Beschädigungen des Netzka
-
bels oder des Gehäuses, sowie auf die Abnutzung
von Verschleißteilen wie Dreh- und Schiebereglern.
- Wenn anzunehmen ist, dass ein gefahrloser Be-
trieb nicht mehr möglich ist, so ist das Gerät au
-
ßer Betrieb zu setzen und gegen unbeabsichtigten
Betrieb zu sichern. Netzstecker aus der Steckdose
ziehen!
- Es ist anzunehmen, dass ein gefahrloser Betrieb
nicht mehr möglich ist, wenn das Gerät sichtbare
Beschädigungen aufweist, das Gerät nicht mehr
funktioniert, nach längerer Lagerung unter ungüns-
tigen Verhältnissen oder nach schweren Transport
-
beanspruchungen.
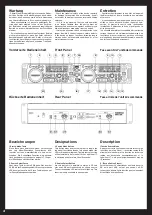
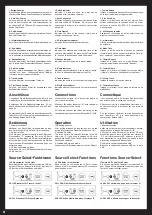
Vorderseite Bedieneinheit
Rückseite Bedieneinheit
Bezeichnungen
1.Search-Mode-Taste
Diese Taste muss gedrückt werden, um zwischen
den Jog Wheel-Funktionen Schnellsuche (LED
leuchtet auf) und Normalbetrieb hin- und herzu
-
schalten. Die Schnellsuch-Funktion wird automa
-
tisch ausgeschaltet, falls das Jogwheel -17- länger
als 15 Sekunden nicht betätigt wurde.
2.Source-Select-Taste
Über diese Taste wird ein SD-Karten-Slot bzw. der
USB-Port als Quelle ausgewählt. Die entsprechende
LED-Anzeige leuchtet auf. Diese Funktion kann nur
im Pause-Modus genutzt werden.
Maintenance
- Check the technical safety of the device regularly
for damage to the mains line or the casing, as well
as for wear of wear parts such as rotary and sliding
switches.
- If it is to be assumed that the safe operation
is no longer feasible then the device must be
disconnected and secured against accidental use.
Always disconnect mains plug from the outlet!
- It must be assumed that a safe operation is no
longer feasible if the device bears visible defects,
if the device no longer functions, following longer
storage under unfavourable conditions or after
major transport stress.
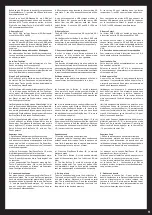
Front Panel
Rear Panel
Designations
1. Search Mode Button
This button must be pressed in order to toggle the
jog wheel functions between fast search mode (the
LED is lit) and normal mode. The fast search function
will automatically be turned off if the Jog Wheel -17-
is not being used for more than 15 seconds.
2. Source Select Button
Via this button it is possible to assign a SD card
slot and USB port respectively as sound source.
The corresponding LED indicator will light up. This
function is only available in pause mode.
4
Entretien
- Contrôlez régulièrement le bon état de l’appareil
(boîtier, cordon) et l’usure éventuelle des molettes
et curseurs.
- Si vous supposez que l’appareil ne peut plus être
utilisé en toute sécurité, mettez l’appareil hors-
service et assurez-le contre toute réutilisation
involontaire. Débranchez la fiche électrique de la
prise de courant !
- La sécurité d’emploi est susceptible d’être affectée
lorsque l’appareil est visiblement endommagé, ne
fonctionne plus correctement, après un stockage
prolongé dans des conditions défavorable ou après
une forte sollicitation de transport.
Face avant de l‘unité decommande
Face arrière de l‘unité de commande
Description
1.Touche Search-Mode
Appuyer sur cette touche pour commuter entre les
fonctions de la Jog Wheel : recherche rapide (DEL
allumée) et mode normal. La fonction de recherche
rapide est désactivée automatiquement si la
Jogwheel -17- n‘est pas manipulée pendant plus de
15 secondes.
2. Touche Source Select :
Cette touche sert à sélectionner une fente de carte
SD ou le port USB en tant que source. La DEL
respective s‘allume. Cette fonction peut uniquement
être utilisée en mode Pause.
1
2
3
4
5
6
7
24
8
9
10
11
12
13
14
15
16
17
18
19
20
Содержание SMP-1
Страница 12: ......


