background image

P11

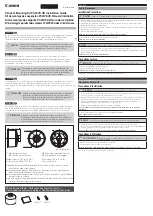
STEP 5- ATTACH PANEL TO MOUNT

Hang with monitor attached

Cuelgue con el monitor adherido.

Accrochez avec le moniteur installé.

STEP 5-  ADJUST TILT TENSION/ POST INSTALLATION LEVEL

Locking mechanism

Mecanismo de fijación

Mécanisme de verrouillage

Heavy, Assistance 

Required

TRES LOURD ! Cette etape

requiert deux personnes
!PESADO! Necesitara ayuda

para

realizar esta operacion

Flat panel can be leveled 

(+/-3 degrees) as needed. If 

security screws are ten-

sioned tight it will be difficult 

to adjust leveling.

Secure Monitor Plate to Arm 

using 2 Phillips head screws 

removed in step 1. Tighten 

only to snug tension.

_+

a) Rotate handle clockwise 

as far as possible.

b) Pull handle to side lateral-

ly (against spring tension) 

and rotate counter- clock-

wise as far as possible.

c) Repeat steps a) and b) 

until panel holds desired tilt.

Содержание REDMC70

Страница 1: ...LOADING WEIGHT IS 70 LBS USE WITH PRODUCTS HEAVIER THAN THE MAXIMUM WEIGHT INDICATED MAY RESULT IN INSTABILITY AND POSSIBLE PERSONAL INJURY REDMC70 INSTRUCTION MANUAL MANUAL DE INSTRUCCIONES MANUEL D...

Страница 2: ...aran da os o si faltara alg n elemento Las piezas incluidas est n dise adas para ser instaladas en paredes con TVes de madera o en paredes de hormig n Se define como pared con montantes de madera aqu...

Страница 3: ...7 in 400 mm 15 7 in 300 mm 11 8 in 200 mm 7 9 in 200 mm 7 9 in 100 mm 3 9 in 300 mm 11 8 in 400 mm 15 7 in 400 mm 15 7 in 300 mm 11 8 in 200 mm 7 9 in 200 mm 7 9 in 200 mm 7 9 in 300 mm 11 8 in 200 mm...

Страница 4: ...Plastic End Caps B 1 Monitor Plate 2 Monitor Adapters A CA 2 Monitor Adapters B CB 14 PHILLIPS SCREWS X 8 9 5mm SPACER X 4 12 8 SQUARE WASHER X 4 5 1 2 M6 x 15 X 4 M8 x 15 X 4 M6 x 30 X 4 M8 x 30 X 4...

Страница 5: ...ONITOR PLATE FROM MOUNT Remove and save Phillips head screws and washers Screws and washers will be used to reattach monitor plate in step 5 Conecte el adaptador al monitor Connectez l adaptateur au m...

Страница 6: ...nectez l adaptateur au moniteur 14 9 or 10 Spacers to be used when back of panel is curved or when more clearance is required Spacers can be stacked 5mm 5mm between panel and monitor plate to allow fo...

Страница 7: ...ng additional washers if hardware screws are too long to properly tighten into back of flat panel television 10 10 9 9 select the proper spacers or spacer suit as below if necessary STEP 2 USE M8 STEE...

Страница 8: ...l emplacement d une poutre puis marquez l emplacement des bords et du centre de cette poutre Mount wall plate Coloque la placa de pared Montez la plaque murale Wood Stud DRILL BIT NOT INCLUDED X2 12 S...

Страница 9: ...Percez le trou de guidage DRILL BIT NOT INCLUDED Solid Concrete Concreto s lido B ton massif STEP 3B DRILL PILOT HOLE AND MOUNT WALL PLATE 13 Ratchet Handle 3 8 Secure top lag bolt first If necessary...

Страница 10: ...P10 STEP 4 SNAP PLASTIC END CAPS ON TOP AND BOTTOM OF WALL PLATE D D...

Страница 11: ...ux personnes PESADO Necesitara ayuda para realizar esta operacion Flat panel can be leveled 3 degrees as needed If security screws are ten sioned tight it will be difficult to adjust leveling Secure M...

Страница 12: ...nstrucciones proporcionadas por RED ATOM En la medida en que la ley lo permita RED ATOM no se hace responsable de ninguna otra garant a expresa o impl cita incluso las garant as de aptitud para un fin...

Отзывы: