background image

192

Appendix F:An Introduction to Disk Partitions

CAUTION

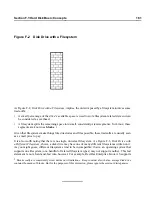
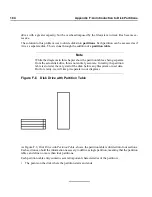
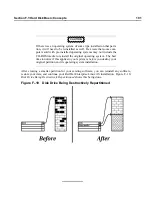
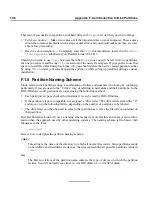
As Figure F–10, Disk Drive Being Destructively Repartitioned, shows,
any data present in the original partition will be lost without proper
backup!

Non-Destructive Repartitioning

Here, you run a program that does the seemingly impossible: it makes a big partition smaller
without losing any of the files stored in that partition. Many people have found this method
to be reliable and trouble-free. What software should you use to perform this feat? There are
several disk management software products on the market. You will have to do some research
to find the one that is best for your situation.

While the process of non-destructive repartitioning is rather straightforward, there are a number
of steps involved:

Compress existing data

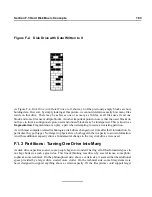
Resize the existing partition

Create new partition(s)

Next we will look at each step in a bit more detail.

Compress existing data

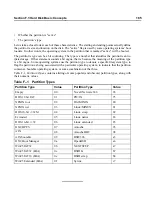
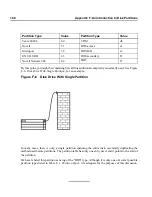
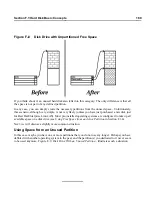
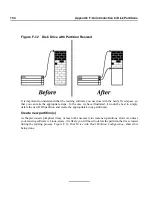
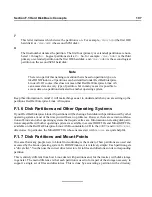
As Figure F–11, Disk Drive Being Compressed, shows, the first step is to compress the data in your
existing partition. The reason for doing this is to rearrange the data such that it maximizes the available
free space at the "end" of the partition.

Содержание ENTERPRISE LINUX AS 2.1 -

Страница 1: ...Red Hat Enterprise Linux AS 2 1 The Official Red Hat Enterprise Linux AS Installation Guide ...

Страница 2: ...work or derivative of the work in any standard paper book form for commercial purposes is prohibited unless prior permission is obtained from the copyright holder The admonition graphics note tip important caution and warning were created by Marianne Pecci goddess ipass net They may be redistributed with explicit permission from Marianne Pecci and Red Hat Inc Red Hat Red Hat Network the Red Hat Sh...

Страница 3: ...Inc FireWire is a trademark of Apple Computer Corporation S 390 and zSeries are trademarks of International Business Machines Corporation All other trademarks and copyrights referred to are the property of their respective owners Printed in Canada Ireland and Japan iii ...

Страница 4: ...Installation Class is Best For You 22 Chapter 2 System Requirements Table 27 Chapter 3 Installing Red Hat Enterprise Linux AS 31 3 1 The Installation Program User Interface 31 3 2 Starting the Installation Program 32 3 3 Selecting an Installation Method 35 3 4 Beginning the Installation 35 3 5 Language Selection 37 3 6 Keyboard Configuration 38 3 7 Mouse Configuration 40 3 8 Welcome to Red Hat Lin...

Страница 5: ...d Customization 75 3 27 Installation Complete 78 Chapter 4 Installing Red Hat Enterprise Linux AS via Text Mode 81 4 1 Things You Should Know 81 4 2 The Installation Program User Interface 83 4 3 Starting the Installation Program 86 4 4 Installation Cross Reference Table 87 4 5 Installing from a Hard Drive 89 4 6 Installing over a Network 90 Part II Configuring Red Hat Enterprise Linux AS 95 Chapt...

Страница 6: ...ces on the Real Servers 120 Chapter 8 Setting Up a Red Hat Enterprise Linux AS LVS Cluster 121 8 1 The NAT LVS Cluster 121 8 2 Configuring Network Interfaces for a NAT LVS Cluster 123 8 3 Multi port Services and LVS Clustering 126 8 4 FTP In an LVS Cluster 129 8 5 Saving Network Packet Filter Settings 132 Chapter 9 Configuring the LVS Routers with Piranha Configuration Tool 133 9 1 Necessary Softw...

Страница 7: ...4 D 4 How to Get Technical Support 165 D 5 Questions for Technical Support 166 Appendix E Troubleshooting Your Installation of Red Hat Enterprise Linux AS 169 E 1 You are Unable to Boot Red Hat Enterprise Linux AS 169 E 2 Trouble Beginning the Installation 171 E 3 Trouble During the Installation 172 E 4 Problems After Installation 174 Appendix F An Introduction to Disk Partitions 179 F 1 Hard Disk...

Страница 8: ...viii ...

Страница 9: ...ollowing command Linux commands and other operating system commands when used are represented this way This style should indicate to you that you can type the word or phrase on the command line and press Enter to invoke a command Sometimes a command contains words that would be displayed in a different style on their own such as filenames In these cases they are considered to be part of the comman...

Страница 10: ... a menu on a GUI screen or window When you see a word in this style it indicates that the word is the top level of a pulldown menu If you click on the word on the GUI screen the rest of the menu should appear For example Under Settings on a GNOME terminal you will see the following menu items Preferences Reset Terminal Reset and Clear and Color selector If you need to type in a sequence of command...

Страница 11: ...a text box on a GUI screen is displayed in this style In the following example text is displayed in this style To boot your system into the text based installation program you will need to type in the text command at the boot prompt Additionally we use several different strategies to draw your attention to certain pieces of information In order of how critical the information is to your system the...

Страница 12: ...uses on a CD ROM based installation so it is ideal for users both new and old who want a quick and simple installation solution It will help you prepare your system walk you through the installation and assist you in the configuration of Red Hat Enterprise Linux AS If you are an experienced user who wants to perform a Red Hat Enterprise Linux AS CD ROM in stallation and you do not need a review of...

Страница 13: ...EN 2 1 Print RHI 2002 03 22T11 09 0400 That way we will know exactly which version of the guide you have If you have a suggestion for improving the documentation try to be as specific as possible when de scribing it If you have found an error please include the section number and some of the surrounding text so we can find it easily If you have a support question for example if you need help confi...

Страница 14: ...xiv Introduction ...

Страница 15: ...Part I Installing Red Hat Enterprise Linux AS ...

Страница 16: ......

Страница 17: ...rd How to identify our official boxed set The bottom of our box has an ISBN number next to one of the bar codes That ISBN number should be in this form 1 58569 x y The x and y will be unique numbers Red Hat partners with companies international and domestic so that we can makeRed Hat Enterprise Linux AS available to you in the most convenient form Because of these partnerships you might find that ...

Страница 18: ... list of supported hardware can be found at http hardware redhat com hcl Refer to the Red Hat Cluster Manager Installation and Administration Guide for specific details on hardware installation and supplemental hardware information 1 3 Do You Have Enough Disk Space Nearly every modern day operating system OS uses disk partitions and Red Hat Enterprise Linux AS is no exception When you install Red ...

Страница 19: ... 2 GB of free space if every package is selected If you are not sure that you meet these conditions or if you want to know how to create free disk space for your Red Hat Enterprise Linux AS installation please refer to Appendix F An Introduction to Disk Partitions 1 4 Can You Install Using the CD ROM There are several methods that can be used to install Red Hat Enterprise Linux AS This manual fo c...

Страница 20: ...efer to Section 1 4 2 Making Installation Diskettes for more information on making a boot disk Note USB Floppies You can also boot the Red Hat Enterprise Linux AS instal lation program using a USB floppy as a boot disk if your system supports booting from a USB floppy Note Although it is not required to boot your installation you may occasionally find that a driver disk is needed to continue with ...

Страница 21: ... the following commands assuming your CD ROM is drive d C d D cd dosutils D dosutils rawrite Enter disk image source file name images boot img Enter target diskette drive a Please insert a formatted diskette into drive A and press ENTER Enter D dosutils First rawrite asks you for the filename of a diskette image enter the directory and name of the image you wish to write for example images boot im...

Страница 22: ...Server installation is specifically targeted at server installations capable of high levels of availablity through load balancing and failover capacities The Advanced Server con figuration includes at your option the ability to install a default X Window System environment with management as well as the necessary components for clustering together two or more sys tems to achieve higher levels of p...

Страница 23: ...me and so on Advanced Server minimum no graphical interface 800 MB Advanced Server default choosing GNOME or KDE 1 GB Advanced Server choosing GNOME and KDE 1 3 GB Advanced Server choosing everything GNOME and KDE 1 5 GB If you plan to choose all group packages as well as select additional individual packages you may want to allow yourself 2 0 GB or more of disk space This will provide space where...

Страница 24: ...n you have complete control over the packages that will be installed on your system The recommended disk space requirements for a Custom installation are as follows Note The minimum recommended disk space requirements as listed below are just minimum recommendations for the installation itself You should ad just these disk space requirements as appropriate for your specific computing needs such as...

Страница 25: ...he amount of RAM in your system and the amount of space available on your hard drive If you have 128 MB of RAM then the swap partition created can be 128 MB 256 MB twice your RAM depending on how much disk space is available For this example a 1020 MB swap partition mounted as swap is created A 47 MB partition mounted as boot in which the Linux kernel and related files reside A 2609 MB root partit...

Страница 26: ...26 Chapter 1 Steps to Get You Started ...

Страница 27: ...and requirements Enter information about your system in the table provided as a handy reference to help make your Red Hat Enterprise Linux AS installation go more smoothly Table 2 1 System Requirements Table hard drive s type label size ex IDE hda 1 2 GB partitions map of partitions and mount points ex dev hda1 home dev hda2 fill this in once you know where they will reside memory amount of RAM in...

Страница 28: ...e model number and size of VRAM ex Creative Labs Graphics Blaster 3D 8MB sound card make chipset and model number ex S3 SonicVibes Sound Blaster 32 64 AWE IP DHCP and BOOTP addresses four numbers separated by dots ex 10 0 2 15 netmask four numbers separated by dots ex 255 255 248 0 gateway IP address four numbers separated by dots ex 10 0 2 245 one or more name server IP addresses DNS one or more ...

Страница 29: ...o your organization ex Red Hat s would be redhat com hostname the name of your computer your personal choice of names ex cookie southpark If any of these networking requirements or terms are unfamiliar to you contact your network admin istrator for assistance ...

Страница 30: ...30 Chapter 2 System Requirements Table ...

Страница 31: ...1 1 A Note about Virtual Consoles The Red Hat Enterprise Linux AS installation program offers more than the dialog boxes of the in stallation process Several different kinds of diagnostic messages are available to you in addition to providing a way to enter commands from a shell prompt The installation program displays these mes sages on five virtual consoles among which you can switch using a sin...

Страница 32: ... that is not otherwise supported by the installation program Refer to Appendix G Driver Disks for more information 3 2 1 Booting the Installation Program Note To create a boot disk refer to Section 1 4 2 Making Installation Diskettes You can boot the Red Hat Enterprise Linux AS installation program using any one of the following media depending upon what your system can support Bootable CD ROM You...

Страница 33: ...pear The screen contains infor mation on a variety of boot options Each boot option also has one or more help screens associated with it To access a help screen press the appropriate function key as listed in the line at the bottom of the screen As you boot the installation program be aware of two issues Once you see the boot prompt the installation program will automatically begin if you take no ...

Страница 34: ... press Enter to boot using those options If you need to specify boot options to identify your hardware please write them down The boot op tions will be needed during the boot loader configuration portion of the installation please see Section 3 14 Boot Loader Installation for more information Booting Without Diskettes The Red Hat Enterprise Linux AS CD ROM can be booted by computers that support b...

Страница 35: ...ux AS CD ROM s or a mirror image of Red Hat Linux you can use this method You will need a network boot disk PCMCIA boot and driver disks may also be used Refer to Chapter 4 Installing Red Hat Enterprise Linux AS via Text Mode for network installation instructions Please note that NFS installations may also be performed in GUI mode FTP If you are installing directly from an FTP server use this meth...

Страница 36: ...ny point before the About to Install screen See Section 3 23 Preparing to Install for more information If a CD ROM drive is not detected you will be asked what type of CD ROM drive you have Choose from the following types SCSI Select this if your CD ROM drive is attached to a supported SCSI adapter the installation pro gram will then ask you to choose a SCSI driver Choose the driver that most clos...

Страница 37: ...E controller master b first IDE controller slave c second IDE controller master d second IDE controller slave If you have a third and or fourth controller continue assigning letters in alphabetical order going from controller to controller and master to slave 3 5 Language Selection Using your mouse select the language you would prefer to use for the installation and as the system default see Figur...

Страница 38: ... Next choose the correct layout type for your keyboard for example U S English Creating special characters with multiple keystrokes such as Ñ Ô and Ç is done using dead keys also known as compose key sequences Dead keys are enabled by default If you do not wish to use them select Disable dead keys Tip The following example will help you determine if you need dead keys en abled An example of a dead...

Страница 39: ...e selections click Next to continue Figure 3 2 Keyboard Configuration Tip To change your keyboard type after you have installed Red Hat Enterprise Linux AS log in as root and use the usr sbin kbdconfig command Alternatively you can type setup at the root prompt To become root type su at the shell prompt in a terminal window and then press Enter Then enter the root password ...

Страница 40: ... various languages which use dead keys should have them enabled unless the nodeadkeys option is present 3 7 Mouse Configuration Choose the correct mouse type for your system If you cannot find an exact match choose a mouse type that you are sure is compatible with your system see Figure 3 3 Mouse Configuration To determine your mouse s interface follow the mouse cable back to where it plugs into y...

Страница 41: ... Window System is easier to use with a three button mouse If you select this checkbox you can emulate a third middle button by pressing both mouse buttons simultaneously Tip To change your mouse configuration after you have completed the in stallation of Red Hat Enterprise Linux AS become root then use the usr sbin mouseconfig command from a shell prompt To configure your mouse to work as a left h...

Страница 42: ...by default If you do not want to view the help information click on Hide Help to minimize the help portion of the screen Click on the Next button to continue 3 9 Install Options Choose the type of installation you would like to perform see Figure 3 4 Choosing Your Installation Type Red Hat Enterprise Linux AS allows you to choose the installation type that best fits your needs Your options are Adv...

Страница 43: ...using Disk Druid or fdisk see Figure 3 5 Disk Partitioning Setup Automatic partitioning allows you to perform an installation without having to partition your drive s yourself If you do not feel comfortable with partitioning your system it is recommended that you do not choose to partition manually and instead let the installation program partition for you To partition manually choose either the D...

Страница 44: ...our options are Remove all Linux partitions on this system select this option to remove only Linux partitions partitions created from a previous Linux installation This will not remove other partitions you may have on your hard drive s Remove all partitions on this system select this option to remove all partitions on your hard drive s this includes partitions created by other operating systems su...

Страница 45: ... such as these the boot partition must be created on a partition outside of the RAID array such as on a separate hard drive An internal hard drive is necessary to use for partition creation with problematic RAID cards If you have chosen to automatically partition your system you should select Review and manually edit your boot partition To review and make any necessary changes to the partitions cr...

Страница 46: ...ete partitions at this time refer to Figure 3 7 Partitioning with Disk Druid Note If you have not yet planned how you will set up your partitions refer to Ap pendix F An Introduction to Disk Partitions At a bare minimum you need an appropriately sized root partition and a swap partition equal to twice the amount of RAM you have on the system Figure 3 7 Partitioning with Disk Druid The partitioning...

Страница 47: ...ount point and size that must be filled in Edit Used to modify attributes of the partition currently selected in the Partitions section Se lecting Edit opens a dialog box Some or all of the fields can be edited depending on whether the partition information has already been written to disk You can also edit free space as represented in the graphical display to create a new partition within that sp...

Страница 48: ...te the following partitions A swap partition at least 32 MB swap partitions are used to support virtual memory In other words data is written to a swap partition when there is not enough RAM to store the data your system is processing The size of your swap partition should be equal to twice your computer s RAM or 32 MB whichever amount is larger but no more than 2048 MB or 2 GB In Disk Druid the p...

Страница 49: ...p all files except those stored in boot are on the root partition A 350 MB partition will allow you to install a minimal Custom installation without the Advanced Server packages a 1 0 GB root partition will permit the equivalent of a default Advanced Server with GNOME or KDE installation with very little free space while a 3 2 GB root partition will let you perform a full Custom installation choos...

Страница 50: ...s a list of the hard disks installed on your system If a hard disk s box is highlighted then a desired partition can be created on that hard disk If the box is not checked then the partition will never be created on that hard disk By using different checkbox settings you can have Disk Druid place partitions as you see fit or let Disk Druid decide where partitions should go Size Megs Enter the size...

Страница 51: ...ed with the settings and wish to create the partition Cancel Select Cancel if you do not want to create the partition Filesystem Types Red Hat Enterprise Linux AS allows you to create different partition types based on the filesystem they will use The following is a brief description of the different filesystems available and how they can be utilized ext2 An ext2 filesystem supports standard Unix ...

Страница 52: ...n Skip to Section 3 14 Boot Loader Installation for further installation instructions 3 13 Partitioning with fdisk This section applies only if you chose to use fdisk to partition your system To partition your system without using fdisk please skip to Section 3 11 Automatic Partitioning for automatic partitioning or Section 3 12 Partitioning Your System for partitioning with Disk Druid If you have...

Страница 53: ...points for the partitions you have already created For each partition created with fdisk click on the Edit button choose the appropriate mount point for that partition from the pulldown menu and click on OK 3 14 Boot Loader Installation In order to boot your Red Hat Enterprise Linux AS system without a boot disk you usually need to install a boot loader You can choose to install either GRUB select...

Страница 54: ...that is automatically loaded by your computer s BIOS and is the earliest point at which the boot loader can take control of the boot process If you install it in the MBR when your machine boots GRUB or LILO will present a boot prompt You can then boot Red Hat Enterprise Linux AS or any other operating system that you have configured the boot loader to boot The first sector of your root partition R...

Страница 55: ...llation program has not already detected this extension from your BIOS you should select the Force use of LBA32 not normally required option Every bootable partition is listed including partitions used by other operating systems The partition holding your Red Hat Enterprise Linux AS system s root filesystem will have a Boot label of Red Hat Linux Other partitions may also have boot labels If you w...

Страница 56: ...rom ftp metalab unc edu pub Linux system boot dualboot and associated mirror sites SYSLINUX SYSLINUX is an MS DOS program very similar to LOADLIN It is also available from ftp metalab unc edu pub Linux system boot loaders and associated mirror sites Some commercial boot loaders You can load Linux using commercial boot loaders For example System Commander and Partition Magic are able to boot Linux ...

Страница 57: ...r or did not install a boot loader skip to Section 3 16 Network Configuration GRUB passwords provide a security mechanism in an environment where physical access to your server is available If you are installing GRUB as your boot loader you should create a password to protect your system Otherwise users may be able to pass options to the kernel which can compromise your system security Figure 3 10...

Страница 58: ...ple between eth0 and eth1 and the information you provide on each tab will be specific to each device Indicate if you would like to configure your IP address using DHCP Dynamic Host Configuration Protocol If you select Activate on boot your network interface will be started when you boot If you do not have DHCP client access or you are unsure what to provide here please contact your network admini...

Страница 59: ...t your network administrator for assistance Tip Even if your computer is not part of a network you can enter a hostname for your system If you do not take this opportunity to enter a name your system will be known as localhost 3 17 Firewall Configuration Red Hat Enterprise Linux AS offers firewall protection for enhanced system security A firewall exists between your computer and the network and d...

Страница 60: ...hoose High your system will not accept connections other than the default settings that are not explicitly defined by you By default only the following connections are allowed DNS replies DHCP so any network interfaces that use DHCP can be properly configured If you choose High your firewall will not allow the following Active mode FTP passive mode FTP used by default in most clients should still ...

Страница 61: ...to your system and does no security checking Security checking is the disabling of access to certain services This should only be selected if you are running on a trusted network not the Internet or plan to do more firewall configuration later Choose Customize to add trusted devices or to allow additional incoming services Trusted Devices Selecting any of the Trusted Devices allows access to your ...

Страница 62: ...tion This option is not required for viewing pages locally or for developing webpages You will need to install the apache package if you want to serve webpages Mail SMTP If you want to allow incoming mail delivery through your firewall so that remote hosts can connect directly to your machine to deliver mail enable this option You do not need to enable this if you collect your mail from your ISP s...

Страница 63: ...lecting only that language will save significant disk space The default language is the language you selected to use during the installation However if you select only one language you will only be able to use that specified language after the Red Hat Enterprise Linux AS installation is complete Figure 3 13 Language Support Selection To use more than one language on your system choose specific lan...

Страница 64: ... specify different areas to view World North America South America Pacific Rim Europe Africa and Asia Figure 3 14 Configuring the Time Zone On the interactive map you can also click on a specific city which is marked by a yellow dot a red X will appear indicating your selection You can also scroll through a list and choose a time zone The second tab allows you to specify a UTC offset The tab displ...

Страница 65: ...ou can set up user accounts for you to log in to once the installation is complete see Figure 3 15 Account Creation Figure 3 15 Account Creation 3 20 1 Setting the Root Password Setting up a root account and password is one of the most important steps during your installation Your root account is similar to the administrator account used on Windows NT machines The root account is used to install p...

Страница 66: ...n remember but not something that is easy for someone else to guess Your name your phone number qwerty password root 123456 and anteater are all examples of bad passwords Good passwords mix numerals with upper and lower case letters and do not contain dictionary words Aard387vark or 420BMttNT for example Remember that the password is case sensitive If you write down your password keep it in a secu...

Страница 67: ...r to the account list You can also Edit or Delete the user accounts you have created and no longer want 3 21 Package Group Selection After your partitions have been selected and configured for formatting you are ready to select pack ages for installation Note Unless you choose a custom installation the installation program will auto matically choose most packages for you However you must select ei...

Страница 68: ...each component you wish to install Selecting Everything at the end of the component list during a custom installation installs all packages included with Red Hat Enterprise Linux AS If you select every package you will need approximately 1 7 GB of free disk space To select packages individually check the Select Individual Packages box at the bottom of the screen 3 21 1 Selecting Individual Package...

Страница 69: ...an alphabetical listing on the right of the screen To sort alphabetically click on the Package tab To sort packages by size click on the Size MB tab To select an individual package double click the checkbox beside the package name A check mark in the box means that a package has been selected For more information about a specific package click on the individual package name The package information...

Страница 70: ...ying status a desktop where data and applications can be placed multiple window managers which control the look and feel of your desktop and a standard set of desktop tools and applications GNOME allows you to setup your desktop the way you want it to look and feel GNOME s session manager remembers settings and currently running programs So once you have set things the way you like they will stay ...

Страница 71: ...be installed on your system For example many of the graphical Red Hat system administration tools require the python and pythonlib packages To make sure your system has all the packages it needs in order to be fully functional Red Hat Enterprise Linux AS checks these package dependencies each time you install or remove software packages If any package requires another package which you have not se...

Страница 72: ...ded to install the X Window System packages you now have the opportunity to configure an X server for your system If you did not choose to install the X Window System packages skip ahead to Section 3 23 Preparing to Install If your video card does not appear on the list see Figure 3 21 Video Card Setup X may not support it However if you have technical knowledge about your card you may choose Unli...

Страница 73: ... start correctly if you do If you decide that the values you have selected are incorrect you can click the Restore original values button to return to the suggested settings You can also select Skip X Configuration if you would rather configure X after the installation or not at all 3 23 Preparing to Install You should now see a screen preparing you for the installation of Red Hat Enterprise Linux...

Страница 74: ... the installa tion you should reboot now before any existing information on any hard drive is rewritten To cancel this installation process press your computer s Reset button or use the Control Alt Delete key combination to restart your machine 3 24 Installing Packages At this point there is nothing left for you to do until all the packages have been installed see Figure 3 22 Installing Packages H...

Страница 75: ...em After a short delay your boot disk will be created remove it from your diskette drive and label it clearly Note that if you would like to create a boot disk after the installation you will be able to do so For more information please see the mkbootdisk man page by typing man mkbootdisk at the shell prompt If you boot your system with the boot disk instead of GRUB or LILO make sure you create a ...

Страница 76: ...does not appear on the list select the most appropriate Generic model available If you do select a Generic monitor Xconfigurator will suggest horizontal and vertical sync ranges These values are generally available in the documentation which accompanies your monitor or from your monitor s vendor or manufacturer please check your documentation to make sure these values are set correctly CAUTION Do ...

Страница 77: ...n Note If you need to exit out of the X test use the Ctrl Alt Backspace key com bination Also note that this will not work in some test cases We recommend that you test your configuration to make sure the resolution and color settings are usable If you installed both GNOME and KDE you can choose which one to use as your default desktop environment If you installed one or the other it will only sho...

Страница 78: ...leted you should see the graphical boot loader prompt at which you can do any of the following things Press Enter causes the default boot entry to be booted Select a boot label followed by Enter causes the boot loader to boot the operating system corresponding to the boot label Press at the text mode boot loader prompt for a list of valid boot labels Do nothing after the boot loader s timeout peri...

Страница 79: ... Linux Getting Started Guide available online at http www red hat com docs if not included as part of your product which covers topics relating to the basics of your system and is an introduction to using Red Hat Enterprise Linux AS If you are a more experienced user looking for information on administration topics you may find the Official Red Hat Linux Reference Guide to be more helpful If you a...

Страница 80: ...80 Chapter 3 Installing Red Hat Enterprise Linux AS ...

Страница 81: ...sizing If you plan to install Red Hat Enterprise Linux AS on a disk where another operating system is currently installed this knowledge will be crucial If you plan to install over a network via NFS FTP or HTTP you must make a network boot disk Chapter 1 Steps to Get You Started explains how to do this If you have never used the text mode installation program or need a refresher on its user interf...

Страница 82: ...er s BIOS may refer to linear mode by other names such as large disk mode Again your computer s documentation should be consulted for clarification Memory the amount of RAM installed in your computer CD ROM most importantly the unit s interface type IDE SCSI or other interface and for non IDE non SCSI CD ROMs the make and model number IDE CD ROMs also known as AT API are the most common type of CD...

Страница 83: ... separated numbers for example 10 0 2 1 might be the address of a name server Domain name the name your organization uses for example Red Hat has a domain name of redhat com Hostname the name assigned to your individual system for example a computer might be named pooh Note The information provided here is as an example only Do not use it when you install Red Hat Enterprise Linux AS If you do not ...

Страница 84: ...n in Disk Druid Here is a list of the most important widgets shown in Figure 4 1 Installation Program Widgets as seen in Configure TCP IP and Figure 4 2 Installation Program Widgets as seen in Disk Druid Window windows usually referred to as dialogs in this manual will appear on your screen throughout the installation process At times one window may overlay another in these cases ...

Страница 85: ...tallation pro gram You progress through the windows of the installation program by navigating these buttons using the Tab and Enter keys Buttons can be selected when they are highlighted Cursor although not a widget the cursor is used to select and interact with a particular widget As the cursor is moved from widget to widget it may cause the widget to change color or you may only see the cursor i...

Страница 86: ... your screen When the installation pro gram has loaded this prompt appears boot 4 3 1 Text Mode Boot Options If you press Enter at the boot prompt or if you take no action within the first minute after the boot prompt appears the graphical installation program will start Pressing one of the help screen function keys as described in Section 4 3 2 Displaying Online Help disables this autostart featu...

Страница 87: ...28 MB system enter boot linux text mem 128M 4 3 2 Displaying Online Help Once the installation program is loaded into memory you can obtain information about the installation process and options by pressing F1 through F6 For example press F2 to see general information about the online help screens 4 4 Installation Cross Reference Table Note This installation cross reference table only documents th...

Страница 88: ...ction 3 10 Disk Partitioning Setup Automatic Partitioning Section 3 11 Automatic Partitioning Disk Druid Section 3 12 Partitioning Your System fdisk Section 3 13 Partitioning with fdisk Boot Loader Installation Section 3 14 Boot Loader Installation GRUB Password Section 3 15 GRUB Password Boot Loader Configuration Where to install boot loader kernel options boot labels Section 3 14 Boot Loader Ins...

Страница 89: ...use of the ISO or CD ROM images rather than copying an entire installation tree After placing the required ISO images the binary Red Hat Enterprise Linux AS CD ROMs in a directory choose to install from the hard drive You will then point the installation program at that directory to perform the installation Verifying that the ISO images are intact before you attempt an installation will help to av...

Страница 90: ... Figure 4 3 Selecting Partition Dialog for Hard Drive Installation 4 6 Installing over a Network If you are performing a network installation the Configure TCP IP dialog appears for an explanation of this dialog go to Section 3 16 Network Configuration and then return here 4 6 1 Setting Up the Server Because the Red Hat Enterprise Linux AS 2 1 installation program is capable of installing Red Hat ...

Страница 91: ...e location of disk space accessible to the installation program for example exporting it for NFS installations Export location of disk space If you are not sure how to do this refer to the Official Red Hat Linux Customization Guide and the Official Red Hat Linux Reference Guide for more information 4 6 2 NFS Setup The NFS dialog Figure 4 4 NFS Setup Dialog applies only if you are installing from a...

Страница 92: ...do not know this directory path ask your system administrator For example if your NFS server contains the directory mirrors red hat i386 RedHat enter mirrors redhat i386 Next you will see the Welcome dialog See Table 4 1 Installation Cross reference Table for more information 4 6 3 FTP Setup The FTP dialog Figure 4 5 FTP Setup Dialog applies only if you are installing from an FTP server if you sel...

Страница 93: ... dialog prompts you for infor mation about the HTTP server from which you are installing Red Hat Enterprise Linux AS Figure 4 6 HTTP Setup Dialog Enter the name or IP address of the HTTP site you are installing from and the name of the directory there containing the RedHat installation files for your architecture For example if the HTTP site contains the directory mirrors redhat i386 RedHat enter ...

Страница 94: ...94 Chapter 4 Installing Red Hat Enterprise Linux AS via Text Mode ...

Страница 95: ...Part II Configuring Red Hat Enterprise Linux AS ...

Страница 96: ......

Страница 97: ...guring and monitoring an LVS cluster An accompanying manual the Red Hat Cluster Manager Installation and Administration Guide ex plains how to deploy a clustering solution based on Red Hat Cluster Manager Learn about the Red Hat Cluster Manager s high availability services technology Explain how to set up the appropriate hardware and software to use Red Hat Cluster Manager 5 1 Technology Overview ...

Страница 98: ...Cluster Manager utilize two Linux servers or nodes and a shared storage device to enhance the availability of key services on the network Each of these key services in the cluster is assigned its own virtual server IP address VIP The VIP address or floating IP is an IP address that is distinct from the either node s normal IP address and is associated with the service rather than any particular ma...

Страница 99: ...quorum partition is not updated properly by a member of the cluster the other node can verify the integrity of that member by pinging it through a heartbeat channel Heartbeat channels can be configured on one or more Ethernet interfaces or a serial connection or on both interfaces concurrently For more information about configuring Red Hat Cluster Manager clusters please see the accompa nying manu...

Страница 100: ...100 Chapter 5 Introduction ...

Страница 101: ...xplain how LVS clusters perform these functions let us look at a basic configuration 6 1 A Basic LVS Configuration Figure 6 1 A Basic LVS Configuration shows a simple LVS cluster consisting of two layers On the first layer are two LVS routers one active and one backup Each of the LVS routers have two network interfaces per machine one interface on the Internet and one on the private network enabli...

Страница 102: ...but there may be more than one The important thing to remember is that a VIP address will migrate from one LVS router to the other during a failover thus maintaining a presence at that IP address As such they can be considered floating IP addresses VIP addresses may be aliased to the same device which connects the LVS router to the Internet For instance if eth0 is connected to the Internet than mu...

Страница 103: ...uter During failover the backup router takes over the VIP addresses serviced by the failed router using a technique known as ARP spoofing where the backup LVS router announces itself as the destination for IP packets ad dressed to the failed node When the failed node returns to active service the backup node assumes its hot backup role again The simple two layered configuration used in Figure 6 1 ...

Страница 104: ...usy with users uploading files or issuing database transactions For a cluster with a high load a three tiered topology is the best solution 6 2 A Three Tiered LVS Configuration Figure 6 2 A Three Tiered LVS Configuration shows a typical three tiered LVS cluster topology In this example the active LVS router routes the requests from the Internet to the pool of real servers Each of the real servers ...

Страница 105: ...s over application level request forwarding because balancing loads at the network packet level causes minimal computational overhead and allows for greater scalability Using scheduling the active router can take into account the real servers activity and optionally an administrator assigned weight factor when routing service requests Thus it is possible to create a group of real servers using a v...

Страница 106: ...f variation in the request load It is best suited for a real server pool where each member node has roughly the same capacity If a group of servers have different capabilities weighted least connection scheduling is a better choice Weighted Least Connections default Distributes more requests to servers with fewer active connections relative to their capacities Capacity is indicated by a user assig...

Страница 107: ...ight of 1 and the other server has a weight of 5 then the server with a weight of 5 will get 5 connections for every 1 connection the other server gets The default value for a real server weight is 1 Although adding weight to varying hardware configurations in a real server pool can help load balance the cluster more efficiently it can cause temporary imbalances when a real server is introduced to...

Страница 108: ...S Cluster Implemented with NAT Routing In the example there are two NICs in the LVS router The NIC for the Internet has a real IP address on eth0 and has a floating IP address aliased to eth0 1 The NIC for the private network interface has a real IP address on eth1 and has a floating IP address aliased to eth1 1 In the event of failover the virtual interface facing the Internet and the private fac...

Страница 109: ... outgoing as well as incoming requests 6 5 Persistence and Firewall Marks In certain situations it may be desirable for a client to reconnect repeatedly to the same real server rather than have an LVS load balancing algorithm send that request to the best available server Exam ples of such situations include multi screen web forms cookies SSL and FTP connections In these cases a client may not wor...

Страница 110: ...quests to the same real server after a connection is opened Because of its efficiency and ease of use administrators of LVS clusters should use firewall marks instead of persistence whenever possible for grouping connections However administrators should still add persistence to the virtual servers in conjunction with firewall marks to ensure the clients are reconnected to the same server for an a...

Страница 111: ...s daemon and responds to heartbeat queries from the backup LVS router Once started the lvs daemon calls the ipvsadm service to configure and maintain the IPVS routing table in the kernel and starts a nanny process for each configured virtual server on each real server Each nanny process checks the state of one configured service on one real server and tells the lvs daemon if the service on that re...

Страница 112: ...able interval it initiates failover During failover pulse on the backup router instructs the pulse daemon on the active router to shut down all LVS services starts the send_arp program to reassign the floating IP addresses to the backup router s MAC address and starts the lvs daemon lvs The lvs daemon runs on the active LVS router once called by pulse It reads the configuration file etc sysconfig ...

Страница 113: ... Normally this is the tool used to maintain etc sysconfig ha lvs cf send_arp This program sends out ARP broadcasts when the floating IP address changes from one node to an other during failover The next chapter reviews important post installation configuration steps you should take before con figuring Red Hat Enterprise Linux AS to be an LVS router ...

Страница 114: ...114 Chapter 6 Linux Virtual Server Overview ...

Страница 115: ...t the appropriate services must be activated before configuring the cluster For both of the LVS routers set the appropriate services to start at boot time There are three primary tools for setting services to activate at boot time under Red Hat Linux the command line program chkconfig the ncurses based program ntsysv or the graphical application serviceconf All of these tools require root access T...

Страница 116: ...he system as well as what runlevel they are set to activate on issue the following command sbin chkconfig list WARNING Turning any of the above services on using chkconfig does not actually start the daemon To do this use the sbin service See Section 7 3 Starting the Piranha Configuration Tool Service for an example of how to use the service command For more information on runlevels and configurin...

Страница 117: ...che httpd by calling the symbolic link usr sbin piranha_gui usr sbin httpd For security reasons the piranha gui version of httpd runs as the piranha user in a separate process The fact the piranha gui leverages the httpd service means two things 1 Apache must be installed on the system 2 Stopping or restarting Apache via the service command will stop the piranha gui service WARNING If the command ...

Страница 118: ... tool over the network The next section reviews ways to accomplish this task 7 4 Limiting Access To the Piranha Configuration Tool The Piranha Configuration Tool prompts for a valid username and password combination However because all of the data passed to the Piranha Configuration Tool is in clear text it is recommended that you restrict access to trusted networks or only to the local machine Th...

Страница 119: ...lines identical to etc sysconfig ha web se cure htaccess 7 5 Turning on Packet Forwarding In order for the LVS router to forward network packets properly to the real servers each LVS router node must have IP forwarding turned on in the kernel Log in as root and change the line which reads net ipv4 ip_forward 0 in etc sysctl conf to the following net ipv4 ip_forward 1 The changes will take effect w...

Страница 120: ...rvers in the cluster are Red Hat Linux systems set the appropriate the server daemons to activate at boot time These daemons can include httpd for Web services or xinetd for FTP or telnet services It may also be useful to access the real servers remotely so the sshd daemon should also be running ...

Страница 121: ...k layout perspective because the cluster needs only one access point to the public network The real servers pass all requests back through the LVS router so they are on their own private network Hardware The NAT topography is the most flexible in regards to cluster hardware because the real servers do not need to be Linux machines to function correctly in the cluster In a NAT cluster each real ser...

Страница 122: ...edhat con fig network or by editing the network scripts manually For more information about adding devices using redhat config network see the chapter titled Network Configuration in the Official Red Hat Linux Customization Guide For more information on editing network scripts by hand see the chap ter titled Network Scripts in the Official Red Hat Linux Reference Guide For the remainder of the cha...

Страница 123: ...or a machine issue the following command sbin route 8 2 Configuring Network Interfaces for a NAT LVS Cluster To set up a NAT LVS cluster the administrator must first configure the network interfaces for the public network and the private network on the LVS routers In this example the LVS routers public interfaces eth0 will be on the 192 168 26 24 network I know I know this is not a routable IP but...

Страница 124: ...vate floating IP addresses the administrator should use the Piranha Configuration Tool as shown in Section 9 4 GLOBAL SETTINGS and Section 9 6 1 The VIRTUAL SERVER Subsection After configuring the primary LVS router node s network interfaces configure the backup LVS router s real network interfaces taking care that none of the IP address conflict with any other IP addresses on the network Importan...

Страница 125: ...the real servers may not route requests properly It is best to turn off extraneous network interfaces by setting ONBOOT no in their network scripts within the etc syscon fig network scripts directory or by making sure the gateway is correctly set in the interface which comes up first 8 2 2 Enabling NAT Routing on the LVS Routers In a simple NAT LVS cluster where each clustered service uses only on...

Страница 126: ...ort services can be created artificially by using firewall marks to bundle together different but related protocols such as HTTP port 80 and HTTPS port 443 or when LVS is used to cluster true multi port protocols such as FTP In either case the LVS router uses firewall marks to recognize that packets destined for different ports but bearing the same firewall mark should be handled identically Also ...

Страница 127: ...otocol using a firewall mark in Piranha Configuration Tool there must be a commensurate iptables or ipchains rule to assign marks to the network packets Before creating network packet filter rules make sure there are no rules already in place To do this open a shell prompt login as root and type sbin service iptables status sbin service ipchains status If iptables is not running the prompt will in...

Страница 128: ...ating IP address n n n n on ports 80 and 443 For instructions on assigning the VIP to the public network interface see Section 9 6 1 The VIRTUAL SERVER Subsection Also note that you must log in as root and load the module for either iptables or ipchains before issuing rules for the first time iptables sbin modprobe ip_tables sbin iptables t mangle A PREROUTING p tcp d n n n n 32 dport 80 j MARK se...

Страница 129: ...ction chosen by the client determines how the server responds and on what ports transactions will occur The two types of data connections are Active Connections When an active connection is established the server opens a data connection to the client from port 20 to a high range port on the client machine All data from the server is then passed over this connection Passive Connections When an pass...

Страница 130: ...ng rules 8 4 3 Creating Network Packet Filter Rules Before assigning any iptables or ipchains rules for FTP service review the information in Section 8 3 1 Assigning Firewall Marks concerning multi port services and techniques for checking the existing network packet filtering rules Note You must log in as root and load the module for either iptables or ipchains before issuing rules for the first ...

Страница 131: ...ollowing line to the end of etc ftpaccess passive ports 0 0 0 0 0 10000 20000 For other FTP servers consult the documetation This range should be a wide enough for most situations however you can increase this number to include all available non secured ports by changing 10000 20000 in the commands below to 1024 65535 iptables sbin iptables t mangle A PREROUTING p tcp d n n n n 32 dport 21 j MARK ...

Страница 132: ...sbin iptables save With ipchains type the following command sbin ipchains save This will save the settings in etc sysconfig iptables or etc sysconfig ipchains so they can be recalled at boot time Once this file is written you will also be able to use the sbin service command to start stop and check the status using the status switch of iptables or ipchains The sbin service will automatically load ...

Страница 133: ...n to the primary LVS router as the root user While configuring the primary LVS router it is a good idea to keep a concurrent ssh connection in a terminal window This connection provides a secure way to restart pulse and other services configure network packet filters and monitor var log messages during trouble shooting The next four sections walk through each of the configuration pages of the Pira...

Страница 134: ...irtual Servers panel contains four subsections The CONTROL MONITORING panel is the first panel after the login screen 9 3 CONTROL MONITORING The CONTROL MONITORING Panel presents the cluster administrator with a limited runtime status of the cluster It displays the status of the pulse daemon the LVS routing table and the LVS spawned nanny processes Note The fields for CURRENT LVS ROUTING TABLE and...

Страница 135: ...matic update to an interval less than 10 seconds Doing so may make it difficult to reconfigure the Auto update interval because the page will update too frequently If you encounter this issue simply click on another panel and then back on CONTROL MONITORING The Auto update feature does not work with all browsers such as Mozilla Update information now You can manually update the status information ...

Страница 136: ...twork Interfaces for a NAT LVS Cluster Primary server public IP In this field enter the publicly routable real IP address for the primary LVS node Primary server private IP Enter the real IP address for an alternative network interface on the primary LVS node This address is used solely as an alternative heartbeat channel for the backup router and does not have to correlate to the real private IP ...

Страница 137: ...de The next three fields deal specifically with the NAT router s virtual network interface connected the private network with the real servers NAT Router IP Enter the private floating IP in this text field NAT Router Netmask If the NAT router s floating IP needs a particular netmask select it from drop down list NAT Router Device Use this text field to define the device name of the network interfa...

Страница 138: ...n selecting a new panel 9 5 REDUNDANCY The REDUNDANCY panel allows you to configure of the backup LVS router node and set various heartbeat monitoring options Tip The first time you visit this screen it displays an inactive Backup status and an ENABLE button To configure the backup LVS router click on the ENABLE button so that the screen matches Figure 9 4 The REDUNDANCY Panel ...

Страница 139: ...S panel and enter a Primary server private IP address and click ACCEPT The rest of the panel is devoted to configuring the heartbeat channel which is used by the backup node to monitor the primary node for failure Heartbeat Interval seconds This field sets the number of seconds between heartbeats the interval that the backup node will check the functional status of the primary LVS node Assume dead...

Страница 140: ... making any changes in this panel to make sure you do not lose any changes when selecting a new panel 9 6 VIRTUAL SERVERS The VIRTUAL SERVERS panel displays information for each currently defined virtual server Each table entry shows the status of the virtual server the server name the virtual IP assigned to the server the netmask of the virtual IP the port number to which the service communicates...

Страница 141: ... adding a virtual server you can configure it by clicking the radio button to its left and clicking the EDIT button to display the VIRTUAL SERVER subsection 9 6 1 The VIRTUAL SERVER Subsection The VIRTUAL SERVER subsection panel shown in Figure 9 6 The VIRTUAL SERVERS Subsection allows you to configure an individual virtual server Links to subsections related specifically to this virtual server ar...

Страница 142: ...l Mark Do not enter a firewall mark integer value in this field unless you are bundling multi port pro tocols or creating a multi port virtual server for separate but related protocols In this example the above virtual server has a Firewall Mark of 80 because we are bundling connections to HTTP on port 80 and to HTTPS on port 443 using the firewall mark value of 80 When combined with persistence t...

Страница 143: ...ne the least connections table is reset to zero so the active LVS router routes requests as if all the real servers were freshly added to the cluster This option prevents the a new server from becoming bogged down with a high number of connections upon entering the cluster Load monitoring tool The LVS router can monitor the load on the various real servers by using either rup or rup time If you se...

Страница 144: ...istence and firewall marks see Section 6 5 Persistence and Firewall Marks Persistence Network Mask To limit persistence to particular subnet select the appropriate network mask from the drop down menu Note Before the advent of firewall marks persistence limited by subnet was a crude way of bundling connections Now it is best to use persistence in relation to firewall marks to achieve the same resu...

Страница 145: ...R Subsection Click the ADD button to add a new server To delete an existing server select the radio button beside it and click the DELETE button Click the EDIT button to load the EDIT REAL SERVER panel as seen in Figure 9 8 The REAL SERVER Configuration Panel ...

Страница 146: ...o make it descriptive and easily identifiable Address The real server s IP address Since the listening port is already specified for the associated virtual server do not add a port number Weight An integer value indicating this host s capacity relative to that of other hosts in the pool The value can be arbitrary but treat it as a ratio in relation to other real servers in the cluster For more on ...

Страница 147: ...eld or by clicking on the MONITORING SCRIPTS link at the top of the page If you choose the latter method be sure to click the ACCEPT button before doing so or you will loss your changes The EDIT MONITORING SCRIPTS subsection allows the administrator to specify a send expect string sequence to verify that the service for the virtual server is functional on each real server It is also the place wher...

Страница 148: ...erification you can use this field to specify the path to a service checking script This functionality is especially helpful for services that require dynamically changing data such as HTTPS or SSL To use this functionality you must write a script that returns a textual response set it to be executable and type the path to it in the Sending Program field Tip To ensure that each server in the real ...

Страница 149: ... changes when selecting a new panel Once you have configured virtual servers using the Piranha Configuration Tool you must copy spe cific configuration files to the backup LVS router See Section 9 7 Synchronizing Configuration Files for details 9 7 Synchronizing Configuration Files After configuring the primary LVS router there are several configuration files that must be copied to the backup LVS ...

Страница 150: ...S router nodes can prevent failover The best way to do this is to use the scp command Important To use scp the sshd must be running on the backup router see Section 7 1 Configuring Services on the LVS Routers for details on how to properly configure the necessary services on the LVS routers Issue the following command as the root user from the primary LVS router to sync the lvs cf files between th...

Страница 151: ...xt either open an ssh session to the backup router or log into the machine as root and type the following command sbin service net_filter restart In the above command replace net_filter with either iptables or ipchains Once you have copied these files over to the backup router and started the appropriate services see Section 7 1 Configuring Services on the LVS Routers for more on this topic you ar...

Страница 152: ... this point on the primary LVS router is also the active LVS router While you can make requests to the cluster at this point you should start the backup LVS router before putting the cluster into service To do this simply repeat the process described above on the backup LVS router node After completing this final step the cluster will be up and running ...

Страница 153: ...Part III Appendixes ...

Страница 154: ......

Страница 155: ...w redhat com The Red Hat website contains links to Red Hat Enterprise Linux AS product information documentation and support http www linuxvirtualserver org The community LVS project page and a good source for additional information and documentation This site also links to many clustering related pages for Linux https listman redhat com To get help from the community and from developers sub scrib...

Страница 156: ...156 Appendix A Additional Resources for LVS Clustering ...

Страница 157: ...ive 1 backup 192 168 26 8 backup_private 10 11 12 8 heartbeat 1 heartbeat_port 1050 keepalive 6 deadtime 18 network nat nat_router 10 11 12 10 eth1 1 nat_nmask 255 255 255 0 reservation_conflict_action preempt debug_level NONE virtual HTTP active 1 address 192 168 26 10 eth0 1 vip_nmask 255 255 255 0 fwmark 80 port 80 persistent 320 send GET HTTP 1 0 r n r n expect HTTP load_monitor none scheduler...

Страница 158: ...th0 1 vip_nmask 255 255 255 0 fwmark 21 port 21 persistent 1 send quit expect 220 load_monitor none scheduler rr protocol tcp timeout 6 reentry 15 quiesce_server 0 server one address 10 11 12 1 active 1 weight 1 server two address 10 11 12 2 active 1 weight 1 server three address 10 11 12 3 active 1 weight 1 virtual HTTPS active 1 address 192 168 26 10 eth0 1 vip_nmask 255 255 255 0 ...

Страница 159: ... port 443 persistent 320 load_monitor none scheduler wlc protocol tcp timeout 6 reentry 15 quiesce_server 1 server one address 10 11 12 1 active 1 weight 1 server two address 10 11 12 2 active 1 weight 1 server three address 10 11 12 3 active 1 weight 1 ...

Страница 160: ...160 Appendix B A Sample etc sysconfig ha lvs cf File ...

Страница 161: ... exist but they do not exist problem The best way to remove non DOS partitions is with a tool that understands partitions other than DOS You can do this with the installation media by typing linux expert at the boot prompt boot linux expert Select install versus upgrade and at the point when you should partition the drive choose fdisk In fdisk type p to print out the partition numbers and remove t...

Страница 162: ...162 Appendix C Removing Red Hat Linux ...

Страница 163: ...your Official Red Hat Enterprise Linux AS boxed set D 2 An Overview of Red Hat Support Note Refer to the service level agreement at http www redhat com support sla for more information on how Red Hat s technical support staff can assist you Red Hat provides installation assistance for Official Red Hat Enterprise Linux AS products and covers installation on a single computer This assistance is inte...

Страница 164: ... Hat En terprise Linux AS and other operating systems A large number of Linux related websites are available The best starting point for finding information on Red Hat Enterprise Linux AS is the Red Hat Inc website http www redhat com Many Linux related books are available If you are new to Linux a book that covers Linux basics will be invaluable We can recommend several titles The Official Red Ha...

Страница 165: ... character alphanumeric string The Product ID for Red Hat Enterprise Linux AS 2 1 is located on the Registration Information Card that can be found inside the box Your Product ID is included in your boxed set and you should keep it in a safe place You need this code so do not lose the card Note Do not throw away the card with your Product ID You need the Product ID to get technical support If you ...

Страница 166: ... for your boxed set product The Support Certificate Number or Entitlement Number if the product is a contract 5 Set your customer preferences 6 Answer the optional customer questionnaire 7 Submit the form If the previous steps were completed successfully you can now login at http www redhat com sup port and open a new technical service request However you must still use your Product ID in order to...

Страница 167: ...If you cannot setup networking what kind of network card do you have Note Refer to the service level agreement at http www redhat com support sla for more information on how Red Hat s technical support staff can assist you D 5 1 How to Send Support Questions Please login at http www redhat com support and open a new service request or call the phone number for support If your product came with pho...

Страница 168: ...168 Appendix D Getting Technical Support ...

Страница 169: ...boot image on the CD ROM itself In cases such as these a boot disk should be made to boot Red Hat Enterprise Linux AS Once booted the CD ROMs will work properly for the installation To change your BIOS refer to your system manual for the correct keyboard combination that allows you to access your BIOS or you can read the key sequence needed while the system begins to boot To create a boot disk fol...

Страница 170: ...the motherboard slots to see if the problem is either slot or memory related For more information concerning signal 11 errors refer to http www bitwizard nl sig11 E 1 4 Are You Unable to Boot from a Network Boot Disk If you are experiencing difficulties in getting the network boot disk you made to boot your system correctly you may need an updated boot disk Check the online errata for updated disk...

Страница 171: ...hich does not require using a mouse If you choose to continue with the GUI installation you will need to provide the installation program with your mouse configuration information see Figure 3 3 Mouse Configuration Figure E 1 Mouse Not Detected For an overview of text mode installation instructions please refer to Chapter 4 Installing Red Hat Enterprise Linux AS via Text Mode E 2 2 Problems with B...

Страница 172: ...oot does not exceed the 1023 cylinder head If you do not the installation program will not allow you to create a boot or partition Some new systems allow you to exceed the 1023 limit with GRUB and the newer LILO versions that are available but most machines with older BIOS will not E 3 2 Using Remaining Space You have a swap and a root partition created and you have selected the root partition to ...

Страница 173: ...er the selection of individual packages or while trying to save the upgrade log in tmp The error may look similar to Traceback innermost last File var tmp anaconda 7 1 usr lib anaconda iw progress_gui py line 20 in run rc self todo doInstall File var tmp anaconda 7 1 usr lib anaconda todo py line 1468 in doInstall self fstab savePartitions File fstab py line 221 in savePartitions sys exit 0 System...

Страница 174: ...oting your system To do this comment out the line which begins with splashimage in the grub conf file To comment out a line insert the character at the beginning of the line Once you reboot the grub conf file will be reread and your changes will take place You may re enable the graphical boot screen by uncommenting or adding the above line back into the grub conf file and rebooting E 4 2 Trouble W...

Страница 175: ...come root To become root type su and enter your root password when prompted Then type passwd username This allows you to enter a new password for the specified user account If you selected either the custom or workstation installation and do not see the graphical login screen check your hardware for compatibility issues The Hardware Compatibility List can be found at http hardware redhat com hcl E...

Страница 176: ...f file depending on the boot loader you installed append mem xxM Replace xx with the amount of RAM you have in megabytes Remember that per image append lines completely overwrite the global append line It might be worth adding this to the per image descrip tions as shown in this example append mem 128M In boot grub grub conf the above example would look similar to the following NOTICE You have a b...

Страница 177: ...have sound after your installation you may need to run the sound configuration utility As root type sndconfig in a terminal window Note sndconfig must be run in runlevel 3 More information about runlevels can be found in the Official Red Hat Linux Reference Guide in chapter Boot Process Init and Shutdown If the sndconfig application does not help you may need to select the Enable sound server star...

Страница 178: ...178 Appendix E Troubleshooting Your Installation of Red Hat Enterprise Linux AS ...

Страница 179: ...Room For Red Hat Enterprise Linux AS for more information on the process of freeing up disk space to prepare for a Red Hat Enterprise Linux AS installation This section also discusses the partition naming scheme used by Linux systems sharing disk space with other operating systems and related topics F 1 Hard Disk Basic Concepts Hard disks perform a very simple function they store data and reliably...

Страница 180: ... to store some data on this drive As things stand now it will not work There is something we need to do first F 1 1 It is Not What You Write it is How You Write It Experienced computer users probably got this one on the first try We need to format the drive For matting usually known as making a filesystem writes information to the drive creating order out of the empty space in an unformatted drive...

Страница 181: ...ly seen as a small price to pay It is also worth noting that there is no single universal filesystem As Figure F 3 Disk Drive with a Different Filesystem shows a disk drive may have one of many different filesystems written on it As you might guess different filesystems tend to be incompatible that is an operating system that supports one filesystem or a handful of related filesystem types may not...

Страница 182: ...erating systems making data interchange between different filesystems easy Figure F 3 Disk Drive with a Different Filesystem Of course writing a filesystem to disk is only the beginning The goal of this process is to actually store and retrieve data Let us take a look at our drive after some files have been written to it ...

Страница 183: ...xisting partition As with most computer related technologies disk drives changed over time after their introduction In particular they got bigger Not larger in physical size but bigger in their capacity to store information And this additional capacity drove a fundamental change in the way disk drives were used F 1 2 Partitions Turning One Drive Into Many As disk drive capacities soared some peopl...

Страница 184: ...k drive this is not entirely accurate In reality the partition table is stored at the very start of the disk before any filesystem or user data But for clarity we will keep it separate in our diagrams Figure F 5 Disk Drive with Partition Table As Figure F 5 Disk Drive with Partition Table shows the partition table is divided into four sections Each section can hold the information necessary to def...

Страница 185: ...artition type to denote a specific filesystem type to flag the partition as being associated with a particular operating system to indicate that the partition contains a bootable operating system or some combination of the three Table F 1 Partition Types contains a listing of some popular and obscure partition types along with their numeric values Table F 1 Partition Types Partition Type Value Par...

Страница 186: ...re F 6 Disk Drive With Single Partition for an example Figure F 6 Disk Drive With Single Partition In many cases there is only a single partition spanning the entire disk essentially duplicating the method used before partitions The partition table has only one entry used and it points to the start of the partition We have labeled this partition as being of the DOS type Although it is only one of ...

Страница 187: ...on As you may have noticed in Table F 1 Partition Types there is an Extended partition type It is this partition type that is at the heart of extended partitions When a partition is created and its type is set to Extended an extended partition table is created In essence the extended partition is like a disk drive in its own right it has a partition table that points to one or more partitions now ...

Страница 188: ...Linux AS There are three possible scenarios you may face when attempting to repartition your hard disk Unpartitioned free space is available An unused partition is available Free space in an actively used partition is available Let us look at each scenario in order Note Please keep in mind that the following illustrations are simplified in the in terest of clarity and do not reflect the exact part...

Страница 189: ...just purchased a new disk just for Red Hat Enterprise Linux AS Most pre installed operating systems are configured to take up all available space on a disk drive see Using Free Space from an Active Partition in Section F 1 4 Next we will discuss a slightly more common situation Using Space from an Unused Partition In this case maybe you have one or more partitions that you do not use any longer Pe...

Страница 190: ...t to handle The main problem is that even if you have enough free space it is presently allocated to a partition that is already in use If you purchased a computer with pre installed software the hard disk most likely has one massive partition holding the operating system and data Aside from adding a new hard drive to your system you have two choices Destructive Repartitioning Basically you delete...

Страница 191: ...all the original operating system The best time to notice if this applies to your system is before you destroy your original partition and its operating system installation After creating a smaller partition for your existing software you can reinstall any software restore your data and continue your Red Hat Enterprise Linux AS installation Figure F 10 Disk Drive Being Destructively Repartitioned ...

Страница 192: ... to perform this feat There are several disk management software products on the market You will have to do some research to find the one that is best for your situation While the process of non destructive repartitioning is rather straightforward there are a number of steps involved Compress existing data Resize the existing partition Create new partition s Next we will look at each step in a bit...

Страница 193: ...t be moved If this is the case and it severely restricts the size of your new partition s you may be forced to destructively repartition your disk Resize the existing partition Figure F 12 Disk Drive with Partition Resized shows the actual resizing process While the actual result of the resizing operation varies depending on the software used in most cases the newly freed space is used to create a...

Страница 194: ...ave illustrated it would be best to simply delete the new DOS partition and create the appropriate Linux partition s Create new partition s As the previous step implied it may or may not be necessary to create new partitions However unless your resizing software is Linux aware it is likely you will need to delete the partition that was created during the resizing process Figure F 13 Disk Drive wit...

Страница 195: ... dosutils directory This is a freely available program that can resize FAT File Allocation Table partitions WARNING Many people have successfully used fips to resize their hard drive par titions However because of the nature of the operations carried out by fips and the wide variety of hardware and software configurations un der which it must run Red Hat cannot guarantee that fips will work proper...

Страница 196: ... be confusing particularly if you are used to the C drive way of referring to hard disks and their partitions In the DOS Windows world partitions are named using the following method Each partition s type is checked to determine if it can be read by DOS Windows If the partition s type is compatible it is assigned a drive letter The drive letters start with a C and move on to the following letters ...

Страница 197: ...ng Systems If your Red Hat Enterprise Linux AS partitions will be sharing a hard disk with partitions used by other operating systems most of the time you will have no problems However there are certain combina tions of Linux and other operating systems that require extra care Information on creating disk parti tions compatible with other operating systems is available in several HOWTOs and Mini H...

Страница 198: ... continues to spark debate within the Linux community and without any end to the debate in sight it is safe to say that there are probably as many partition layouts as there are people debating the issue Keeping this in mind we recommend that unless you have a reason for doing otherwise you should at least create the following partitions A swap partition Swap partitions are used to support virtual...

Страница 199: ...ect to some limitations imposed by the BIOS in most Intel based computers Specifically most BIOSes cannot access more than two hard drives and they cannot access any data stored beyond cylinder 1023 of any drive Note that some recent BIOSes do not have these limitations but this is by no means universal All the data GRUB and LILO need to access at boot time including the Linux kernel is located in...

Страница 200: ...cause all the necessary information is below cylinder 1023 but will fail if a new kernel is to be loaded and that kernel resides above cylinder 1023 As mentioned earlier it is possible that some of the newer BIOSes may permit GRUB and LILO to work with configurations that do not meet these guidelines Likewise some of GRUB and LILO s more esoteric features may be used to get a Linux system started ...

Страница 201: ...I adapters or NICs These are the only devices used during the installation that might require drivers not included on the Red Hat Enterprise Linux AS CD ROMs or boot disk if you created an installation boot disk to begin the install process Note If an unsupported device is not needed to install Red Hat Enterprise Linux AS on your system continue with the installation and add support for the new pi...

Страница 202: ...Enterprise Linux AS instal lation program to load that driver disk and use it during the installation process Note A driver disk is different than a boot disk If you require a boot disk to begin the Red Hat Enterprise Linux AS installation you will still need to create that floppy and boot from it before using the driver disk If you do not already have an installation boot disk and your system doe...

Страница 203: ...LO 53 MBR 54 boot methods local boot disk 20 USB floppies 20 boot options installation 86 boot partition See partition boot bootable CD ROM 34 86 booting installation program 32 C canceling the installation 36 CD ROM ATAPI 36 unrecognized problems with 37 bootable 34 86 IDE 36 unrecognized problems with 37 installation from 36 other 36 SCSI 36 chkconfig 116 class installation 42 clock 64 cluster S...

Страница 204: ...ng under Linux like OS 21 making with MS DOS 21 network boot creating 20 documentation other manuals 17 driver disk 20 32 201 creating from image 202 produced by others 201 produced by Red Hat 201 using 202 E editing partitions 52 etc sysconfig ha lvs cf file 112 expert installation mode 34 86 extended partitions 187 F fdisk 52 filesystem formats overview of 180 filesystem types 51 fips partitioni...

Страница 205: ...tion 81 install log file tmp install log 73 installation aborting 36 Advanced Server 23 boot options text mode 86 booting without diskette 86 can you install with a CD ROM 19 CD ROM 36 choosing 22 class 42 Custom 24 disk space 18 expert mode 34 86 FTP 92 getting Red Hat Enterprise Linux AS 17 GRUB 53 GUI CD ROM 31 hard drive 89 HTTP 93 keyboard navigation 85 LILO 53 method CD ROM 35 FTP 35 hard dr...

Страница 206: ... installation 53 partitioning related issues 199 removing 161 SMP motherboards 56 Linux Virtual Server See LVS clustering Linux like OS creating installation diskette with 21 load balance clustering See cluster types LOADLIN 56 LVS clustering components of 112 date replication real servers 103 definition of 97 etc sysconfig ha lvs cf file 112 initial configuration 115 ipvsadm program 112 job sched...

Страница 207: ...methods LVS 107 network configuration 58 information 83 installations FTP 92 HTTP 93 network address translation See NAT network install 90 NFS installation 91 O online help hiding 42 text mode installation 87 options kernel 34 87 OS 2 boot manager 54 P packages groups 67 selecting 67 individual 68 installing 67 selecting 67 packet forwarding 119 See also LVS clustering partition boot 198 extended...

Страница 208: ...IP Address 142 VIRTUAL SERVERS 140 piranha gui service 115 piranha passwd 116 pre installation information 81 pulse daemon 112 pulse service 115 R rawrite creating installation diskette 21 real servers See LVS clustering configuring services 119 recursion See recursion Red Hat Cluster Manager 97 heartbeat channel 98 overview of 98 quorum partitions 98 Red Hat Enterprise Linux AS 97 overview of 97 ...

Страница 209: ...able 88 time zone configuration 64 tmp install log install log file location 73 troubleshooting 169 after the installation 174 graphical GRUB screen 174 graphical LILO screen 174 logging in 175 Netscape Navigator 175 printers and X 176 RAM not recognized 176 server installations and X 174 sound configuration 177 beginning the installation 171 GUI installation method unavailable 171 mouse not detec...

Страница 210: ...figuration 82 virtual consoles 31 W weighted least connections See job scheduling LVS weighted round robin See job scheduling LVS X X configuration 72 X Window System 72 Xconfigurator monitor setup 76 video card setup 72 ...

Отзывы: