Chapter 2. Creating Directory Entries
20
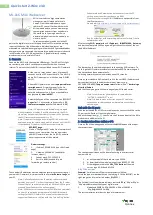
2.1.3.8.4. Adding a Subtype to an Attribute
To add a subtype to an entry, do the following:
1. In the
Directory
tab of the Directory Server Console, right-click the entry to modify, and select
Properties
from the pop-up menu.
Alternatively, double-click the entry to open the
Property Editor
.
2. Click
Add Attribute
. The
Add Attribute
dialog box opens.
3. Select the attribute to add from the list.
4. To assign a language subtype to the attribute, select the subtype from the
Language
drop-down
list.
Assign one of the other two subtypes, binary or pronunciation, from the
Subtype
drop-down list.
5. Click
OK
to close the
Add Attribute
window, then click
OK
again to close the
Property Editor
.
2.1.4. Deleting Directory Entries
To delete entries using the Directory Server Console, do the following:
1. In the Directory Server Console, select the
Directory
tab.
For information on starting the Directory Server Console, see
Section 1.4, “Starting the Directory
Server Console”
.
2. Right-click the entry to delete in the navigation tree or in the right pane. To select multiple entries,
use
Ctrl
or
Shift
.
3. Select
Delete
from the
Edit
menu.
WARNING
The server deletes the entry or entries immediately. There is no way to undo the delete
operation.
2.2. Managing Entries from the Command-Line
The command-line utilities allow you to manipulate the contents of your directory. They can be useful
to write scripts to perform bulk management of the directory or to test the Directory Server. For
example, you might want to ensure that it returns the expected information after you have made
changes to access control information.
With command-line utilities, information can be provided directly from the command-line or through an
LDIF input file.
•
Section 2.2.1, “Providing Input from the Command-Line”
•
Section 2.2.2, “Creating a Root Entry from the Command-Line”
•
Section 2.2.3, “Adding Entries Using LDIF”
Содержание DIRECTORY SERVER 8.0
Страница 18: ...xviii ...
Страница 29: ...Configuring the Directory Manager 11 6 Enter the new password and confirm it 7 Click Save ...
Страница 30: ...12 ...
Страница 112: ...94 ...
Страница 128: ...110 ...
Страница 190: ...Chapter 6 Managing Access Control 172 4 Click New to open the Access Control Editor ...
Страница 224: ...206 ...
Страница 324: ...306 ...
Страница 334: ...316 ...
Страница 358: ...340 ...
Страница 410: ...392 ...
Страница 420: ...402 ...
Страница 444: ...426 ...
Страница 454: ...436 ...
Страница 464: ...446 ...
Страница 484: ...466 ...
Страница 512: ...494 ...
Страница 522: ...504 ...