background image

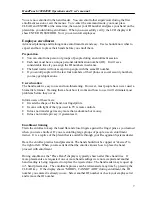
HandPunch 3000/4000 Operations and User’s manual

17

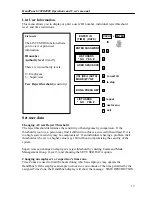
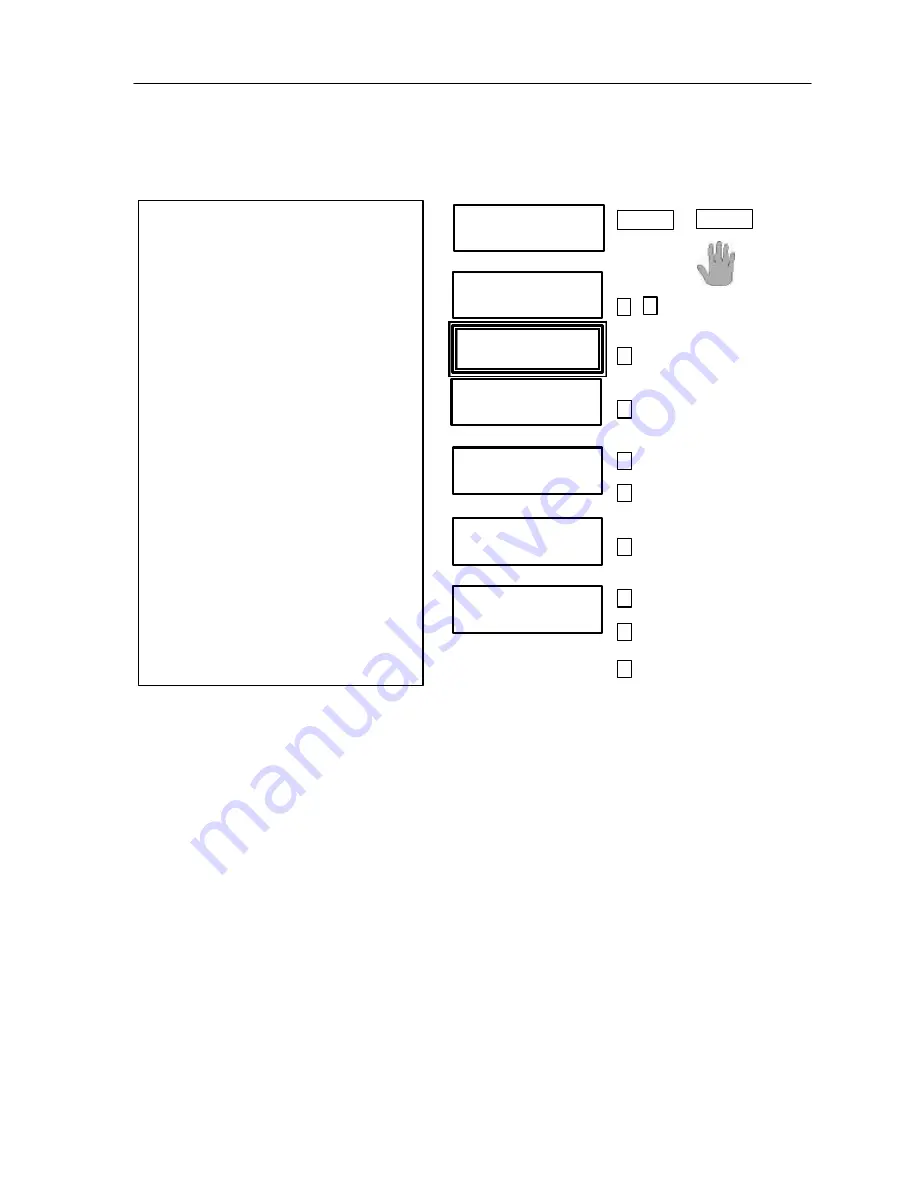
List User Information.

This menu allows you to display or print a users’ ID number, individual reject threshold
level, and time restrictions.

           ENTER  ID             

CLEAR  +  ENTER


(TIME)   (DATE)

                                      ID

      ENTER PASSWORD

                                 3    #

    LIST USERS
   *  NO   YES  #

#


USER SPACE XXX

                                 #

(ID)  (REJ) (AUTH)   

#    to next ID

MORE (#Y/*N)?


 to stop

DONE. PRESS KEY  

#

        LIST USERS          

#   repeat


*  NO     YES  #

*    next menu

5    exit

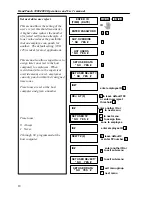
Set user data

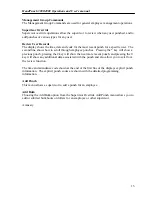
Changing A Users Reject Threshold

The reject threshold determines the sensitivity of hand geometry comparison.  If the
threshold is too low, a person may find it difficult to achieve a successful hand read. If it is
too high, system security may be compromised.  If an individual is having a problem, their
threshold can be set to a higher value (say 160) without compromising the security of the
system.

Supervisors can change an employee’s reject threshold by entering Command Mode
Management Group  (Level 3) and choosing the SET USER DATA option.

Changing an employee’s or supervisor’s time zone.

Time Zones are used to limit the hours during which an employee may operate the
HandPunch. If the employee attempts to clock in or out outside of the time permitted by the
assigned Time Zone, the HandPunch display will show the message:  TIME RESTRICTION.

List users

The LIST USERS function allows
you to view or print user
information:

ID number
Authority level

 (0 and 5)

There are two authority levels:

0 = Employees
5 = Supervisors

User Reject threshold

 (sensitivity)

Содержание HandPunch 3000

Страница 1: ...HandPunch 3000 4000 Operations and Users Manual Recognition Systems Inc 1520 Dell Avenue Campbell CA 95008 Tel 408 364 6960 Fax 408 370 3679 Email sales recogsys com ...

Страница 2: ...rollment 5 Employee enrollment 7 Special enrollment 9 Removing a user 10 Using the hand reader 11 Management group commands supervisor override 12 List user information 17 Set user information reject level and time zone 18 Turning restrictions on and off 19 Maintenance 20 Calibration 21 Set status display 22 Warranty 23 Index 25 ...

Страница 3: ... camera to capture a three dimensional image of the hand Using advanced microprocessor technology the terminal converts the image to a template It stores the template in database with the employee s ID number To punch in the employee enters his or her ID number at the terminal HandPunch prompts the employee to place his or her hand The terminal compares the hand on the platen with employee s uniqu...

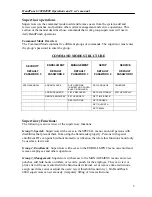
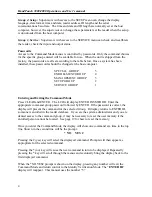
Страница 4: ...TUS DISPLAY REMOVE EMPLOYEE SET USER DATA SET TIME DATE RESTRICTIONS SET ADDRESS SET ID LENGTH SET SERIAL Supervisory Functions The following is an overview of the supervisory functions Group 5 Special Supervisors with access to the SPECIAL menu can enroll persons with disabilities that prevent them from using the hand reader properly Persons with special enrollment ID s can punch without biometri...

Страница 5: ...ting the Command Mode Press CLEAR and ENTER The LCD will display ENTER PASSWORD Enter the appropriate command group password followed by ENTER If the password is correct the display will present the command for the selected Group If display returns to ENTER ID someone is enrolled in the reader database If you are the system administrator and you are denied access to the command group it may be nec...

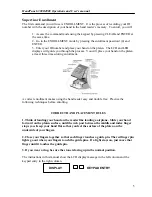
Страница 6: ...s using the hand reader easy and trouble free Practice the following techniques before enrolling CORRECT HAND PLACEMENT RULES 1 Think of landing your hand on the reader like landing a airplane Slide your hand forward on the platen surface until the web post between the middle and index finger stops you Keep your hand flat so that you feel the surface of the platen on the underside of your fingers ...

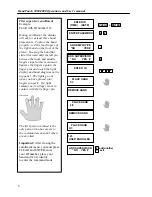
Страница 7: ...of the right hand on the front of the platen Keeping the hand flat slide it forward until the tall pin between the index and middle fingers stops further movement Squeeze the fingers against the finger pins and watch the light display and hand diagram on the top panel The lights go out when you have placed your fingers properly If a light remains on it a finger is not in contact with the its finge...

Страница 8: ...ut how it works and how to use it will eliminate most problems before they occur Inform users of these facts It reads the shape of the hand not fingerprints It scans with light of the type used in TV remote controls It does not transfer germs any more than a doorknob or money It does not invade privacy it guarantees it Enrollment training Train the enrollee to keep the hand flat and close fingers ...

Страница 9: ... and ENTER at the same time enter your ID and place your hand to enter the command mode When the display shows ENTER PASSWORD enter the enrollment password 4 is default and Example Enroll user 321 Show the employee the hand placement techniques used in the FIRST ENROLLMENT The hand reader may ask for another hand placement If the LCD displays SORRY CAN T ADD another employee is likely enrolled wit...

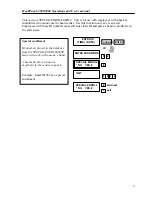
Страница 10: ...se ID numbers must still enter their ID and place a hand or prosthetic in the platen area ENTER ID TIME DATE CLEAR ENTER ID ENTER PASSWORD 5 SPECIAL ENROLL NO YES ID 9 8 7 SPECIAL ENROLL add next NO YES 5 exit Special enrollment ID numbers placed in the database from the SPECIAL ENROLLMENT menu will work with anyone s hand A user must place a hand or prosthetic in the reader to punch Example Enter...

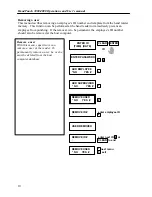
Страница 11: ... is to be permanent the employee s ID number should also be removed at the host computer ENTER ID CLEAR ENTER TIME DATE ID ENTER PASSWORD 4 ADD EMPLOYEE NO YES ADD SUPERVISOR NO YES REMOVE USER NO YES REMOVE ID enter employee ID USER REMOVED REMOVE ID enter next ID or CLEAR to end REMOVE USER next menu NO YES 5 exit Remove a user With this menu supervisors can remove a user at the reader To perman...

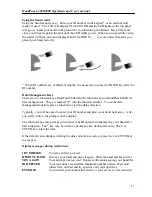
Страница 12: ...the function number To use the data management function press a function to start the data collection Typically you will be asked to enter your ID number and place your hand right away After you verify follow the prompts on the display The function keys may prompt you to enter your ID number and hand place your hand after data collection The key may be used as a backspace key during data entry The...

Страница 13: ...NVALID TEMPORARILY This is called a lockout Before the rejected number can be used again another employee or a supervisor must successfully verify at the reader If you enter an ID number but do not place your hand on the platen the unit will time out in about 25 seconds You can reset the unit by pressing CLEAR The LCD display the audible beeper and verification lights on the top panel show data en...

Страница 14: ...ee punches Pressing the key will show a previous punch pressing the key will show the next more recent punch and pressing the 0 key will show any additional data associated with the punch and also allow you to exit from the review function The time and attendance code shown at the end of the first line of the displays explicit punch information The explicit punch codes are shown with the detailed ...

Страница 15: ... YES 5 Supervisor override review punches This menu allows supervisors to review employees punches The punch information includes the time date and explicit punch information Using the and keys the supervisor can scroll through the punch history Example Employee whose ID you entered punched in at 8 00 A M on January 25th 1999 T A CODE MEANING 1 In 2 Back From Lunch 3 Out 4 Department Code 5 Back F...

Страница 16: ...bulk dollars SUBTRACT ADD or to add or HOURS subtract hrs or ENTER ID enter employee ID number ENTER ANOTHER to add another finished 1 REVIEW 2 ADD END to exit SUP OVERRIDE to next menu NO YES 5 to exit Supervisor override add bulk hours or dollars Supervisors can add or subtract hours or dollars to employees punch records Example Add 8 hours to employee 321 s punch record effective March 15 2001 ...

Страница 17: ...ber ENTER ANOTHER ID to punch for another ID NO YES to finish 1 REVIEW 2 ADD END to exit sub menu SUP OVERRIDE to next menu NO YES 5 to exit Supervisor override add punch With this menu supervisors can punch for employees at the present time or enter a different time into the punch record Example Add a punch for employee 321 on January 15 1999 at 5 30 P M select 2 to add a punch enter the effectiv...

Страница 18: ... security may be compromised If an individual is having a problem their threshold can be set to a higher value say 160 without compromising the security of the system Supervisors can change an employee s reject threshold by entering Command Mode Management Group Level 3 and choosing the SET USER DATA option Changing an employee s or supervisor s time zone Time Zones are used to limit the hours dur...

Страница 19: ...u NO YES SET USER DATA 5 exit menu group NO YES next menu Set user data user reject This menu allows the setting of the user s reject threshold sensitivity A higher value reduces the number of rejected verification attempts A lower value reduces the possibility that one employee can punch for another The default setting 100 125 is ideal for most applications This menu also allows supervisors to as...

Страница 20: ... enter number of amnesty punches 3 ID enter another ID or to exit sub menu SET USER REJECT to next sub menu NO YES 5 to exit sub menu SET USER DATA to next menu NO YES 5 to exit menu group Amnesty Model HP 4000 only The AMNESTY function allows supervisors to remove employee time restrictions for a specific number of punches Employees can punch at any time for as many times as the supervisor specif...

Страница 21: ...SSWORD 3 SUP OVERRIDE NO YES LIST USERS NO YES SET USER DATA NO YES RESTRICTIONS NO YES RESTRCTN S ON RESTRICTN S OFF TURN OFF N Y TURN ON N Y to turn restrictions off to turn restrictions on RESTRICTIONS to top menu NO YES 5 to exit Restrictions This menu allows supervisors to turn time restrictions for all users off or on It is typically used when employees must punch outside their assigned time...

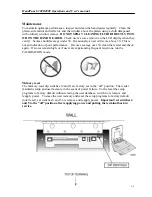
Страница 22: ... performance If scores average over 30 clean the reader and check again If scores remain high or if users are experiencing frequent rejections run the CALIBRATION mode Memory reset The memory reset dip switches 4 and 5 are factory set in the off position The reader maintains setup and user memory in the event of power failure To the reset the setup programs to factory default without erasing the u...

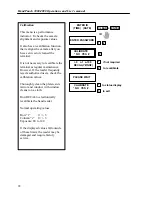
Страница 23: ...ation function that realigns the camera after you have serviced or cleaned the terminal It is not necessary to recalibrate the terminal as regular maintenance However If the reader frequently rejects authorized users check the calibration values Thoroughly clean the platen side mirror and window with window cleaner on a cloth Run RECAL to electronically recalibrate the hand reader Normal operating...

Страница 24: ...ISPLAY NO YES 5 ENTER ID C0000 LLLL Set status display Setting the status display allows you to check the status of The tamper switch The door monitor switch Auxiliary input s Request to exit switch The score of the last person that used the hand reader To turn off the status display press when the panel displays STATUS DISPLAY OFF See network status display chart below ...

Страница 25: ... of charge the Product found upon the Company s inspection to be so defective or if agreed upon refund the purchase price less a reasonable allowance for depreciation in exchange for the Product THE COMPANY MAKES NO OTHER WARRANTY AND ALL IMPLIED WARRANTIES INCLUDING ANY WARRANTY OF MERCHANTABILITY OR FITNESS FOR A PARTICULAR PURPOSE ARE LIMITED TO THE DURATION OF THE EXPRESSED WARRANTY PERIOD AS ...

Страница 26: ...ikely to cause harmful interference in which case the user will be required to correct the interference at his own expense This Class A digital apparatus meets all requirements of the Canadian Interference Causing Equipment Regulations Cet appareil numerique de la classe A respecte toutes les exigences du Reglement sur le materiel brouilleur du Canada ...

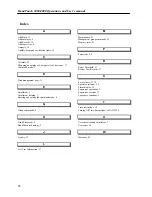
Страница 27: ...ring and exiting the command mode 4 G Group commands 4 H Hand Placement 5 HandPunch technology 2 J Jewelry 12 L List User Information 17 M Maintenance 21 Management group commands 13 Memory reset 21 P Passwords 3 4 R Reject Threshold 17 Review User Records 13 S Set user data 17 18 Special enrollment 4 9 Status display 23 Supervisor operations 3 Supervisor override 13 Supevisory functions 3 T Time ...

Отзывы: