9
UWR-701 F
WIRELESS UHF SYSTEM
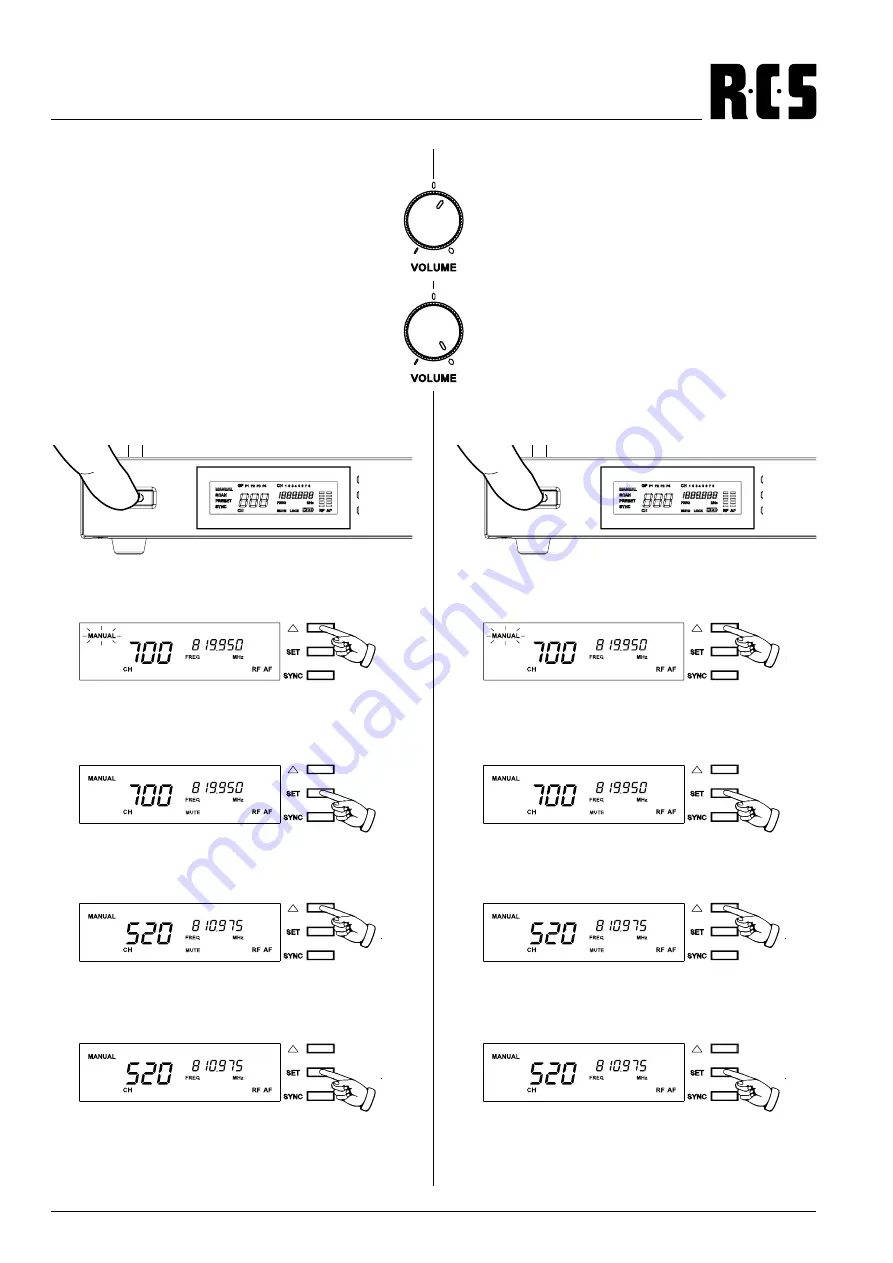
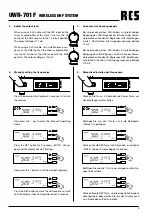
4. Adjust the output level
When using an XLR cable with the MIC input on the
mixer or preamplifier at the same time, turn the LR
control of the UHF receiver to the 1 o‘clock position.
The output voltage is 77 mV.
When using an XLR cable with simultaneous occu-
pancy of the LINE input on the mixer or preamplifier,
turn the LR control of the UHF receiver to the MAX
position. The output voltage is 770 mV.
5. Manually setting the frequencies
Press the power button for about 4 seconds to turn on
the receiver
Now press the ^ key to enter the „Manual“ operating
mode.
Press the SET button for 2 seconds, „MUTE“ will ap-
pear and the display will start flashing.
Now press the ^ button to set the desired frequency.
Press the SET button to store the set frequency or wait
until the display stops flashing after about 5 seconds.
4.
Anpassen des Ausgangspegels
Bei Verwendung eines XLR-Kabels mit gleichzeitiger
Belegung des MIC-Eingangs am Mischer oder Vorver-
stärker drehen Sie den LR-Regler des UHF-Empfängers
in die 1 Uhr-Position. Die Ausgangsspannung beträgt
77 mV.
Bei Verwendung eines XLR-Kabels mit gleichzeitiger
Belegung des LINE-Eingangs am Mischer oder Vorver-
stärker drehen Sie den LR-Regler des UHF-Empfängers
auf die MAX.-Position. Die Ausgangsspannung beträgt
770 mV.
5. Manuelles Einstellen der Frequenzen
Drücken Sie für ca. 4 Sekunden die Power-Taste, um
den Empfänger einzuschalten
Betätigen Sie nun die ^-Taste, um in die Betriebsart
„Manual“ zu gelangen.
Drücken Sie die SET-Taste für 2 Sekunden, es erscheint
„MUTE“ und das Display beginnt zu blinken.
Betätigen Sie nun die ^-Taste, um die gewünschte Fre-
quenz einzustellen.
Drücken Sie die SET-Taste, um die eingestelle Frequenz
abzuspeichern oder warten Sie, bis das Display nach
ca. 5 Sekunden aufhört zu blinken.


