


Chapter 2
19
Chapter 2: Music Features
Illustrations contained in this document are for representation only.
Playing Music
The Home Theater Music Jukebox puts your entire music collection at your fingertips. In this section you’ll learn how to navigate the Music Player screen
and sort, select, and listen to your favorite music. It’s as simple as cuing up something from your library, or putting in a CD to add something new to your
collection. You’ll learn more about how to record new music to your library in the next section, but for now let’s look at how the player works.
Some Terms and Definitions You’ll See in the Following Chapters
There may be a few terms used in the next few chapters you may not be familiar with. Take a minute to familiarize yourself with them.
Playlist — Your customized collection of songs that you can set in any order or include any song.
Track — An individual song.
Group — Think of this as a collection of musical genres (Country, Rock, Classical, etc.).
Title — Think of this as a complete CD album (including every track on the CD, for example).
MP3 track — A track you have recorded or “ripped” from a CD and is stored on the Music Jukebox’s hard drive.
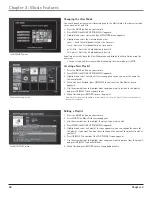
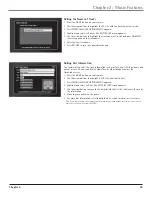
Selecting and Listening to a Music Title
1. Press the MUSIC button on your remote.
2. Press GUIDE. The Music Guide screen appears.
3. Use the left and right arrow buttons to highlight the group of your choice.
4. Use the up and down arrow buttons to highlight the desired music title.
5. Press SELECT to display a list of the tracks on the highlighted CD or PLAY to play the highlighted CD (the title tracks and cover art appear in the
Player screen and the music plays.)
Sorting Music by Artist, Title, Song, Alphabetically
1. Press the MUSIC button on your remote.
2. Press GUIDE. The Music Guide screen appears.
3. To sort by artist, title, or song, highlight and select the View Mode button on the screen and then highlight and select the desired view.
4. To sort alphabetically, press the number buttons on the remote for the desired letter.
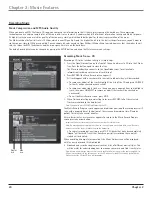
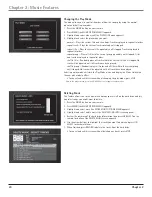
Navigating the Music Player Screen
•
The Music Player screen appears whenever you insert a CD or select a track from the
Music Guide.
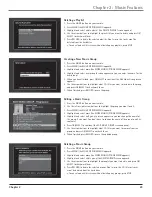
•
Arrow buttons - Use the up and down arrow buttons to move the highlight from one
track to another. The right and left buttons are not used on the Music Player screen.
•
OK/SELECT - When a track is highlighted, stops playing the selected track and starts
playing the highlighted track. You can also play the track by pressing the PLAY button.
•
PAGE +, PAGE- - Scroll the music player track list one page at a time. Each page
contains 12 different tracks. On a page that contains less than 12 tracks, the bottom
rows will be empty.
•
Number buttons - Enter a track number using the number buttons, then press the
SELECT button.
•
INFO - Displays detailed track information (transport status, play mode, elapsed track
time).
•
RECORD - Starts recording an MP3. See the next chapter for details.
•
PLAY, PAUSE, and STOP - Plays, pauses, or stops music. An on-screen status appears
each time the button is pressed.
•
FAST FORWARD and REWIND - Fast forward and rewind a track. Both stop when the
beginning or end of a track is reached. An on-screen status appears each time the
button is pressed.
There are a number of ways to play music:
•
Open the disc tray and insert an audio CD. The Music Jukebox plays the CD, connects to
the internet to identify the disc, loads the information into the music library, displays
the track list, title artist, and cover art in the Music Player View.
•
Use the GUIDE button on the remote. The Music Jukebox displays the Music Guide View
so that you can navigate and select an item.


