3
Graphics are for representation only. Your unit may differ slightly.
Connections and Setup
The Player’s Power Supply
You can power your player either from the battery or power adapter. The battery must first
be charged using the AC power adapter.
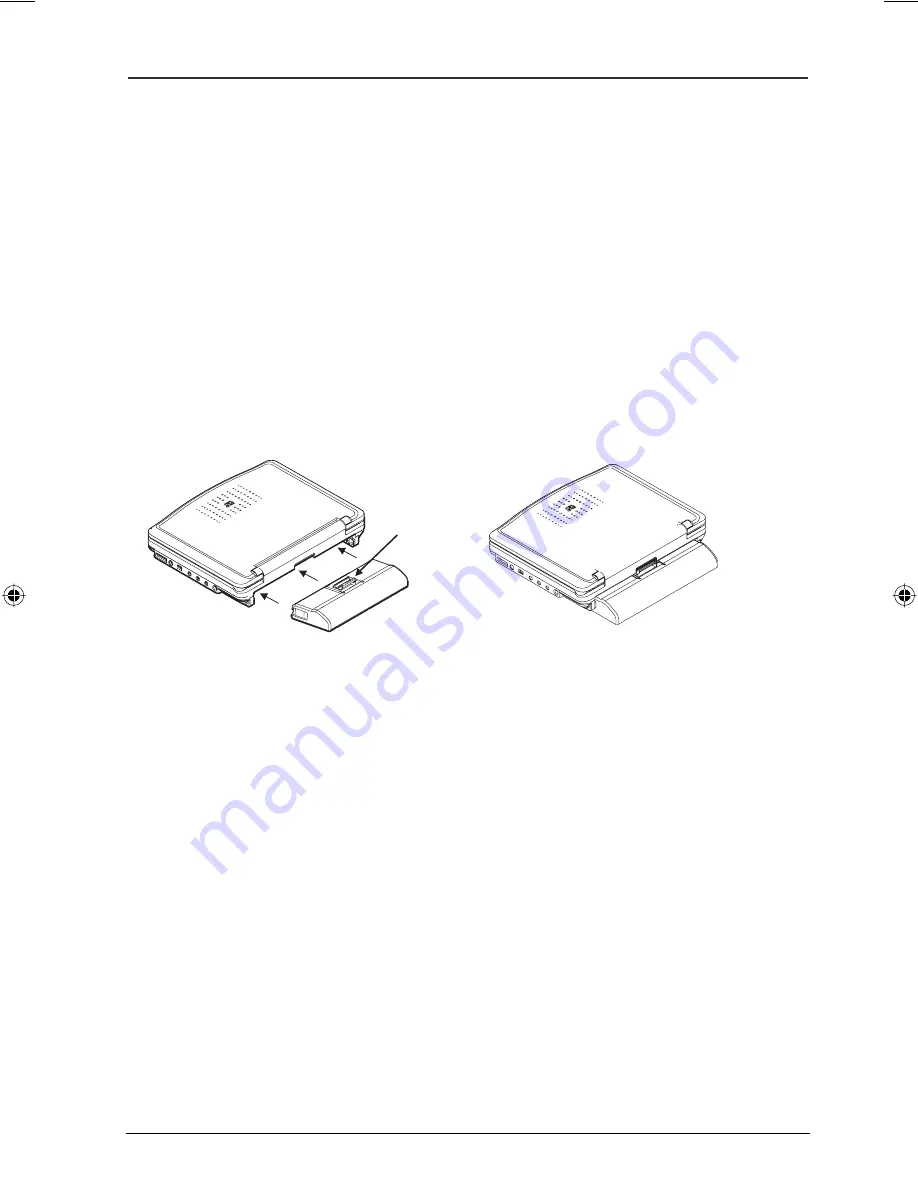
Attaching and Removing the Battery
The battery has three plugs that must be engaged in the three holes located under the DVD
player.
1. Install the battery into the player while taking care to align the plugs on the battery with
the holes located under the player.
2. Slide the battery into place until you hear it click.
3. To remove the battery, press the Lock/Release lever and pull the battery away from the
player.
Note: Contact the applicable local governmental office and your current waste removal provider for
assistance in determining the appropriate disposal method in your area for old batteries.
Charging the Battery
1. Make sure the player is turned off when charging the battery.
2. Insert the plug of the AC power adapter into the DC IN jack on the right side of the
player. Plug the other end into the AC wall outlet.
The
CHARGE
indicator at the front of the player turns red when the battery is
charging. When the battery is fully charged, the
FULL
indicator turns green.
3. Disconnect the adapter from both the battery and AC outlet, when the charging is
completed.
Notes: Fully charge the Ni-MH battery before using it for the first time.
The battery is fully charged approximately 10 to 15 hours after plugging it into the AC outlet.
Use only the supplied AC adapter with this player and battery. Using any other adapter will void the
warranty.
Low Battery Indication
The STANDBY indicator blinks when the battery power is nearing depletion. Within a
while, the power turns off. Refer to the “Charging the Battery” section above to recharge
the battery.
Lock/Release
Lever
Book 1.indb 3
Book 1.indb 3
4/29/05 10:04:27 AM
4/29/05 10:04:27 AM


