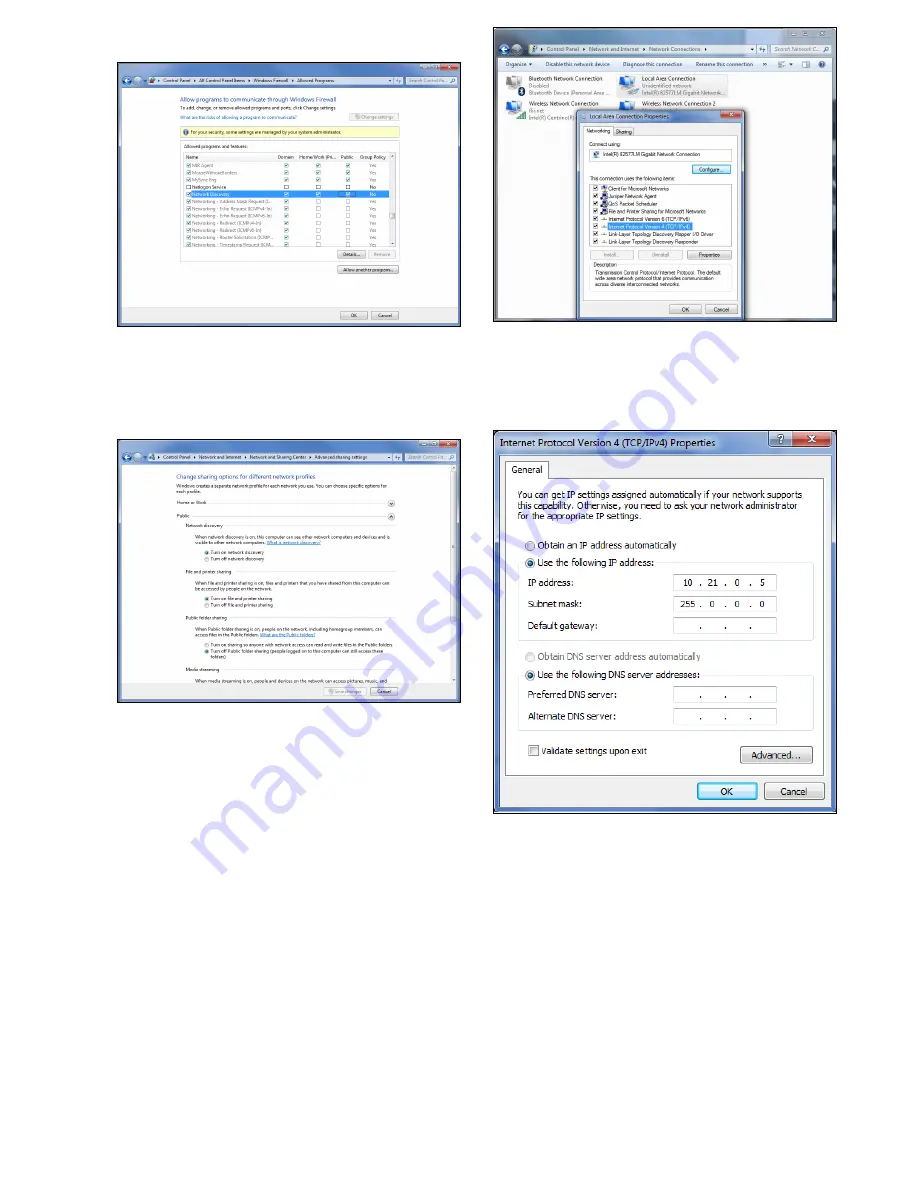
7. Place a tick in the box for the type of network that the camera
is on (this is usually Public).
8. Click
OK
.
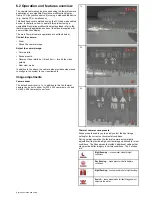
9. From the Control Panel click
Network and Internet
.
10. Click
Network and Sharing Center
.
11. Click
Change advanced sharing settings
.
12. Click on the relevant network type (e.g. Public).
13. Ensure
Turn on network discovery
is selected.
14. Click
Save changes
if you switched on network discovery, or
15. Click
Cancel
if network discovery was already turned on.
You should now be able to access the web interface using a
compatible web browser.
Setting a manual IP address in windows 7
If you experience issues accessing the camera’s web interface
you may need to assign the PC a static IP address.
To assign a static IP address follow the steps below:
1. From the Control panel Click
Network and Internet
.
2. Click
Network and Sharing Center
.
3. Click
Change adaptor settings
.
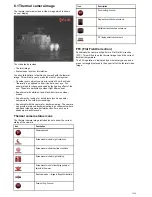
4. Select the Network Connection that your thermal camera is
connected to
5. Right click and choose
Properties
.
The Network Connection Properties dialog is displayed.
6. Select
Internet Protocol Version 4 (TCP/IPv4)
.
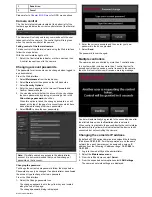
7. Click on the
Properties
button.
8. Click on
Use the following IP address
.
9. Enter an IP address that is in the same range as the thermal
cameras IP address (e.g. 10.21.0.5).
10. Enter the following Subnet Mask:
255.0.0.0
.
11. Click on the
OK
button.
12. You may need to restart the PC for the changes to take effect.
You should now be able to access the web interface using a
compatible web browser.
Web browser interface


