15
INSTALLATION INSTRUCTIONS
INSTALLATION
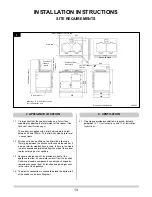
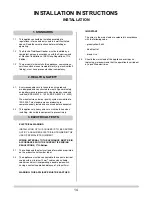
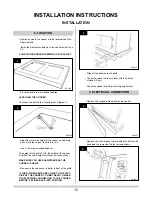
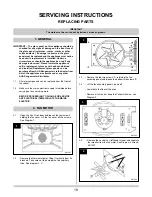
• Decide on where the cooker is to be located, see Site
Requirements
• Install the electrical supply up to the cooker switch, see
3.2
YOUR COOKER SHOULD REMAIN ON THE PALLET.
• Place the plinth in the intended location
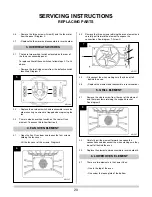
LEVELLING THE COOKER
To access the plinth's four levelling feet, Diagram 2
• Adjust the level and height of the cooker by adjusting
each of the four legs of the plinth in turn:
• Use a 19mm open-ended spanner
The height of the plinth PLUS the height of the cooker
EQUALS the same height as kitchen surfaces (if any)
MAKE SURE YOU HAVE ASSISTANCE AS THE
COOKER IS HEAVY
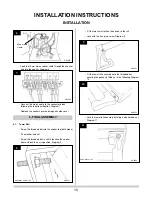
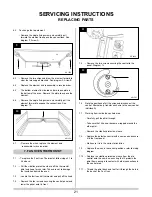
• Manoeuvre the cooker on its pallet in front of the plinth
IF THE KITCHEN UNITS ARE CLOSE TO THE LEFT-
SIDE OF THE COOKER, YOU MAY NEED TO MAKE
THE ELECTRICAL CONNECTION TO THE COOKER
BEFORE IT SLIDES BACK INTO POSITION.
• Slide off the pallet onto the plinth
• Check the cooker surface is level with the kitchen
surfaces (if any)
• Check the cooker itself is level using a spirit level
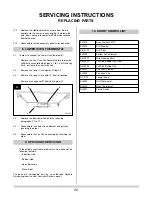
• Remove the magnetic side panel of the cooker
• Remove the control panel cover behind the bottom left-
hand door by removing the four screws shown
4. LOCATION
5. ELECTRICAL CONNECTION
1
3
4
5
2
AR2025
AR2030
AR2027
AR2028
AR2026
Содержание Two-Oven
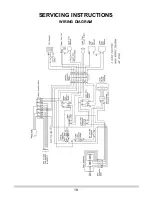
Страница 18: ...SERVICING INSTRUCTIONS WIRING DIAGRAM 18 ...


