2
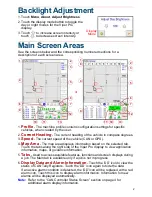
Backlight Adjustment
1. Touch
Menu
,
About
,
Adjust Brightness
.
2. Touch the display mode button to toggle the
day or night modes for the Viper Pro
display.
3. Touch
to increase screen intensity or
touch
to decrease screen intensity.
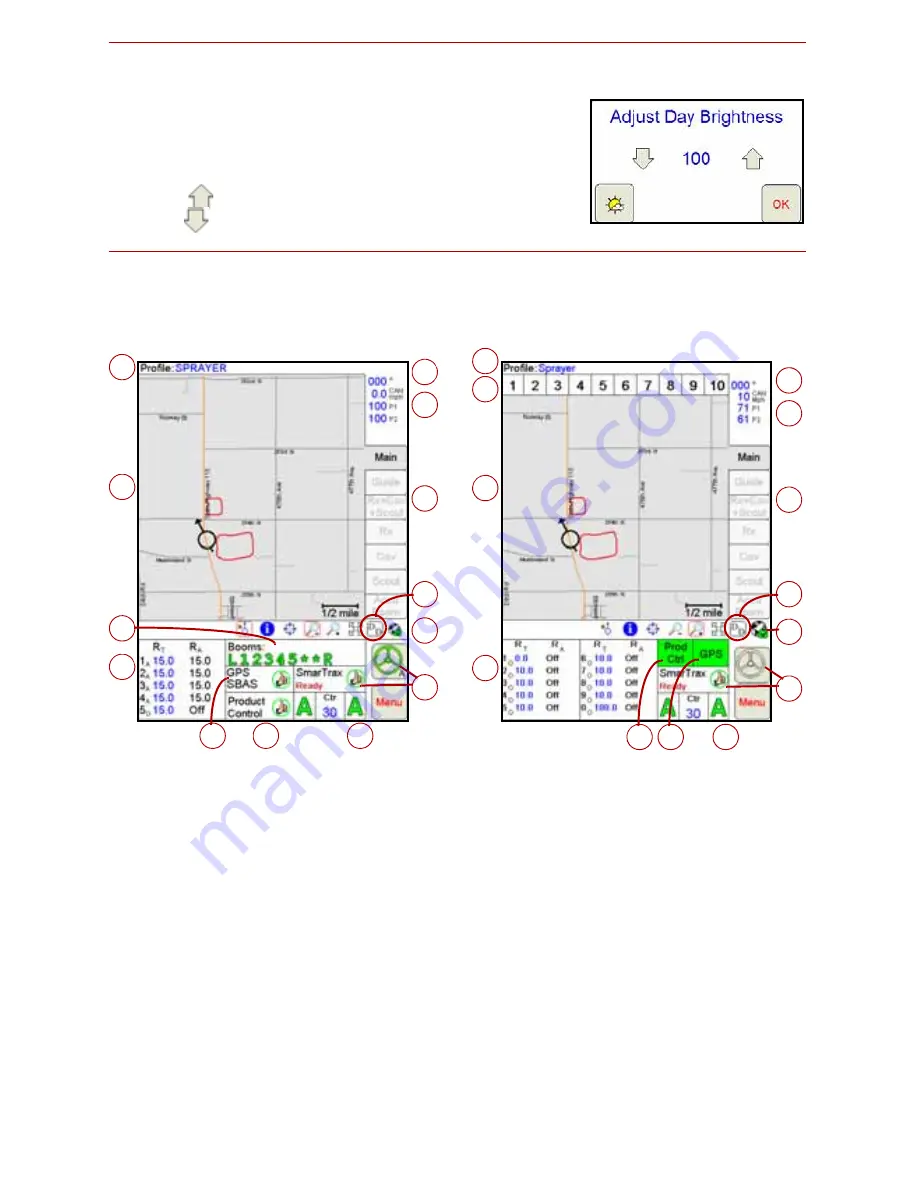
Main Screen Areas
See the screens below and the corresponding numbered sections for a
description of each screen area.
1.
Profile
- The machine profile contains configuration settings for specific
vehicles, when created by the user.
2.
Current Heading
- The current heading of the vehicle in compass degrees.
3.
Speed
- The current speed of the vehicle (CAN or GPS).
4.
Map Area
- The map area displays information based on the selected tab.
Touch the tabs along the right side of the Viper Pro display to view application
information, maps, or guidance information.
5.
Tabs
- Used to access available features, functions and screen displays during
a job. The Main tab is available only if a job is not in progress.
6.
Display Data and Alarm Information
- Touch the ‘DD’ icon to view the
status of CAN Tally Registers. Touch the ‘DD’ icon again to hide the data.
If an active alarm condition is detected, the ‘DD’ icon will be replaced with a red
alarm icon. Touch this icon to display alarm information. Information for new
alarms will be displayed automatically.
Note:
Refer to the “CAN Controller Status Screen” section on page 4 for
additional alarm display information.
Display
Mode
or
1
2
3
5
4
8
11
10
13
12
7
6
9
1
2
3
5
4
8
11 10
13
12
7
6
9
Содержание Viper Pro
Страница 1: ...Software Version 3 10 Viper Pro Quick Reference Guide...
Страница 23: ...22...

