Appendix 2 - Installation Instructions
– Page 1
Installation Overview
The Rainman installation system consists of parts that will allow you to install your AC electric or 12VDC
watermaker. This is a guide only. Installation will vary from vessel to vessel.
All electric Rainman systems can be installed. The systems in the traditional blue case can be either installed
or run as portable. The Rainman Naked systems are specifically designed for a minimum footprint
installation. The plumbing hardware described in this manual is included with a Rainman Naked system, or
available as an optional item for the classic Rainman system in a blue case.
A system installation can be divided into the physical installation process and then plumbing the system into
your vessel.
Physically Mounting Your Watermaker
The mounting system is moulded from rugged fiberglass filled nylon and has been designed to make the
physical installation of your system as quick and easy as possible. The white blemishes that may exist on
some parts are normal residual from the moulding process.
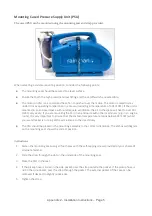
Mounting Naked Pressure Supply Unit (PSU)
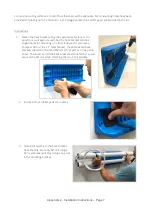
The mounting system for the Naked PSU has three parts. The mounting seat on the base and two mounting
frames on each side.
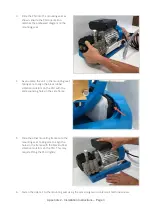
The PSU needs to be correctly oriented when placed in the
mounting assembly. The embossed diagram on the seat
shows the correct orientation. The two side frames are
labelled A or B, and must be used on the correct sides of the
base seat. There are notches to prevent you from installing
them on the incorrect side.


