22
Calibration is only useful when you have a known calibrated source with which you
can compare the measured values of your weather station, therefore it is optional.
The following contents of the sensor calibration practices, procedures, and sources,
to reduce manufacturing and variance tolerances. Under no circumstances should
you compare your readings with sources such as the Internet, radio, television, or
newspapers. The weather data used for this was determined at other locations and
is usually only updated once an hour.
The purpose of your weather station is to measure the conditions of your current
location area. These can vary greatly from place to place.
Note:
The calibrated value can only be set on the display unit. The radio sensor
(s) always shows the uncalibrated value or the value measured by the local radio
sensor.
Note:
The measured humidity range is between 10% and 99%. Outside of this
range, the humidity cannot be measured accurately. Therefore the humidity cannot
be calibrated below 10% or above 99%.
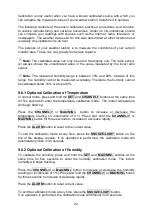
9.6.1 Optional Calibration of Temperature
In normal mode, press and hold the
SET
and
C
buttons at the same time
for five seconds to enter the temperature calibration mode. The indoor temperature
will begin flashing.
Press the
C
or
MAX/MIN/-
button to increase or decrease the
temperature reading (in increments of 0.1). Press and hold the
C
or
MAX/MIN/-
button for three seconds to increase or decrease rapidly.
Press the
ALARM
button to reset to the current value.
To exit the calibration mode at any time, press the
SNOOZE/LIGHT
button on the
top of the display console. If no operation is performed, the calibration mode will
automatically close in 30 seconds.
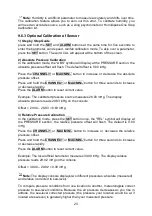
9.6.2 Optional Calibration of Humidity
To calibrate the humidity, press and hold the
SET
and
MAX/MIN/-
buttons at the
same time for five seconds to enter the humidity calibration mode. The indoor
humidity will begin flashing.
Press the
C
or
MAX/MIN/-
button to increase or decrease the humidity
reading (in increments of 1%). Press and hold the
C
or
MAX/MIN/-
button
for three seconds to increase or decrease rapidly.
Press the
ALARM
button to reset current value.
To exit the calibration mode at any time, press the
SNOOZE/LIGHT
button.
If no operation is performed, the calibration mode will timeout in 30 seconds.
Содержание WF-100C Lite
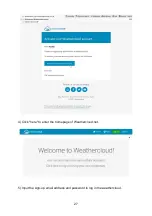
Страница 32: ...31 3 When the registration is completed successfully will pop up the page below ...
Страница 89: ...88 In Ihrem Posteingang sollten Sie nun eine entsprechende E Mail vorfinden ...
Страница 95: ...94 Klicken Sie nun abschließend auf die mit Create bezeichnete Schaltfläche ...
Страница 110: ...109 ...


