


QVM 9
Series
12
■ The units must be firmly secured on the wall, which
can sufficiently hold the unit weight.
■ Exhaust vent pipe has a maximum length of 16
feet with upto three 90° elbows. Vent pipe must be
angled 2-3° toward the water heater to return
condensate.
■ The units should be grounded to prevent electric
shock.
■ Check if the gas indicated
on the rating plate is being
used. If not, change the
nozzle by consulting the
service center or dealers.
WARNING
CONVERSION OF THIS APPLIANCE FROM NATURAL
GAS TO PROPANE CAN ONLY BE PERFORMED BY A
QUALIFIED TECHNICIAN.
■ The flue should be properly installed as indicated
on the installation manual.
■ Dampers available in the market have high rate of
failure and disturb the normal operation of the
water heater. Never install any dampers.
■ Maximum length of the flue is 16-feets with upto
three 90° elbow being used. Flue
φ
is 3″ only.
See page 18 for details
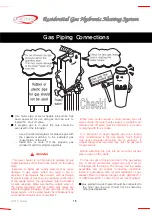
■ The piping materials used
should meet local codes and
industry standards.
■ Piping must be cleaned and
flushed-out before installation.
■ Do not apply torch heat within 12" of the bottom
connections of the unit.
■ Perform all solder connections at a safe distance
from the (brass) male connectors below the unit.
Allow fittings to cool, before attaching to unit. Use
only approved coupling unions with O-rings to
attach field piping to unit.
■ The ‘heating’ pipe should be 3/4" and of type-L
copper, or PEX. Never use aluminum, PVC, or
galvanized steel piping.
■ The pipe size used for
supply
heating water
should be the same size used for the
return
heating water.
■ Use only copper piping with lead-free solder for
the domestic water side.
■ Since the expansion tank has already been
installed in the unit, no separate tank is required.
■ The size of the domestic hot water pipe should be
1/2" diameter.
■ The length of piping should be as short as possible
and the piping should have minimal number of
bends and connections.
■ Use only ball type isolating valves. Do not use gate
valves.
■ Never leave the heating pipes disconnected while
operating the unit as a water heater. This will
cause damage to the heat exchanger and void the
manufacturers warranty.
■ All piping should be insulated.
■ After making the piping connections, check for
gas or water leaks.
■ If the water supply pressure is 142 psig or higher,
install the reduction valve on the water supply
piping.
■ If the water supply pressure is 4.3 psig or lower,
install a pressurizing pump.
Installation
Methods of Installation
Check the type of Gas
Installation of the Flue
Installation of Water Piping
Содержание QVM9 Series
Страница 4: ...QVM 9 Series 2 Model QVM 9 090W1 NG 125W1 NG 150W1 NG Identifying the Components...
Страница 22: ...QVM 9 Series 20 Schematic of SCF 9 Installation Installation of the Flue...
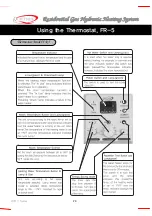
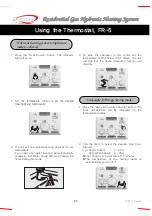
Страница 26: ...QVM 9 Series 24 Thermostat Model FR 5 Using the Thermostat FR 5...
Страница 38: ...QVM 9 Series 36 Wiring Diagram Error Codes FR 5 Thermostat DIP S W Setting on Main Controller Wiring Connecters...
Страница 39: ...37 QVM 9 Series Wiring Diagram...
Страница 41: ...39 QVM 9 Series Models QVM9 090W1 NG 125W1 NG 150W1 NG Exploded Views...


