I
NSTALLING
H
ARDWARE
R
EMOVING
THE
HDD B
ACKPLANE
(3.5” SKU)
2-37
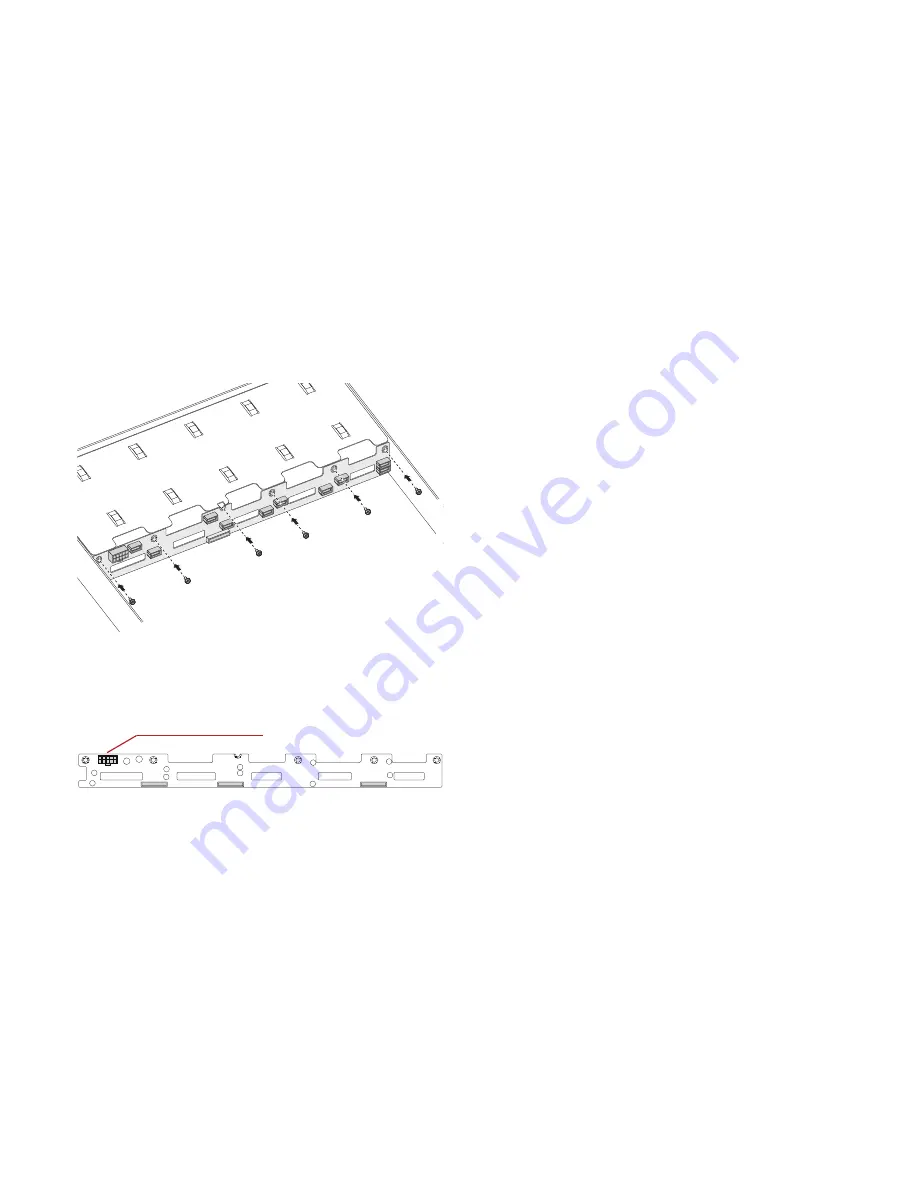
2. Secure the HDD Backplane to the chassis with six (6)
screws.
Figure 2-50. Installing the 2.5” HDD Backplane Screws
3. Connect the power cable to the 10 Pin Power connector
on the HDD BP.
Removing the HDD Backplane (3.5”
SKU)
Prerequisite:
Prerequisite:
Remove the HDDs. See
Removing a 3.5” Hard Disk Drive
on page 2-6.
Prerequisite:
Prerequisite:
Remove the top cover. See
Opening the Top Cover
on
page 2-2.
1. Disconnect the following cables from the HDD BP:
a. Device 0 Connector connect to HDD 0
b. Device 1 Connector connect to HDD 1
c. Device 2 Connector connect to HDD 2
d. Device 3 Connector connect to HDD 3
e. 10 pin Power connector for BP with +12V, +5V, +3.3V
f. IPMB connector lining to on board BMC controller FAN
Speed
g. SGPIO connector for HDD LED Decode.
h. System FAN 0 for CPU 0 Block
i. System FAN 1 for CPU 0 Block
j. System FAN 2 for CPU 0 Block
k. System FAN 3 for CPU 1 Block
l. System FAN 4 for CPU 1 Block
Front
Power Connector
Содержание STRATOS S210 Series S210-X12MS
Страница 21: ...About the Server Chapter 1 About the Server Chapter 1 ...
Страница 37: ...Installing Hardware Chapter 2 Installing Hardware Chapter 2 ...
Страница 78: ...BIOS Chapter 3 BIOS ...
Страница 135: ...BMC Chapter 4 BMC Chapter 4 ...
Страница 194: ...Jumpers and Connectors Chapter 5 Jumpers and Connectors Chapter 5 ...
Страница 197: ...Rail Kit Assembly Chapter 6 Rail Kit Assembly Chapter 6 ...
Страница 201: ...Troubleshooting Chapter 7 Troubleshooting Chapter 7 ...
Страница 206: ...Installation and Assembly Safety Instructions Chapter 8 Installation and Assembly Safety Instructions Chapter 8 ...
Страница 210: ...Safety Information Chapter 9 Safety Information Chapter 9 ...
Страница 219: ...Regulatory and Compliance Information Chapter 10 Regulatory and Compliance Information Chapter 10 ...


