background image

9

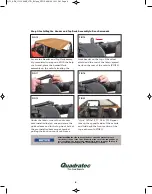
Step 6: Install the Rear Tailgate Bar Brackets

If the vehicle has previously had a tail-
gate bar bracket (Soft Top Vehicles):

Place the Tailgate Bar Bracket on the
outside of the tailgate opening lining

up each hole (from previous Tailgate
brackets) with the existing holes already
drilled in the tailgate (FIGs 35 & 36).

Hand tighten all provided #8 x 1/2" Pan
Head washer screws into place holding
the Tailgate bracket in place. Repeat on
other side of Tailgate opening. Using a
Phillips head screwdriver, tighten all
four screws securing the tailgate bar
bracket to the vehicle.

Do not use a drill or screw gun to
tighten. Doing so may over tighten the
screws causing damage to your body
(FIGs 37, 38 & 39). 

If the vehicle has not had a tailgate bar
bracket on it before:

Line up the driver’s

side Tailgate Bar Bracket with the inside
of the tailgate opening as shown in FIG
36. Use the retainers as a template to
mark and drill two 1/8” holes. Using a
Phillips head screwdriver, tighten each
screw until the Tailgate bar bracket is
secure.

Do not use a drill or screw gun to
tighten. Doing so may over tighten the
screws causing damage to your body
(FIGs 38 & 39).

Repeat on Passenger side.

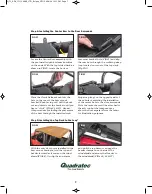
FIG34

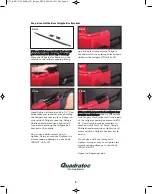
FIG35

FIG36

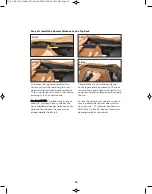
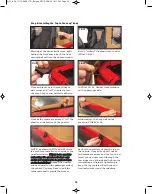
FIG37

FIG38

FIG39

Q_TJ_ADV_11113.00XX_LTR_BU.qxp_QTOP  6/16/20  12:11 PM  Page 9

Содержание QuadraTop Adventure Top 1113.00 Series

Страница 1: ...ROTEC TION ONLY AND SHOULD NOT BE RELIED UPON TO CONTAIN OCCUPANTS IN THE EVENT OF AN ACCIDENT OR TO PROTECT FROM EITHER GROUND CONTACT OR FALLING OBJECTS TO REDUCE RISK OF ACCIDENT OR INJURY ALWAYS WEAR SEATBELTS ALWAYS KEEP HEAD ARMS BODY PARTS WITHIN VEHICLE FULLY SECURE OR STOW THE SOFT TOP BEFORE DRIVING ACCORDING TO INSTRUCTIONS NEVER TRY TO LATCH OR FOLD SOFT TOP WHILE DRIVING DO NOT USE IF...

Страница 2: ... top will install quickly Important Note that it is normal for the fabric and glass to contract and wrinkle when stored in the shipping carton In a few days the fabric and glass will relax wrinkles will disappear Thank you again for your purchase and let s start the installation process a hazardous situation which if not avoided could result in death or serious injury You CAN be KILLED or SERIOUSL...

Страница 3: ...will require two people to properly install the soft top hardware PARTS LIST A Windshield Header with Top Deck QTY 1 B Passenger Side Door Surround Kit QTY 1 C Driver Side Door Surround Kit QTY 1 D Tailgate Bar with Clips QTY 1 E Center Bow QTY 1 F Driver Passenger Over Door Bows QTY 2 G Drivers Side Quarter Window QTY 1 H Passenger Side Quarter Window QTY 1 I Rear Window QTY 1 REQUIRED TOOLS Safe...

Страница 4: ...oles into the inner steel rod of the header until you feel the drill go through the steel inner This may take some force Once the hole is drilled locate the set screw just re moved from the side tube and using a phillip head screw driver install the over door bow to the Header Fig 8 Repeat this on the other side of the header so you have both side tubes installed to the header top deck assembly Se...

Страница 5: ...ine them up with the holes in the horizontal tubes of the roll bar Press the C clamps onto the horizontal tubes and the front portion of the door surrounds forward into the rubber gasket on the windshield FIGs 11 12 With the door open stand on the door sill and locate the two C clamp holes Screw in a Door surround knob into each C clamp into the horizontal tube of the roll bar FIGs 13 14 Secure th...

Страница 6: ...end place the header Deck assembly on the vehicle locating the front header on the top of the wind shield and the rest of the fabric spread back on the rear of the vehicle FIG15 6 FIG15 FIG16 Step 3 Installing the Header and Top Deck Assembly to Door Surrounds FIG17 FIG18 FIG19 FIG20 After installing the side tubes to the door surround brackets please check the location of the front header to make...

Страница 7: ...g the placement of the bow through the installed web bing strap loop on the opposite side of the vehicle completing the installation of the center bow to the door surrounds Note the center bow will be attached to the soft top but the images above show the bow separate from the fabric for illustration purposes FIG21 FIG21A FIG22 FIG23 Step 5 Installing the Top Deck to the Jeep With the over door bo...

Страница 8: ...r clamps on each side of the windshield and secure the Header to the windshield FIGs 25 26 27 FIG26 FIG27 IMPORTANT The top deck MUST be centered on the rear of the vehicle for the windows to fit properly When tightening the rear straps notice the location of the rear bar sewn into the pocket on the top deck It needs to be centered on the rear roll bar legs Once the rear straps are secure but not ...

Страница 9: ...the tailgate bar bracket to the vehicle Do not use a drill or screw gun to tighten Doing so may over tighten the screws causing damage to your body FIGs 37 38 39 If the vehicle has not had a tailgate bar bracket on it before Line up the driver s side Tailgate Bar Bracket with the inside of the tailgate opening as shown in FIG 36 Use the retainers as a template to mark and drill two 1 8 holes Using...

Страница 10: ...windshield header release but not un hook and loosen the rear corner straps installed in Step 5 This will allow you to line up all win dow zippers and attachments The rear corner straps and header will need to be re tightened and reclamped before using the top Locate the drivers rear quarter window Line up and slide the rear quarter win dow into the C Channel as shown in FIGs 40 41 42 43 Repeat th...

Страница 11: ...y at the end of step 10 Each Time you remove the windows Completely pull the windows out of the C Channel before pulling the windows down Fig 48A Do not Peel the windows out FIG44 FIG45 FIG46 FIG47 FIG48 FIG48A When removing the quarter and rear windows from the Top deck be sure to slide them out completely before pulling down Dis engage the side hook and loop before sliding the windows out DO NOT...

Страница 12: ...ner straps Alternate tightening to keep the top centered Seal hook and loop fasteners around the windows Once secure move to the rear driver s side corner and roll the plastic into the Jeep body corner belt rail as shown in FIGs 51 52 Repeat this procedure on the passenger side Starting at the driver s side front right behind the front seat attach the front vertical belt rail into the door surroun...

Страница 13: ...e channel in the door surround Slide the C shaped channel onto the tube sewn into the rear window with the round seal down See FIG61 for correct alignment Slide the tailgate bar all the way across the rear curtain Open the rear tailgate As shown in FIG62 insert roll the tailgate bar into the mounts on each side of the tailgate with the vinyl side of the rear curtain facing the rear of the vehicle ...

Страница 14: ...ndshield FIG65 FIG66 If your windshield header is over hanging or seems short on the windshield you will need to slightly relocate the quick re lease knobs on the over door bows for wards or backwards This slight change will move the entire header forward for short mis location or backward For Header over hang Locate the over door quick release knob shown in FIG 67 Remove the screw hold ing the kn...

Страница 15: ...attractive full function Fastback Style Soft Top with a very streamlined and sporty look Your Adventure Top has been designed with a fold back Sunroof Feature that provides the ultimate open air driving experience FIG70 FIG69 Q_TJ_ADV_11113 00XX_LTR_BU qxp_QTOP 6 16 20 12 11 PM Page 15 ...

Страница 16: ...n park Unlatch your over door Attachments from the door Surrounds FIG71 Unlatch the front header from the windshield FIG72 Using Your QuadraTop Adventure Top Folding Back FIG71 FIG72 Pushing up from the middle fold back the front top section FIG73 Make sure the center bow is secured through the sewn inside webbing strap FIG74 FIG73 FIG74 Q_TJ_ADV_11113 00XX_LTR_BU qxp_QTOP 6 16 20 12 11 PM Page 16...

Страница 17: ...ED TO SPEEDS OF UP TO 75 MPH DO NOT EXCEED THE POSTED SPEED LIMITS WITH THIS TOP INSTALLED AND MAKE SURE ALL STRAPS AND ATTACHMENTS ARE SECURE BEFORE EMBARKING ON ANY LONG HIGHWAY ROAD TRIP ALWAYS WEAR YOUR SEAT BELTS WHEN USING THIS PRODUCT Fastback Top Parts List Part TJ OE Style Front Header 99931001 Over Door Side Tube Each 99931002 Quick Release Knobs Each 99931003 Door Surround Knobs Pair 16...

Страница 18: ...windows to create the ultimate Bimini Plus Top which easily converts back to a weather proof complete soft top Using Your QuadraTop Adventure Top Bimini Plus Conversion 18 Q_TJ_ADV_11113 00XX_LTR_BU qxp_QTOP 6 16 20 12 11 PM Page 18 ...

Страница 19: ...s and try the zipper again Repeat procedure until your zipper operates correctly Windows It is very important that you keep your QuadraTop windows clean Use a mild soap and water solution to gently clean your windows NEVER wipe your windows clean with a dry cloth Dust and dirt on a dry cloth can scratch your windows causing fog ging and permanent damage When re moving your windows store them with ...

Страница 20: ...ected to a installation damage alteration modification failure to maintain or attempted repair or service by anyone not authorized by Quadratec b normal wear and tear cosmetic damage or damage from water immersion c Acts of God accidents misuse negligence inadequate mounting or impact with vehicle s obstacles or other aspects of the environment d theft vandalism or other intentional damage Remedy ...

Отзывы: