background image


www.avsl.com

                                                                                            154.030UK User Manual 

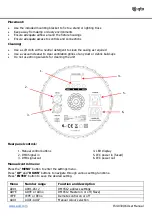
Placement:


Use the included mounting bracket to fix to a stand or lighting truss  


Keep away from damp or dusty environments 


Ensure adequate airflow around the fixture housings 


Ensure adequate access to controls and connections 


Cleaning: 


Use a soft cloth with a neutral detergent to clean the casing as required 


Use a vacuum cleaner to clear ventilation grilles of any dust or debris build-ups  


Do not use strong solvents for cleaning the unit 


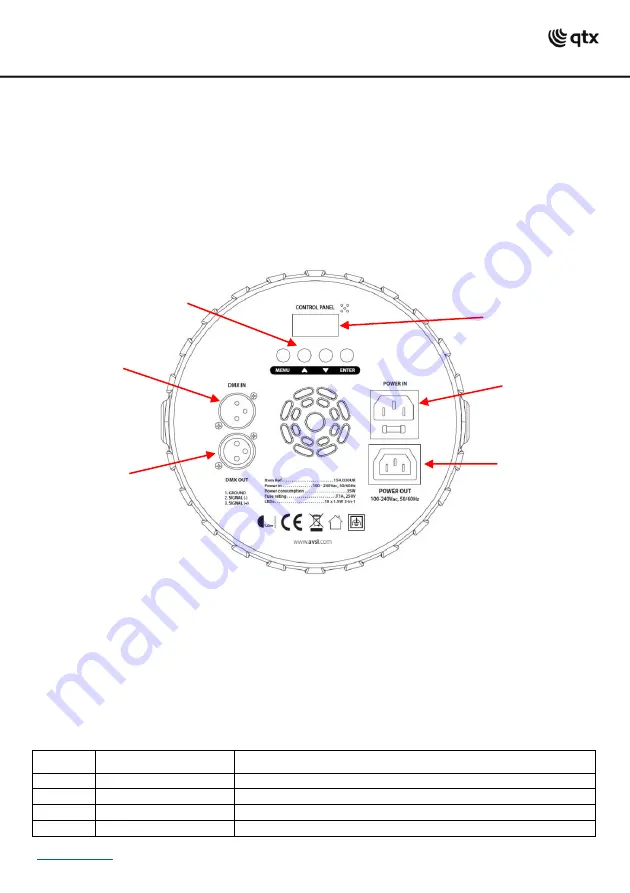
Rear panel controls:


1.


 Manual control buttons 

2.


 DMX Signal in 

3.


 DMX signal out 

4.


 LED display 

5.


 IEC power in (fused) 

6.


 IEC power out 

Manual control menu: 


Press the “

MENU

” 

button to enter the settings menu.  

P

ress “

UP

” and “

DOWN

 buttons to navigate through various setting functions.  

P

ress “

ENTER

 button to save the desired setting. 


Menu 

Number range 

Function and description 

A001 

A001-A512 

DMX512 address settings 

ADYE 

ADYE or ADno 

DMX512 Master on or off (Slave) 

rEYE 

rEYE or REno 

Remote control on or off 

AU01 

AU01-AU07 

Manual colour selection 

2. 

3. 

4. 

5. 

6. 

1. 

Содержание PAR100

Страница 1: ...1 x main unit with bracket and screws 1x remote control 1 x UK IEC mains lead and 1 x manual Warning To prevent risk of fire or electric shock do not expose the unit to rain or damp environments In the event of a spillage disconnect the mains and allow the unit to dry out naturally Qualified personnel should then check the unit before continuing use Please read through this manual thoroughly befor...

Страница 2: ...r debris build ups Do not use strong solvents for cleaning the unit Rear panel controls 1 Manual control buttons 2 DMX Signal in 3 DMX signal out 4 LED display 5 IEC power in fused 6 IEC power out Manual control menu Press the MENU button to enter the settings menu Press UP and DOWN buttons to navigate through various setting functions Press ENTER button to save the desired setting Menu Number ran...

Страница 3: ...R lead Extra fixtures can be controlled by the same DMX signal by looping through the DMX out on the unit To enter DMX mode select A001 from the menu and confirm the correct start address by using the UP and DOWN buttons and ENTER to confirm This unit has 7 DMX channels as indicated in the table below Channel Value Function Setting CH1 0 255 Master dimming 0 100 Available in all modes CH2 0 255 Re...

Страница 4: ... controller dimmer levels blackout etc Unresponsive to DMX Check that unit is in DMX mode and ensure DMX address remains lit to confirm receiving DMX signal Check DMX controller is not set to black out Check DMX controller is on correct fixture page Check master dimmer value Check correct DMX address is set Check DMX connection and leads Overheating cutting out Ensure adequate ventilation and unit...

Отзывы: