


QSA Global, Inc.
40 North Avenue Burlington, MA 01803
888.272.2242
781.272.2000
qsa-global.com
Operations Manual
MAN-038 March 2019
Page 62 of 100
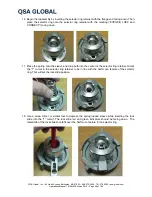
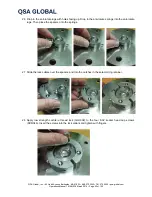
4.5.3 Remote Control Maintenance Requirements
a.
The remote control unit must be disconnected from the gamma-ray source projector for inspection
and maintenance. A “misconnect test” can be performed before servicing to verify if unsafe wear is
present.
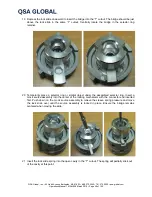
b.
Straighten out the remote control housings on a work surface, then check for freedom of movement of
the control cable within the remote controls by moving the control crank handle back and forth
approximately one-quarter turn. During this test, take care to avoid cranking the control cable onto the
ground exposing it to dirt and sand. If any resistance is felt during this check, inspect the control
conduits for dents or depressions. If dents or depressions are not present on the remote control
conduits, the control cable may be rusted stiff somewhere within the control conduits or the control
crank internal housing may contain dirt or debris. After the operational check, remove the control
cable from the remote control conduits (661 safety connector side) until it stops (a stop spring on the
end of the control cable). Rubber gloves are recommended for this operation. Do not use excessive
force during removal of the control cable. During removal of the control cable, it should be coiled in
loops no less than a 12 in (305 mm) diameter.
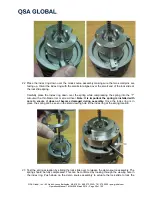
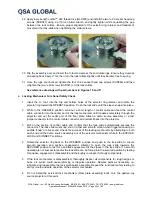
c.
Disconnect the remote control conduit fitting from the control crank using the 11/16 in open-end
wrench. Remove the stop spring from the end of the control cable and pass the control cable through
the crank gear to completely disengage. Label the remote control conduits (hand crank end / safety
plug assembly end) for proper assembly after the servicing.
d.
Pull the remaining control cable through the 661 safety connector and secure using tie wraps or
equivalent.
e.
Using the 11/16 in open-end wrench, remove both remote control conduits from the 661 safety
connector and the control crank.
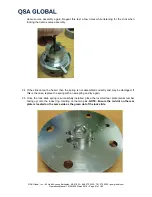
f.
Thoroughly clean the control cable using a brush in a degreaser bath. Use compressed air to blow off
residual solvent after the degreasing and cleaning operation.
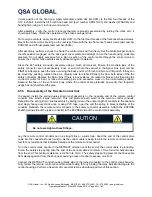
CAUTION
Be sure to follow the solvent manufacturer's safety instructions and Material Safety
Data Sheet recommendations
.
g.
Perform the following inspections of the control cable:
1 Use the Model 550 NO GO gauge to inspect the control cable connector for wear. Closely inspect
the connector for bends or cracks in the neck (shank) area and dented areas on the ball of the
connector. Remove the control cable from service if any cracks or bends in the shank or dents in
the ball of the male connector are found during this inspection. The male connector should not be
bent at an angle greater than 15 degrees from the axis of the control cable in the area where it is
crimped. Using your hands, attempt to twist or rotate the male connector off the control cable. If
any movement is possible during this test, the control cable must be removed from service and
the male connector must be replaced.
2 Carefully inspect the control cable directly behind the remote control cable connector and
approximately 12 in (305 mm) beyond the male connector looking for the following anomalies:
Cuts, breaks, nicks or fraying in the spiral windings of the cable.
Kinks or permanent bends.


