


56
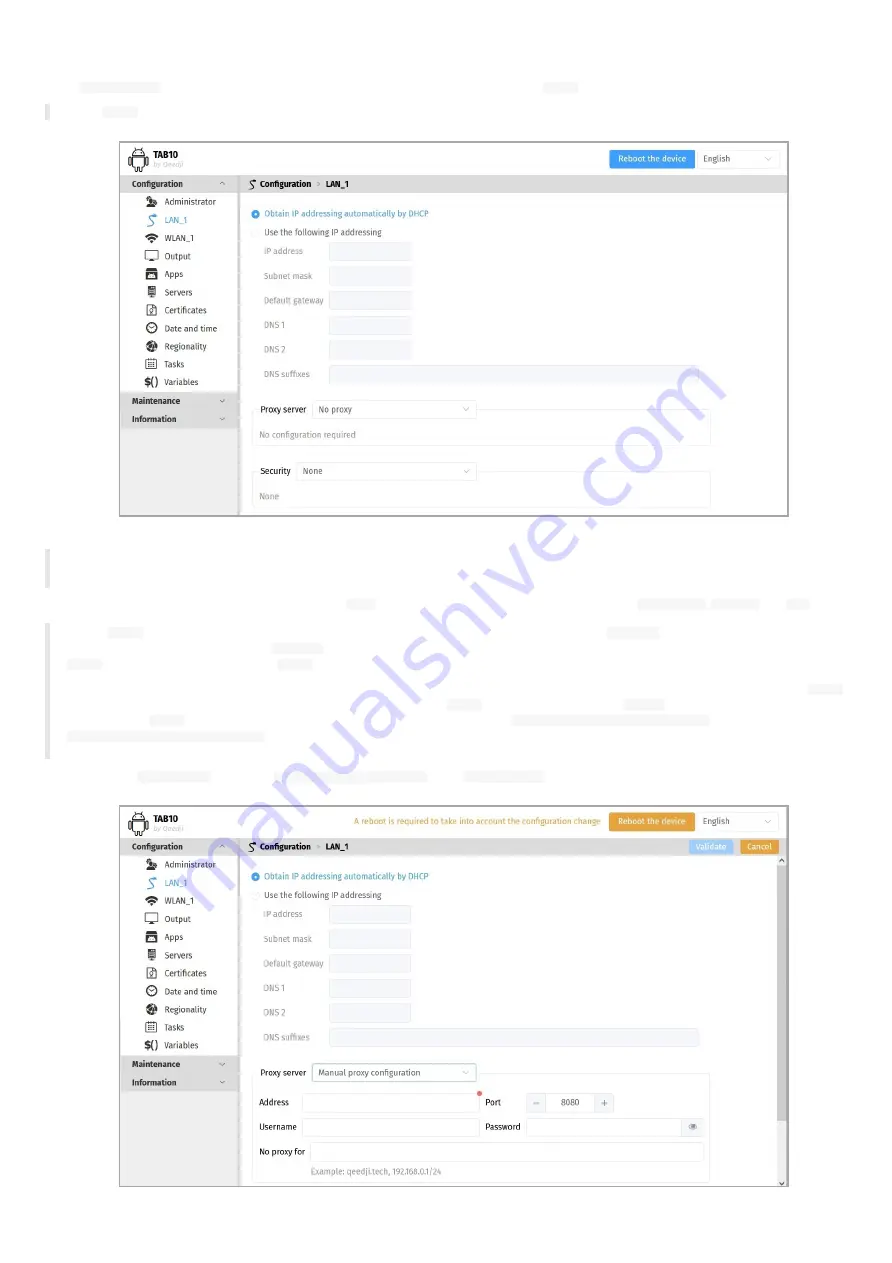
4.1.2 Configuration > LAN_1
In the
Configuration
tab, select the
LAN_1
menu to set up the network configuration of the
LAN_1
interface of your device.
☛
The
LAN_1
menu may not be available when the TAB10b device is connected to a WIFI network and supplied by a standard USB-C wall plug.
☛
The device supports the UPnP and can be for example detected automatically in the local network environment of your computer.
☛
By default, the device is configured with DHCP activated.
Choose whether the IP address is static or given by the
DHCP
server. If static, fill the suitable parameters like
subnet mask
,
gateway
and
DNS
.
◬
The
LAN_1
configuration is modified dynamically without rebooting after having pressed on the
Validate
button. If the IP address is
changing after having pressed on the
Validate
button, you need to reconnect to the device configuration Web user interface with the new
LAN_1
device IPV4 address or with the
LAN_1
device IPV6 address.
☛
The connection from a computer to the device configuration Web user interface with the device IPV6 address, computed from the device
LAN_1
MAC address value, is supported. To connect to the IPV6 address of the
LAN_1
interface, ensure that the
WLAN_1
connection is down. For
example, if the
LAN_1
MAC address of the device is 00-1c-e6-02-27-bf, type the URL
http://[fe80::21c:e6ff:fe02:27bf]/
or type
http://[fc00::21c:e6ff:fe02:27bf]/
in a Web browser. The routable prefix (fc00, fe80, and so on…) are depending on your network
configuration. Your computer must be configured properly to support the IPV6 protocol.
To use a specific
proxy server
, select the
Manual proxy configuration
in the
Proxy servers
drop down list then enter your proxy configuration.
Содержание TAB10b
Страница 1: ...User manual TAB10b 9 10 18 001A TAB10b 8 30...
Страница 5: ...5 Part I Description and installation...
Страница 10: ...10 1 3 1 Device dimensions...
Страница 13: ...13...
Страница 26: ...26 Part II System con guration...
Страница 42: ...42 This message is then displayed until the device is rebooting automatically once...
Страница 50: ...50 Part III Applicative user interface...
Страница 52: ...52 Part IV Administration console user interface...
Страница 63: ...63...
Страница 95: ...95 Part V Technical information...
Страница 99: ...99 5 3 Antenna return loss This is the return loss diagram for the WIFI Bluetooth antenna...
Страница 101: ...101 Part VI Contacts...
Страница 103: ...103 Part VII Appendix...
Страница 132: ...132 Scroll to the bottom and click on the Power BI Service button Select then the Delegated permissions button...


