ASSEMBLY INSTRUCTIONS
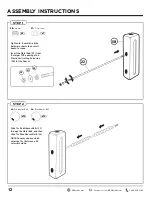
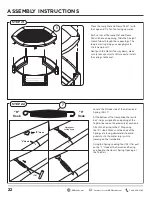
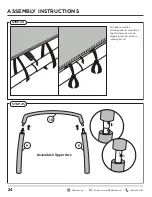
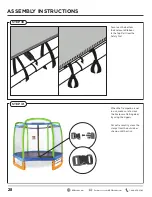
Place the Jump Mat and Frame Pad (1) with
the Logo and Tic-Tac-Toe facing upwards.
Each corner of the Jump Mat and Frame
Pad will have an opening. Slide the Straight
Frame Tubes through these openings. The
loop is elastic giving you enough give to
stretch and insert.
Dont push the Mat all the way down, make
sure to leave yourself a little room to install
the springs to the mat.
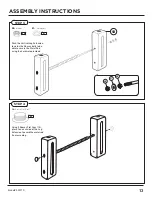
“R”
Hook
“R” Hook
Spring ends
facing down
“C” Hook
(16)
“C”
Hook
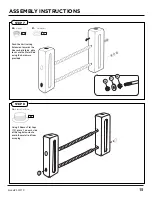
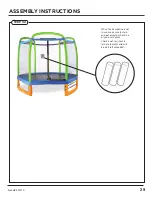
Locate the R-Hook side of the Galvanized
Spring (Part 7).
At the bottom of the trampoline there will
be V-rings assigned to an opening of the
Top Rail based on the proximity of each one.
Attach the Spring to the V-Ring using
the “R”-Hook. Make sure the ends of the
Springs are facing downwards to avoid
punctures to the mat or injury while
jumping on the trampoline.
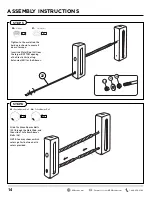
Using the Spring Loading Tool (Part 16) pull
on the “C” Hook of the Galvanized Spring
and hook to the closest Spring Opening of
the Top Rail.
STEP 21
STEP 22
1
7
2
2
CustomerService
@
GQBrands.com
GQBrands.com
1-866-498-5269

