џ
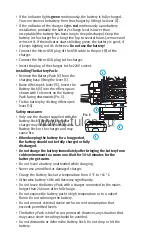
If the indicator lights
green
continuously, the battery is fully charged.
You can remove the battery from the charger by lifting the lever (С).
џ
If the indicator of the charger lights
red
continuously upon battery
installation, probably the battery's charge level is lower than
acceptable (the battery has been long in deep discharge). Keep the
battery in the charger for a long time (up to several hours), remove and
re-insert it. If the indicator starts blinking green, the battery is good; if
it keeps lighting red it's defective.
Do not use the battery!
џ
Connect the Micro-USB plug of the USB cable to the port (E) of the
charger.
џ
Connect the Micro-USB plug to the charger.
џ
Insert the plug of the charger to the 220V socket.
Installing The Battery Pack:
џ
Remove the Battery Pack (6) from the
charging base lifting the lever (C).
џ
Raise rilfescope's lever (15). Insert the
Battery Pack (6) into the riflescope as
shown with F element on the Battery
Pack facing downwards (Pic. 5).
џ
Fix the battery by clicking rilfescope's
lever (15).
Safety measures
:
џ
Only use the charger supplied with the
Battery Pack. The use of any other
charger may irreparably damage the
Battery Pack or the charger and may
cause fire.
џ
When keeping the battery for a long period,
the battery should not be fully charged or fully
discharged.
џ
Do not charge the battery immediately after bringing the battery from
cold environment to a warm one. Wait for 30-40 minutes for the
battery to get warm.
џ
Do not leave a battery unattended while charging.
џ
Never use a modified or damaged charger.
џ
Charge the Battery Pack at a temperature from 0 °C to +45 °C.
џ
Otherwise battery's life will decrease significantly.
џ
Do not leave the Battery Pack with a charger connected to the mains
longer than 24 hours after full charge.
џ
Do not expose the battery pack to high temperature or to a naked
flame. Do not submerge the battery.
џ
Do not connect external device with a current consumption that
exceeds permitted levels.
џ
The Battery Pack is brief circuit protected. However, any situation that
may cause short-circuiting should be avoided.
џ
Do not dismantle or deform the Battery Pack. Do not drop or hit the
battery.
6
3
5
Pic
. 5
F
џ
When using the battery at negative temperatures, battery's capacity decreases,
this is normal and is not a defect.
џ
Do not use the battery at the temperatures above those shown in the table – this
may decrease battery's life.
Keep the battery out of the reach of children.
External Power Supply
9
The riflescope can be powered with an external power supply such as Power Bank
(5V).
џ
Connect the external power supply to the USB port (15) of the riflescope (Pic. 3).
џ
The riflescope switches to operation from external power supply, and the IPS5
Battery Pack will begin slowly charging.
џ
The display will show the battery icon
with charge level as a percentage.
џ
If the riflescope operates on external power supply but the IPS5 battery is not
connected, icon
is shown.
џ
When the external power supply is disconnected, the riflescope switches to the
internal battery pack without powering off.
Operation
10
Installation of mount
џ
Before using the riflescope you need to install a mount (may not be included).
џ
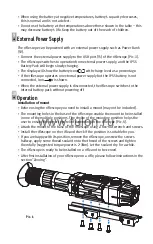
The mounting holes in the base of the riflescope enable the mount to be installed
in one of the multiple positions. The choice of the mounting position helps the
user to ensure the correct eye relief depending on the rifle type
(
Pic
. 6).
џ
Attach the mount to the base of the riflescope using a hex-nut wrench and screws.
џ
Install the riflescope on the rifle and check if the position is suitable for you.
џ
If you are happy with its position, remove the riflescope, unscrew the screws
halfway, apply some thread sealant onto the thread of the screws and tighten
them fully (suggested torque power is 2-3Nm). Let the sealant dry for a while.
џ
The riflescope is ready to be installed on a rifle and to be zeroed.
џ
After first installation of your riflescope on a rifle, please follow instructions in the
section “Zeroing”.
Pic
. 6
www.tulon.ru


