3. Once you are connected to the server via ftp, upload the
“PAA20V2.xml” file available in the FTP:
[email protected]/manual/paa20+
to the “/etc/cueslib/” direct-
ory in the server. You can see the “PAA20V2.xml” loaded in this folder
in
figure 8.2.4A
. Now, you should be able to set-up the output cues
taking the commands from this library.
4. The procedure to create automation cues using the library is very sim-
ilar to the one that does not, but simpler, first of all open the Doremi
“Marco Editor”.
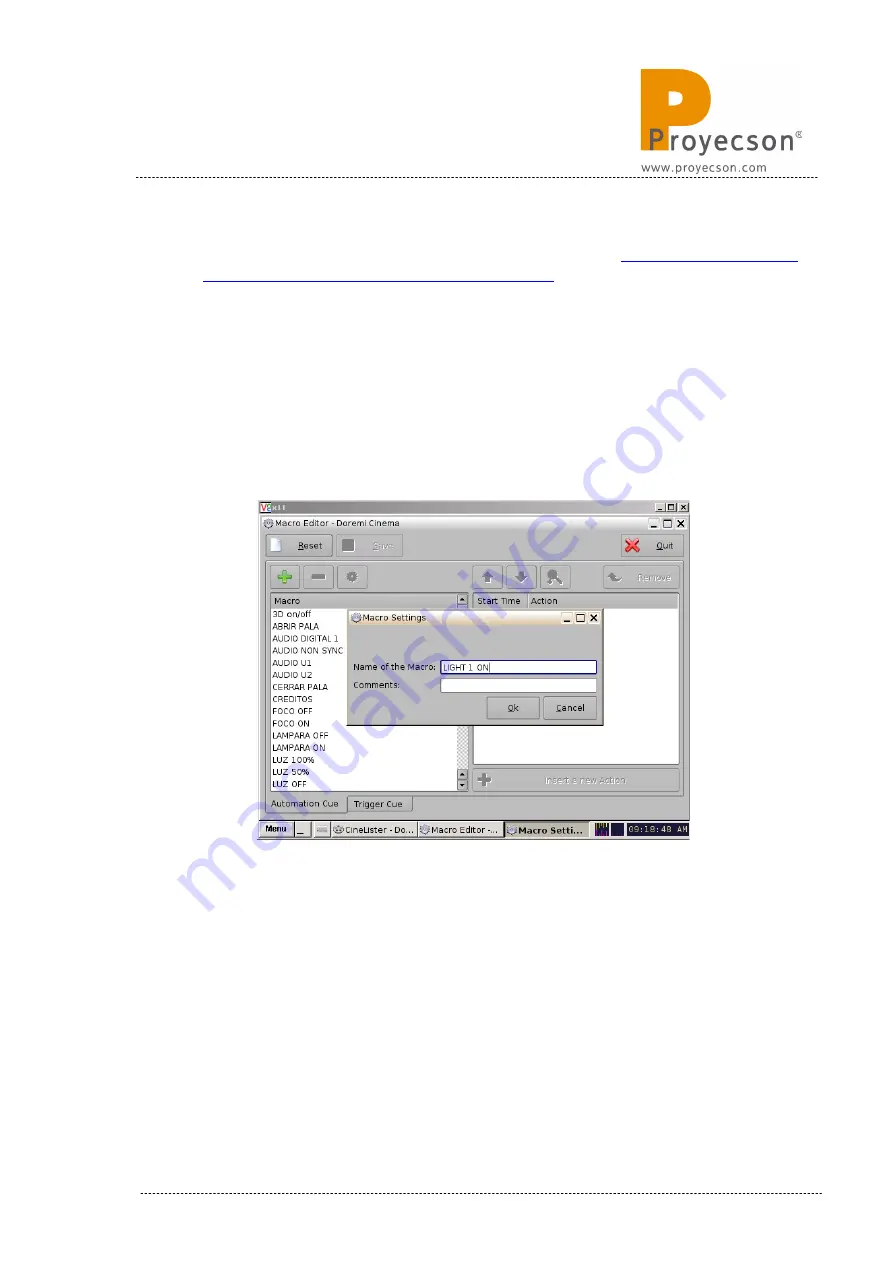
5. Then create a new “Macro” with the “+” button and name it, like in
figure 8.2.4B
.
Figure 8.2.4B
6. Click on “Insert a new Action” button while the new created macro is
selected.
7. Select “Library / PAA20+_V1” on the “Add a new Action” pop-up win-
dow and click on “Add”. See
figure 8.2.4C
.
INSTALLATION MANUAL: PAA20+ V 2.0 (10/2021)
57
Содержание PAA20+
Страница 1: ...INSTALLATION MANUAL PAA20 V 2 0 ...
Страница 40: ...Figure 7 2 7D INSTALLATION MANUAL PAA20 V 2 0 10 2021 40 Figure 7 2 7E Figure 7 2 7F ...
Страница 110: ...9 2 OUTPUT 2 CONNECTOR Figure 9 2A Picture 9 2B INSTALLATION MANUAL PAA20 V 2 0 10 2021 110 ...
Страница 111: ...9 3 OUTPUT 3 CONNECTOR Figure 9 3A Figure 9 3B INSTALLATION MANUAL PAA20 V 2 0 10 2021 111 ...
Страница 112: ...9 4 INPUT CONNECTOR Figure 9 4A Picture 9 4B INSTALLATION MANUAL PAA20 V 2 0 10 2021 112 ...
Страница 114: ...9 5 2 INPUT WITH A POSITIVE COMMON Picture 9 5 2A INSTALLATION MANUAL PAA20 V 2 0 10 2021 114 ...


