Version 1.0
Version 1.0
Installation
26
26
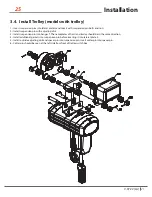
3.6. Install Trolley into Beam (models with trolley)
1. Install trolley at end side of beam and slip trolley which has already been connected with hoist to the appropriate place. This
is the preferred method.
2. If first method is unavailable:
a) Unload brake stopper from hole A on suspension pin, and insert it into hole B.
Insert cotter pin again and bend it completely.
b) Pull side plate S and G outside, then lift trolley until orbit wheel and orbit surface
are in same horizontal position. Put orbit wheel of side plate G onto surface of orbit.
c) Hold side plate G and stop it from dropping from orbit. Firmly push side plate S and
put its orbit wheel onto surface of beam.
d) Unload brake stopper from hole B and insert into hole A. Do not forget to bend
cotter pin.
3.7. Supply Voltage
Check supply voltage everyday before use. If voltage varies more than 10% of
rated value, electrical devices may not function normally and cause damage to
equipment.
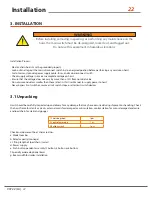
Do not connect equipment to power supply before completing the installation
process.
3.5. Adjust Trolley Width (models with trolley)
• Adjust width of trolley according to drawing (right) for
appropriate clearance.
• Size A is the dimension of two side plates that stretch
outside completely.
• Size A must be approximate B (the width of rail flange) +
4mm.
• Adjust size A by increasing or decreasing adjusting disk.
Insert cotter pin into spacer pin and bend two branches of
cotter pin
until size A is correct.
Nut must be tight, insert cotter pin and bend it completely.
V.07.22 [LA]
Содержание PWJTHF
Страница 2: ...This page intentionally left blank...
Страница 19: ...Version 1 0 19 Specifications 19 V 07 22 LA...
Страница 20: ...Version 1 0 Specifications 20 20 V 07 22 LA...
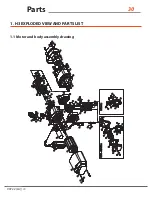
Страница 30: ...Version 1 0 Parts 30 30 1 H3 EXPLODED VIEW AND PARTS LIST 1 1 Motor and body assembly drawing V 07 22 LA...
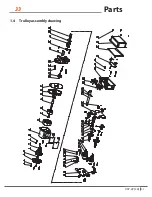
Страница 33: ...Version 1 0 33 Parts 33 1 4 Trolley assembly drawing V 07 22 LA...
Страница 49: ...49 Wiring Diagram 49 7 CONVENTIONAL HOIST WIRING DIAGRAM PWJTHF PWJTHT V 07 22 LA...
Страница 50: ...Wiring Diagram 50 50 V 07 22 LA...

