7
3.2
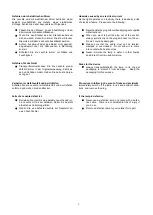
Montage der Wandleuchte
Lieferumfang
:
1
Leuchte mit Wandarm und Wandlager
1
Wandbefestigungsplatte mit montiertem Transformator
4
Befestigungsschrauben mit Dübel
2
Senkschrauben
1
Gebrauchsanleitung
1
Torx-Schlüssel 53 x 20 mm
ACHTUNG!
Vergewissern Sie sich vor Anbringen der Leuchte darü-
ber ob die Wand über die nötige Tragkraft verfügt. Zie-
hen Sie im Zweifelsfalle einen Fachmann zu Rate.
WARNUNG! Elektrischer Strom!
Stellen Sie sicher dass die Stromzuführung unterbro-
chen wurde, bevor Sie die Leuchte montieren. So ver-
meiden Sie Unfälle!
Vorsicht!
Die Zuleitung muss geeignet abgesichert und dauerhaft
geerdet sein. Wir empfehlen die Absicherung über einen
FI Schalter.
Hinweis!
Das Anbringen der Wandbefestigungsplatte und der elekt-
rische Anschluss des Trafos ist durch einen Elektrofach-
mann vorzunehmen. Die Installation ist für Leitungsquer-
schnitte bis 1,5 mm² geeignet
Netzversorgung abschalten und gegen wiedereinschal-
ten sichern.
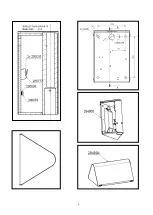
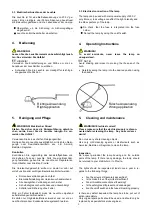
Wandhalterung über der Anschlussdose (2) mit Was-
serwaage senkrecht ausrichten.
Vier Wandbohrungen (3) markieren. Darauf achten,
dass die Aussparung der Wandbefestigung für die Ka-
beldurchführung über der Anschlussdose sitzt.
Hinweis!
Die spätere Positionierbarkeit der Leuchte ist von der senk-
rechten Ausrichtung der Wandbefestigungplatte (1) abhängig.
Wenn die Platte und die Leuchte nicht gerade ange-
schraubt werden, kann dies dazu führen dass sich die
Leuchte immer zu einer Seite wegbewegt.
Verdübelung vornehmen. Darauf achten, dass die
elektrischen Zuleitungen nicht angebohrt werden.
Wandbefestigungsplatte (1) an der Wand
senkrecht
ausrichten und mit Schrauben (4) verschrauben.
Transformator (5) elektrisch anschließen, P und N an
230V und den Schutzleiter (PE) an der Wandbefesti-
gungsplatte, entsprechend dem Aufdruck auf dem
Transformatorgehäuse.
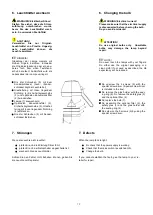
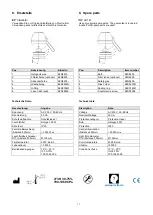
Leuchte von oben in die Wandbefestigungsplatte (1)
einhängen.
Mit Senkschrauben die Wandleuchte senkrecht aus-
richten und fest verschrauben.
Achtung!
Die Senkschraube, M6 x 12 DIN 966 ist eine Spezial-
schraube mit einer maximalen Länge von 12 mm
3.2
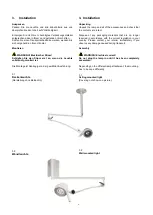
Assembling of the wall-mounted light
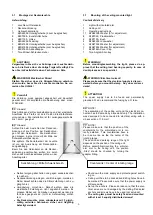
Content of delivery
:
1
Light with wall-mounted arm and wall-housing
1
Assembling plate with pre-mounted transformer
4
Screws with anchors
2
Countersunk screws
1
Operating manuals
1
Torx-Key 53 x 20 mm
WARNING!
Before mounting/assembling the light, please do ap-
prove that the ceiling load bearing capacity. . In case of
doubt please ask an specialist..
WARNING! Electrical current!
Please make sure that the electrical supply is discon-
nected before you mount the lamp. So you avoid acci-
dents!
ATTENTION!
The power supply has to be fused and permanently
grounded. We do recommend the fusing by a FI fuse.
NOTE!
The assembling of the ceiling unit and the electrical con-
nection has to be made by a specialist only. THe installa-
tion was developed to be connected to electrial wiring with
a cross section of 1,5 mm².
Shut-down the mains supply and protect against switch
on
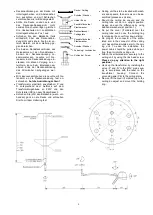
Do adjust the wall holder vertically over the electrical
outlet (2) by using the water-level.
Do mark the 4 drilling points (3). Please take note, that
the cut-out for the cable is positionend over the electri-
cal outlet.
NOTE!
The position of the lamp depends on the correct position of
the wall-mounting plate (1).
If the mounting plate and the lamp are not mounted lev-
elled, then a permanent sliding of the lamp to one side can
be the result.
Do drill and anchor. Please take note, that the electrial
power supply will not get damaged.
Do level the wall plate (1) vertically on the wall and do
screw on the screws (4).
Do hook up the transformer, by installing the wires „P“
and „N“ to the 230V mains supply and the grounding
(PE), in accordance with the label on the transformer
housing.
Do hang on securely the lamp into the mounting plate
(1)
Do level the lamp by srewing on securely the counter-
sunk screws.
ATTENTION!
The countersunk screw M6 x 12 DIN 966 is a special screw
with a maximum length of 12 mm
Содержание 1 Series
Страница 8: ...8 ...


