


Ultra Electronics Ltd
Pronto Maintenance Manual
- 49 -
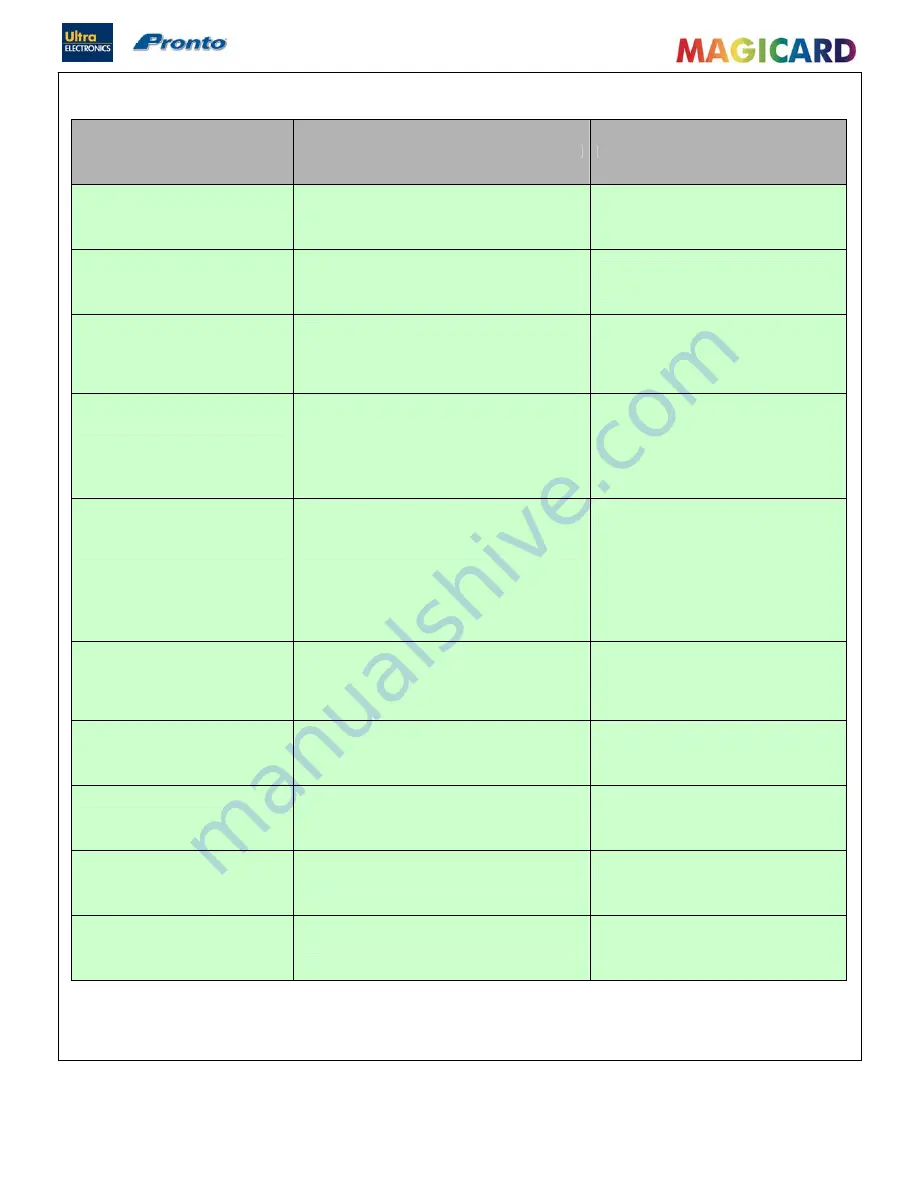
SECTION 12.3
IMAGE PROBLEMS
Problem
Probable Causes
Possible Solutions
White line along the length of the Card.
Line is always in the same place on
every Card.
1.
The Print Head has some damaged heating
elements.
1.
Print Head will have to be replaced.
Mis-registration of colours, (3D effect,
ghosting of colours and blurring).
1.
Card is being positioned in slightly different
positions for each colour pass. Black Text and
Overcoat are not affected.
1.
Clean the rubber Rollers in the Printer.
2.
Slipping Drive Belt
3.
Card Print Drive Motor Belt tension loose.
White margins at one or both ends of the
Card > 5mm
1.
Incorrect page size set in the printing application.
2.
Image Size is not large enough to completely fill
the Card.
1.
Ensure the Page Layout/Setup is taken
from the installed Pronto Driver.
2.
Image size must be 1016 pixels (85.6mm)
x 642 pixels (54.5mm)
White margins at one or both ends of the
Card < 2mm
1.
Incorrect page size set in the printing application
as above.
2.
Image Size is not large enough to completely fill
the Card
3.
Start & End Positions are not at default in the
Printer Driver.
1.
Ensure the Page Layout/Setup is taken
from the installed Pronto Driver.
2.
Image size must be 1016 pixels (85.6mm)
x 642 pixels (54.5mm)
3.
Restore the default Start & End positions in
the Printer Driver
Small Areas or dots of missing colour,
can be in any position on the Card.
1.
Dust, Dirt or surface contamination on the Card.
2.
Dust, Dirt or contamination on the Dye Film
1.
Ensure the Cards are flat, clean and free
from contamination or fingerprints, replace
if necessary.
2.
If the Film has to be removed avoid
touching it and do not place flat on the
surface (static).
3.
Replace the Sticky Roller inside the
Printer, one is included with a new roll of
Dye-Film.
Printed colours across the whole Card
are too light and generally washed out.
1.
Cards are not the correct type
2.
Printer Head Power has been reduced too low.
1.
Cards must be PVC or have a PVC
covering layer across the surface.
2.
Check the driver settings and reset the
YMC Power to 50, increase if necessary.
Text or Barcodes are either missing or
too light, colour is acceptable.
1.
Black Resin Power is set too low.
1.
Increase the Black Resin Power setting in
the Driver
Card images are fading after a few
weeks.
1.
High amount of surface abrasion occurring.
2.
Overcoat has not been printed on the Card.
1.
Cards may need extra protection like a
lamination patch.
2.
Ensure the Overcoat is enabled with the
Driver.
Front section of the card (as its ejected)
is faded compared to the rest of the
Card.
1.
Print Head angle is not set-up correctly.
1.
Rotate the Print Head angle adjustment
screw anti-clockwise by one turn to make
more positive.
Rear section of the Card (as it's ejected)
has faint dark wavy lines.
1.
Print Head angle is not setup correctly.
1.
Rotate the Print Head angle adjustment
screw clockwise by one turn to make more
negative.


