DE
EN
FR
IT
ES
NL
RU
PL
SE
FI
Never change the abrasive before you turn off the device or the device is in standby mode.
The device should never be operated with an intact, built-in suction bag.
The filter chamber
(F)
must always be closed when the device is in operation.
A.
Check before you operate the device, whether the indicated voltage on the device corresponds to the
local power supply. Insert the plug
(S)
in the power socket.
B.
The unit is supplied with a dust filter already installed in the filter chamber. You can check this by removing
the chamber cover
(N)
(pull out the knob).
C.
First connect the vacuum hose
(K)
to the opening on the filter chamber cover
(L)
(press the connection
piece in firmly), then attach the motor connector to the „Motor“ socket
(M)
on the front of the unit (insert
the connector at an angle and twist it to the right to lock. The opposite applies when un-plugging).
D.
Select a suitable abrasive body. Insert the abrasive on the front hand piece to the abrasive with ceramic
bond
(E)
. Once the abrasive body begins to rotate, the mechanism is locked automatically. Remove
and never run an abrasive with force! Abrasives with 2,332 mm to 2,350 mm (0.091 - 0.093 inches)
shank diameter fit precisely with the abrasives with ceramic bond, without you having used excessive
force. Use only abrasives with a head diameter of max. 12 mm. Ensure that the large-sized dimensioned
abrasives with the maximum of 10.000 rpm may be operated. At higher revolutions, the run becomes
irregular and damage the chuck and (strong vibration in the hand piece) miller cutter. To remove an
abrasive, please switch off the motor by switching off the device either with the power switch
(A)
or with
the standby button
(O)
or switching it to the standby mode with the microswitch on the handpiece
(C)
.
Now, remove the abrasive by simply pulling it straight out.
E.
When you switch on the device, the
Promed
logo is first shown on the display
(J)
for several seconds.
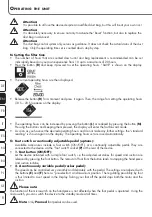
Then, the display changes and the settings used last are displayed.
F. Controlling the direction of rotation and speed regulation:
1. Selecting the direction of rotation:
The preset direction of rotation is clockwise. On the display, this is indicated by the filled right arrow.
By pressing the clockwise/counter-clockwise button
(M),
the direction of rotation can be changed to counter-
clockwise. By pressing the clockwise/counter-clockwise button again
(M), you can return to
clockwise
rotation.
Attention:
The direction of rotation should not be changed while the device is in operation. Changing the direction of
rotation during operation exposes the motor to a very high load and may damage it.
2. Selecting the speed:
Attention:
The set speed must not exceed the maximum permissible speed according to the specifications of the abrasive
manufacturer.
C
OMMISSIONING
THE
DEVICE


