8
2.2
Installation
Please follow the instructions below to complete IP Camera installation.
Lens Mounting: C/CS Mount Lens Model
If use C-Mount lens, after removing the ca
mera’s plastic cover, users need to
mount the C/CS mount adapter to the camera. Then attach the lens onto the
C/CS mount adapter, as the illustrations shown below.
C/CS Mount Adapter
Completion
Power Connection
To power up the IP Camera, please plug the camera’s DC 12V cable into the
power outlet. Alternatively, connect the Ethernet cable to the camera’s PoE port
and plug the other end of the cable into a PoE switch.
NOTE:
If using PoE, make sure Power Sourcing Equipment (PSE) is in
use in the network.
Ethernet Cable Connection
Use of Category 5 Ethernet cable is
recommended for network connection; to
have best transmission quality, cable lengt h shall not exceed 100 meters.
Connect one end of the Ethernet cable to the RJ45 connec tor of the IP Camera,
and the other end of the cable to the network switch or PC.
NOTE:
In some cases, you may need us
e an Ethernet crossover cable
when connecting the IP Camera directly to the PC.
Check the status of the link indicator and ac
tivity indicator LEDs; if the LEDs are
unlit, please check LAN connection.
Green Link Light indicates good network connection.
Orange Activity Light flashes for network activity indication.
Содержание PCW-603R
Страница 1: ...Full HD IP Camera User Manual Ver1 4...
Страница 7: ...6 Dimensions...
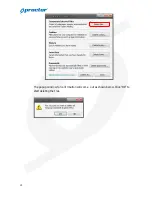
Страница 13: ...12 The popup window for confirmation will come out as shown below Click OK to start deleting the files...
Страница 29: ...28...
Страница 74: ...73 5 3 17 View Parameters Click on this item to view the entire system s par ameter setting...
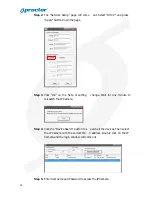
Страница 109: ...108 Step 5 Click N ext in the Windows Components Wizard page Step 6 Click Finish to complete installation...

