4
5
4
5
Quick Start Guide
PreSonus StudioLive
™
16.0.2
Quick Star
t:
Le
vel S
etting
Basic O
per
ation
So
ft
w
a
re
:
Univ
ersal C
on
tro
l, C
aptur
e,
and Studio O
ne Ar
tist
Resour
ce
s
English
English
Deutsch
Français
Español
Español
Français
Deutsch
Quick Star
t:
Le
vel S
etting
Basic O
per
ation
So
ft
w
a
re
:
Univ
ersal C
on
tr
ol
, C
aptur
e,
and Studio O
ne Ar
tist
Resour
ce
s
O
ver
view
O
ver
view
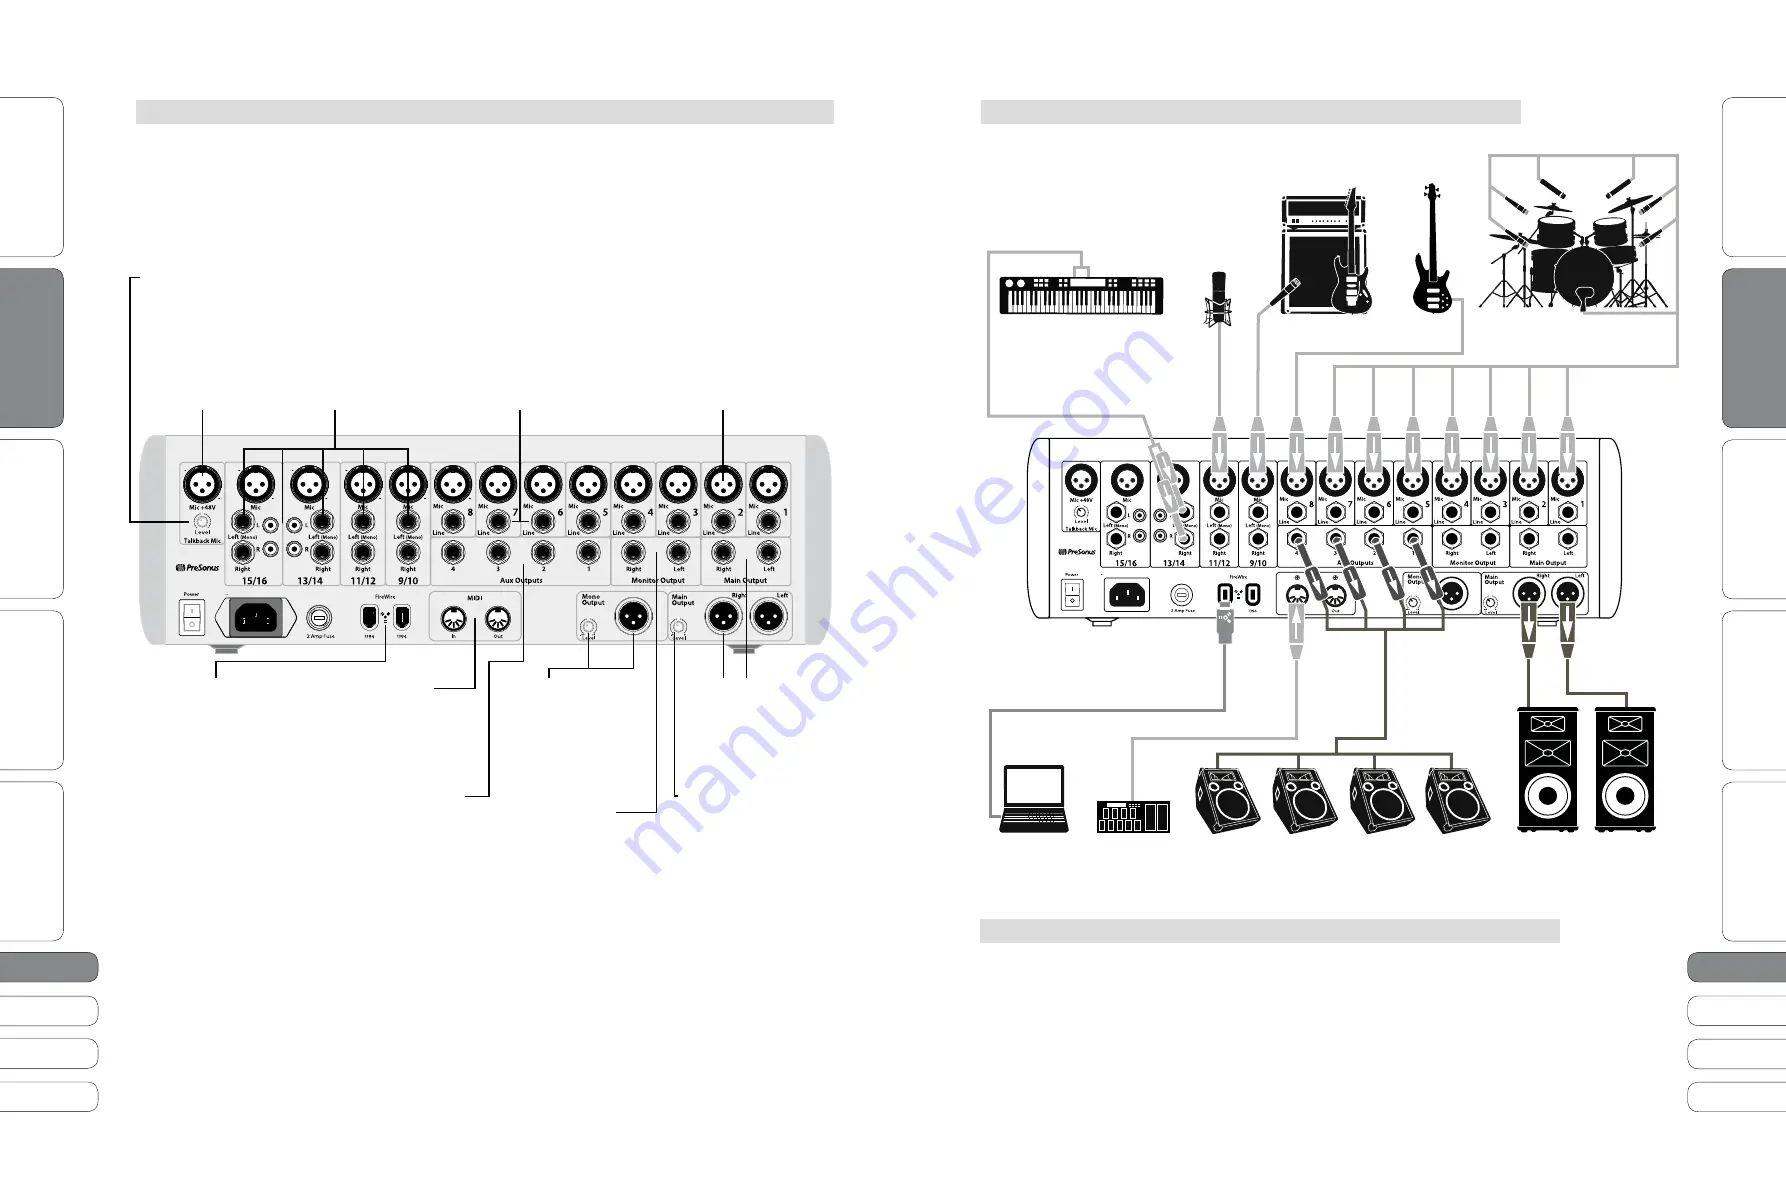
Basic Hookup Diagram 1.3
Overview
1
1.2 Rear-Panel
Connections
1 Overview
1.2
Rear-Panel Connections
1.3
Basic Hookup Diagram
Microphone Inputs.
Your StudioLive is
equipped with 12
PreSonus XMAX™
microphone
preamplifiers for
use with all types of
microphones.
Line-level Input,
Channels 1-8.
Each channel of the
StudioLive has a
¼-inch, balanced TRS
connection for line-
level input. When these
inputs are engaged, the
microphone preamp
circuit is bypassed.
Stereo Inputs,
Channels 9-16.
Channels 9-12 are
stereo inputs with
¼-inch, balanced
inputs. Channels
13-16 also include
unbalanced RCA inputs.
Each pair of channels is
controlled by a single
fader and Solo, Mute,
and Select buttons.
Talkback Mic Trim
adjusts the gain of the
Talkback input.
Talkback Mic Input.
You can use either a
dynamic or a condenser
microphone with
phantom power.
Mono Output
carries
a mono, summed
version of the stereo
signal from the main
bus.
Mono Output
Trim
controls the
Mono Output level.
Monitor Outputs
for monitor speakers
or for connection to
a PreSonus Central
Station.
Main Output
s. The
StudioLive features
both XLR and TRS main
outputs parallel to
each other and to the
Mono output.
Main Output Trim
controls the maximum
output level of the XLR
and TRS main outputs.
MIDI I/O
for MIDI
sequencing or to
connect a MIDI
footpedal to control
the parameters of
your StudioLive.
Aux Outputs.
You can
create four individual
monitor mixes (Aux
mixes) for musicans’
headphones, in-ear
monitors, or floor
wedges. Aux mixes
are routed to these
outputs.
FireWire Ports.
Either
standard, 6-pin FireWire
400 port can connect
the StudioLive to a
FireWire port on your
computer. If your
computer has a 4-pin
connector (commonly
found on laptops), you
will need to purchase
a 4-to-6-pin adapter
or cable at your local
computer-supply store.
Consult your Owner’s Manual (on disc) for many more Hookup Diagrams
On
100 - 240 VAC 50-60Hz
On
100 - 240 VAC 50-60Hz
rhythm guitar and amp
bass guitar
drumset
lead vocal mic
keyboard
Front of House Speakers
Monitors
laptop
midi pedal


