


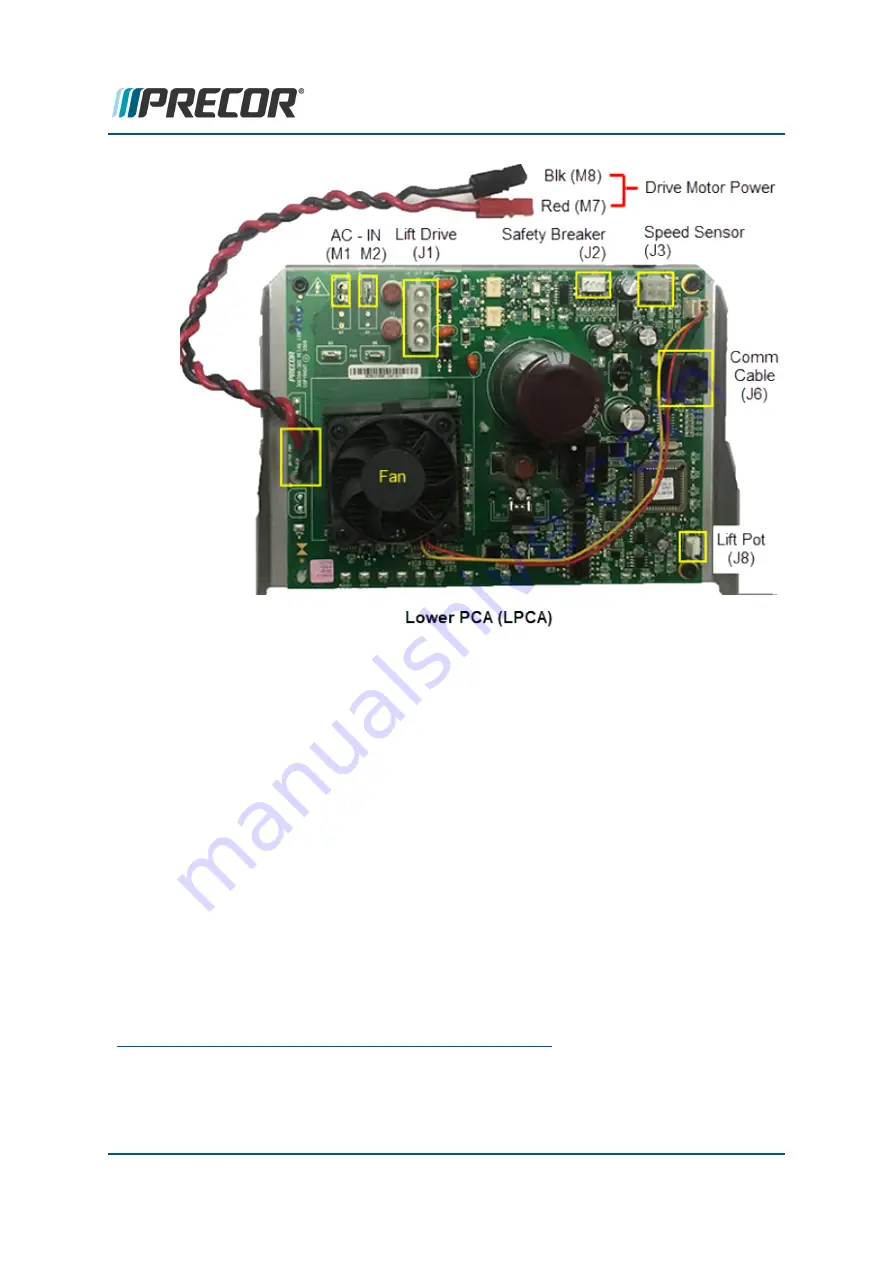
2. Install the Lower
PCA
1
into the mounting screws and tighten.
3. Make sure that the interface cables are correctly routed and secured to the frame
cable clamps.
4. Make sure that the cables have freedom of movement and are not stretched to tight.
5. The cables are clear of any frame or component edges that could pinch, chafe, or oth-
erwise damage the cable wires.
6. Make a final I/O connector check that all LPCA cable connections remain properly
connected
7.
Plug
2
in the power cord and switch the power
ON
.
8. Wait for the console to power up and then clear the Error Log of any active error
codes.
9. Reinstall the hood cover.
1
Printed circuit assembly, generally referred to as either an upper PCA or lower PCA.
2
Device power cord connector or electrical cable male connector that is inserted into an
electrical receptacle "outlet" (also called the plug-in).
Contact Precor Customer Support at [email protected] or 800.786.8404 with
any questions.
Page 90
6 Replacement Procedures
Lower PCA (LPCA) Replacement


