Med Touch Series LCD Alarm Systems
Powerex
•
150 Production Drive
•
Harrison, OH 45030
•
USA
P 1.888.769.7979
•
F 513.367.3125
•
www.powerexinc.com
IN597400AV
•
08/2016
Page 8 of 56
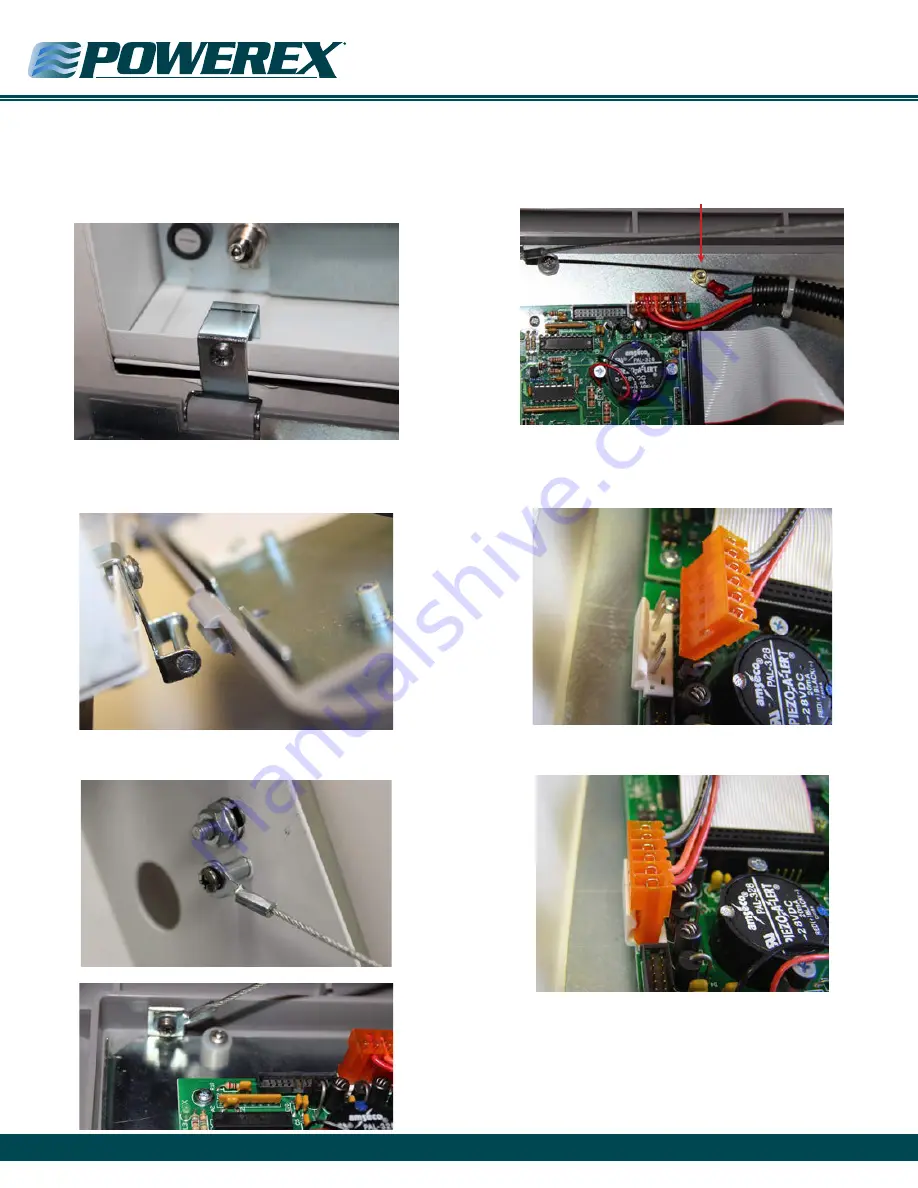
Installing the Hinges
After the walls are finished, the hinges may be installed onto the
rough-in box. The two hinges should be fastened to the lower front
edge of the rough-in box using the screws provided. The hinge should
rest flat against the surface of the drywall.
Installing the Hinges
The alarm front panel snaps onto the two hinge pins. If the hinge
gets detached from the front panel, simply snap it back on.
Attach the two (left & right side) lanyard cables to the alarm back
box and (if necessary) front panel using the screws provided.
Wiring the Alarm Front Panel to the Power Supply
Attach the green ground wire, which is in the wiring harness, to
the ground stud on the left side of the front panel – near the left rear
corner of the button board.
Attach the plug connector at the end of the wiring harness to the
appropriate connector located at the top left corner of the button
module circuit board. The plug should lock into place. The plug can
only be inserted one way.
This is how the wiring harness plug connector should look when
properly installed on the back of the button module board.


